Overview
In a Multi-Tenancy, a Tenant Instance represents an independent running Instance. This Instance consists of an identical copy of the application running on the Control Instance with its unique database.
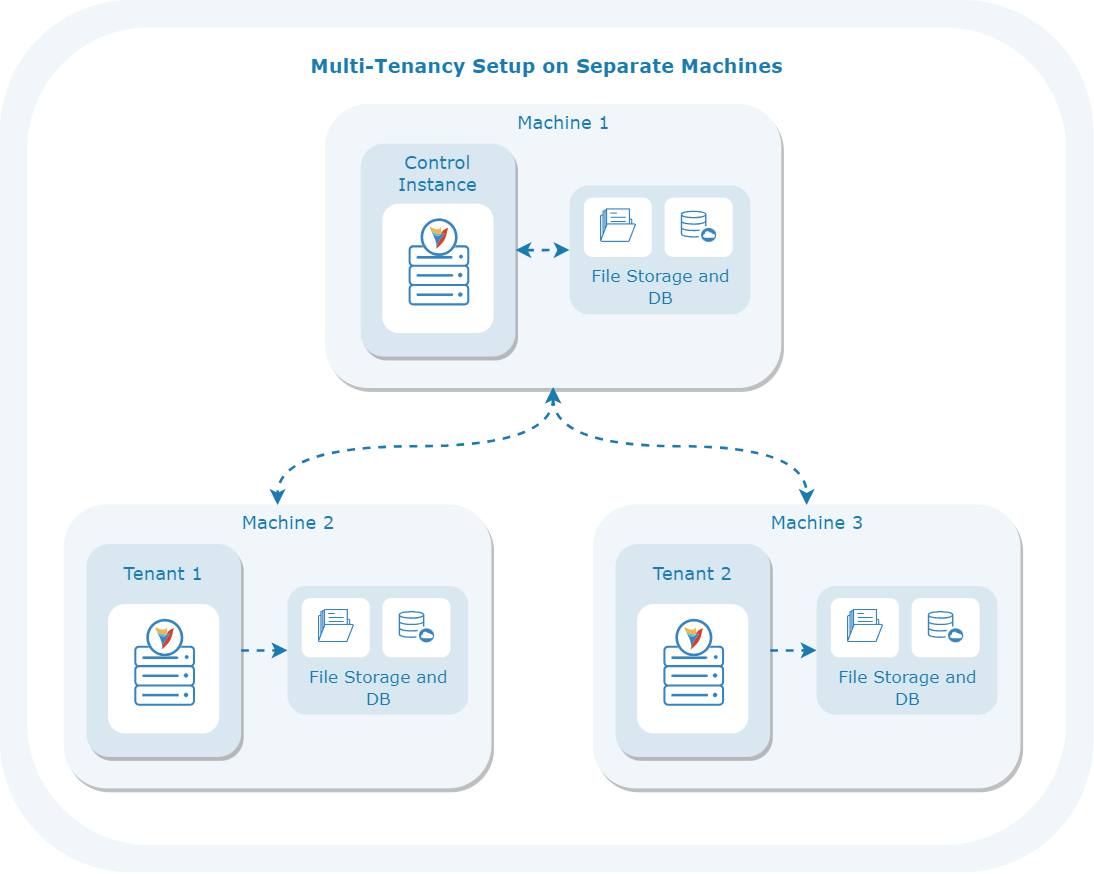
The following document discusses hosting a Tenant Instance on separate machines within a Multi-Tenant environment.
- If hosting the Tenant instance and the Control Instance on the same server, it is strictly recommended to host both applications on Information Internet Services (IIS).
- If the Tenant Instances are hosted on separate servers, it is essential to align the hosting configuration of the Tenant Instances with that of the Control Instance. The Tenant Instances should also be self-hosted if the Control Instance is self-hosted, similarly for Internet Information Services (IIS). Ensuring consistency in the hosting environment is essential in such scenarios.
Example
- Navigate to Control Instance > System > Hosting and click ADD INSTANCE.
- From the Add Instance window, copy the Authentication Key into a text editor for later reference.
- Under Admin Account, PICK an Account that will be used to login into the tenant Instance. No matter the account type, it will be automatically converted into an admin account for the tenant instance. Users can also assign accounts to the Tenant after completing the hosting of the Tenant.
- Under the DATA category, provide the desired name in the Instance Name field.
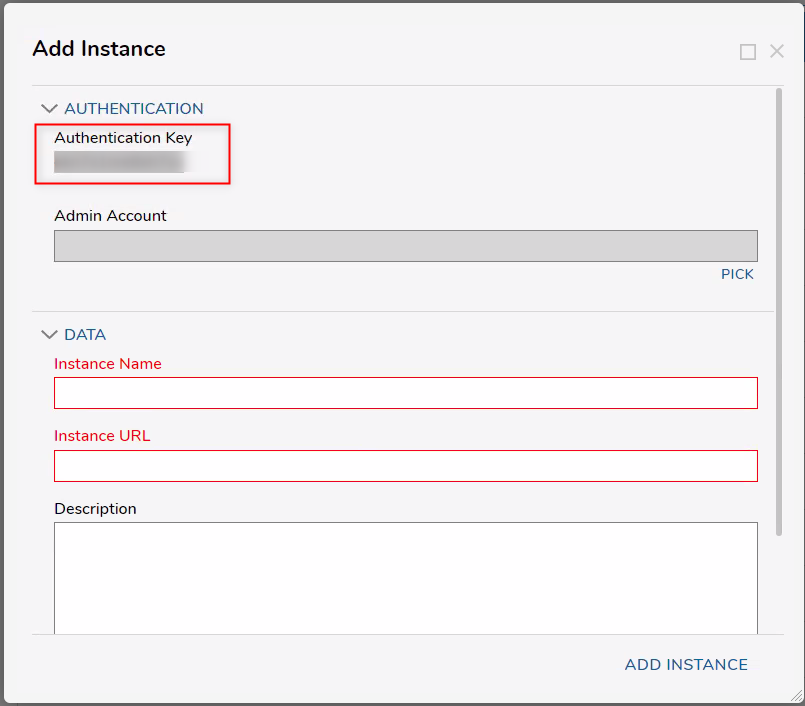
- Configure the Instance Base URL. Then, click ADD INSTANCE. Users can also configure the Internal Instance Base URL for internal communication between the tenant and Control instances. Instance Base URL ConsiderationsFor a Self Hosted installation, the default Instance URL is typically configured as http://localhost:[Port Number of the Instance].
Alternatively, the URL may be configured as http://[IP Address of the machine].
For an IIS Installation, the Instance URL should match the BasePortalUrl of the Tenant machine..png)
Verify that the newly added Instance is present in the Hosting Folder.
From the machine location of the Tenant Instance, download the v.8 DecisionsServerInstaller.exe.
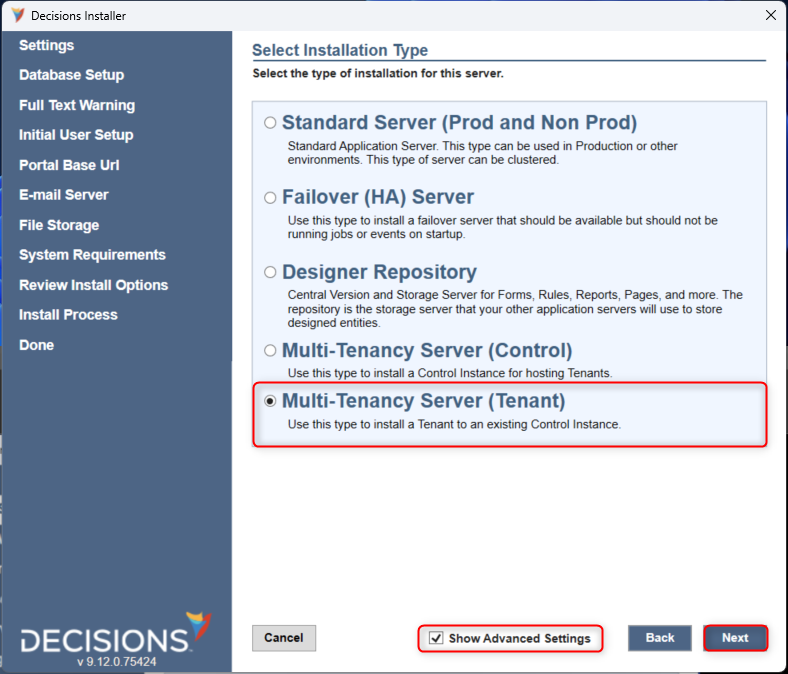
Upon opening the Installer, select INSTALL. Then, select Multi-Tenancy Server (Tenant) from the Select Installation Type screen, then click Next.
Proceed through the installation process as usual until the Tenant Server Setup window is reached.
Then, provide the previously defined Instance Name, reference the Control Instance URL and the copied Control Instance Authentication Key, and click Next.Continue and finish the rest of the installation process, then launch the Decisions Portal for the Tenant Instance.
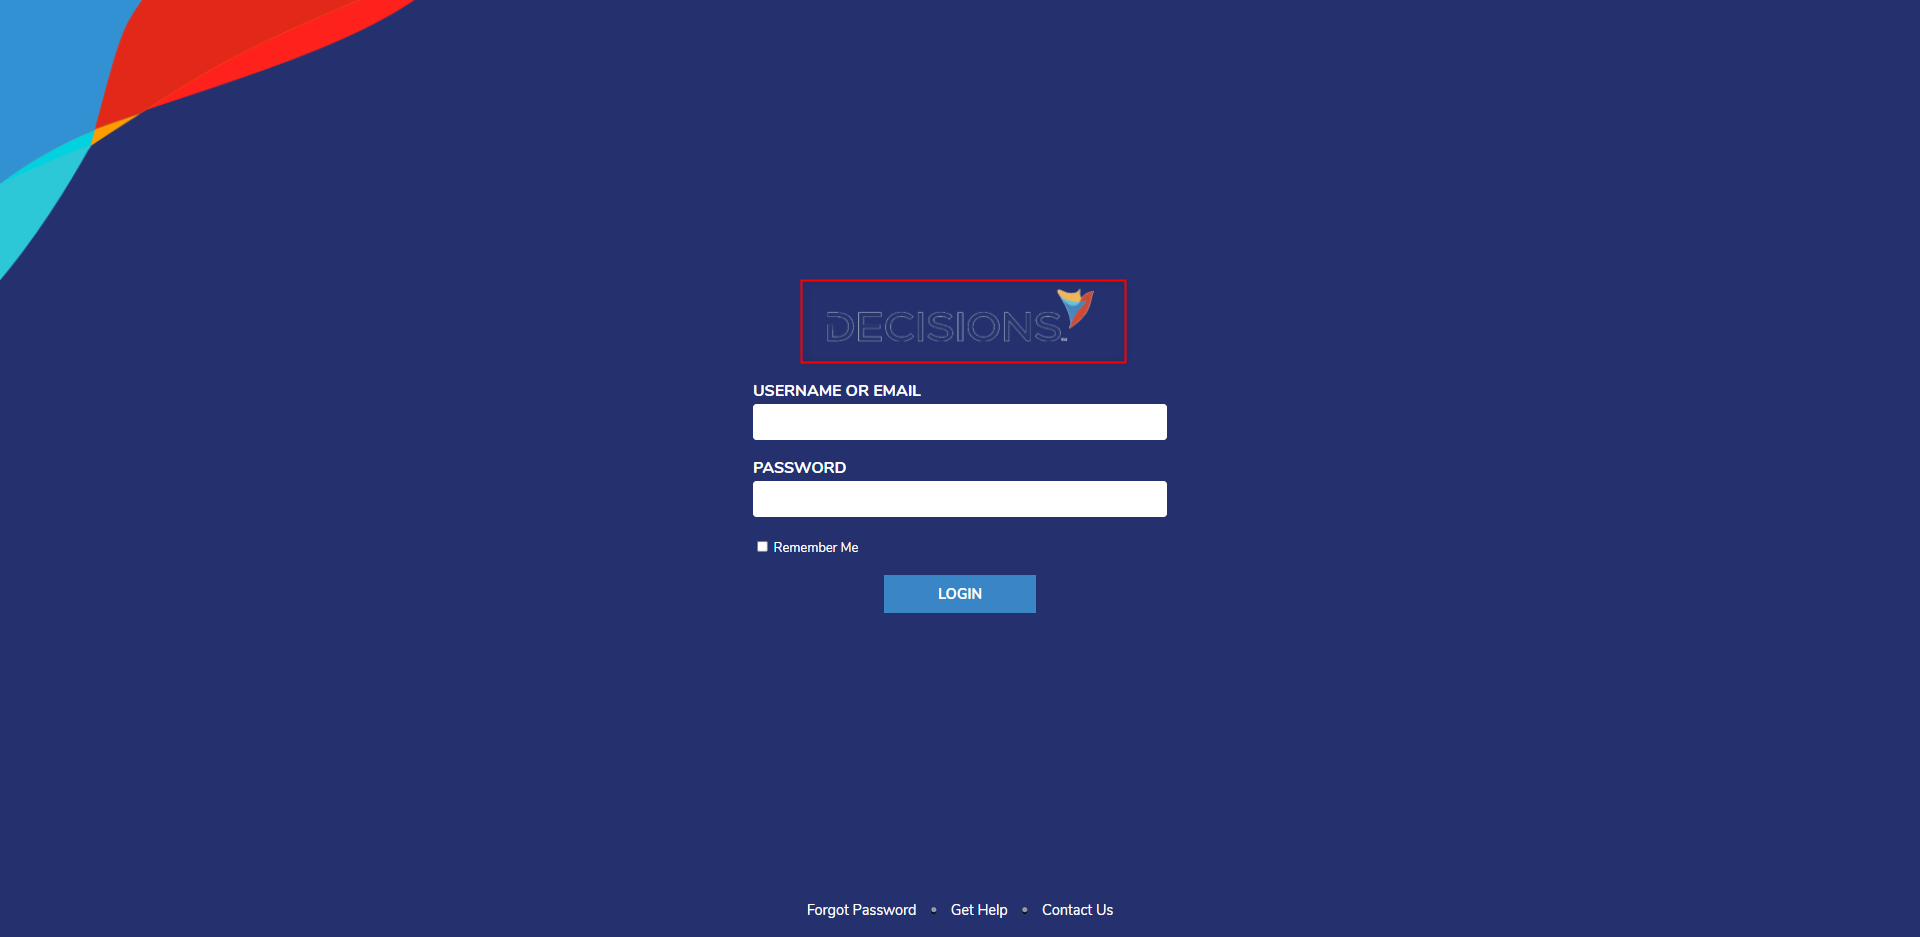
From the Login window, log in to the defined Admin Account for the Tenant Instance, and select the proper Instance from the SELECT INSTANCE options.

From the Decisions Studio of the Tenant, verify that the Hosting Folder can be Active status now states "True".
Secured Key Error If the Tenant Instance is inaccessible after setup and the Instance's Logs display the following error:
"Secured Key passed in is no more valid."
Matching the Timezone/Time on each Tenant and the Control will fix the issue.
Tenant Login Page Customization
After Decisions has been installed on the Tenant Instance, the Login Page may be customized with a user-defined Logo. This is done via the following process.
- From the Control Instance, navigate to the Hosting Folder. Then, right-click the desired Tenant Instance and select Edit Instance.
- Navigate to the LOGIN PAGE section and enable Override Login Page Logo.
- Via Drag File Here, or Choose a File, add the desired image. Then, click OK.
- Navigate to the Tenant Instance and verify that the Login Page Logo has been updated.
Assigning Accounts to the Tenants/Control Instance
Once the tenant has been successfully hosted, you can proceed with assigning an account to a specific Tenant by following the steps below. If accounts are not created, admin users must create the account/s.
- Log into the Control Instance. Navigate to the System > Hosting > Click on the Tenant Folder. The Instance Management page will open.
- Clicking on Add Instance Account will open a Dialog Box to pick the account. The Is Admin property enables the account to be converted into an admin account, regardless of its account type in the Control Instance.
- Pick the desired account to assign to the Tenant.