Creating Database Table Relationships
- 04 Dec 2023
- 3 Minutes to read
- Print
- DarkLight
Creating Database Table Relationships
- Updated on 04 Dec 2023
- 3 Minutes to read
- Print
- DarkLight
Article Summary
Share feedback
Thanks for sharing your feedback!
Overview
A table relationship is a connection or association between two tables in a relational database. These relationships define how data in one table is related to data in another table, typically through the use of keys, such as primary keys and foreign keys. The purpose of creating a Database Table Relationship is to integrate data from two separate database tables and pull from them simultaneously. For more information, refer to Data Structure Relationships.
The following article demonstrates how to create a Database Relationship and use it within the Report.
Referential Integrity
When a relationship is established between two tables, it enforces referential integrity, ensuring that data is linked logically and consistently. This means that the database will only retrieve data from both tables where there is a match in the common field, as it seeks to maintain data consistency and prevent incorrect or orphaned data from being included in the Report.
Users can select the join type from the Relationship Data Source properties to determine how data is retrieved from the related tables and to control the inclusion of matching and non-matching records.
Viewing Relationships
There is no dedicated dashboard or other mechanism that displays database relationships in a diagram within Decisions.
Creating Relationship between Tables
This section demonstrates how to create a relationship between tables.
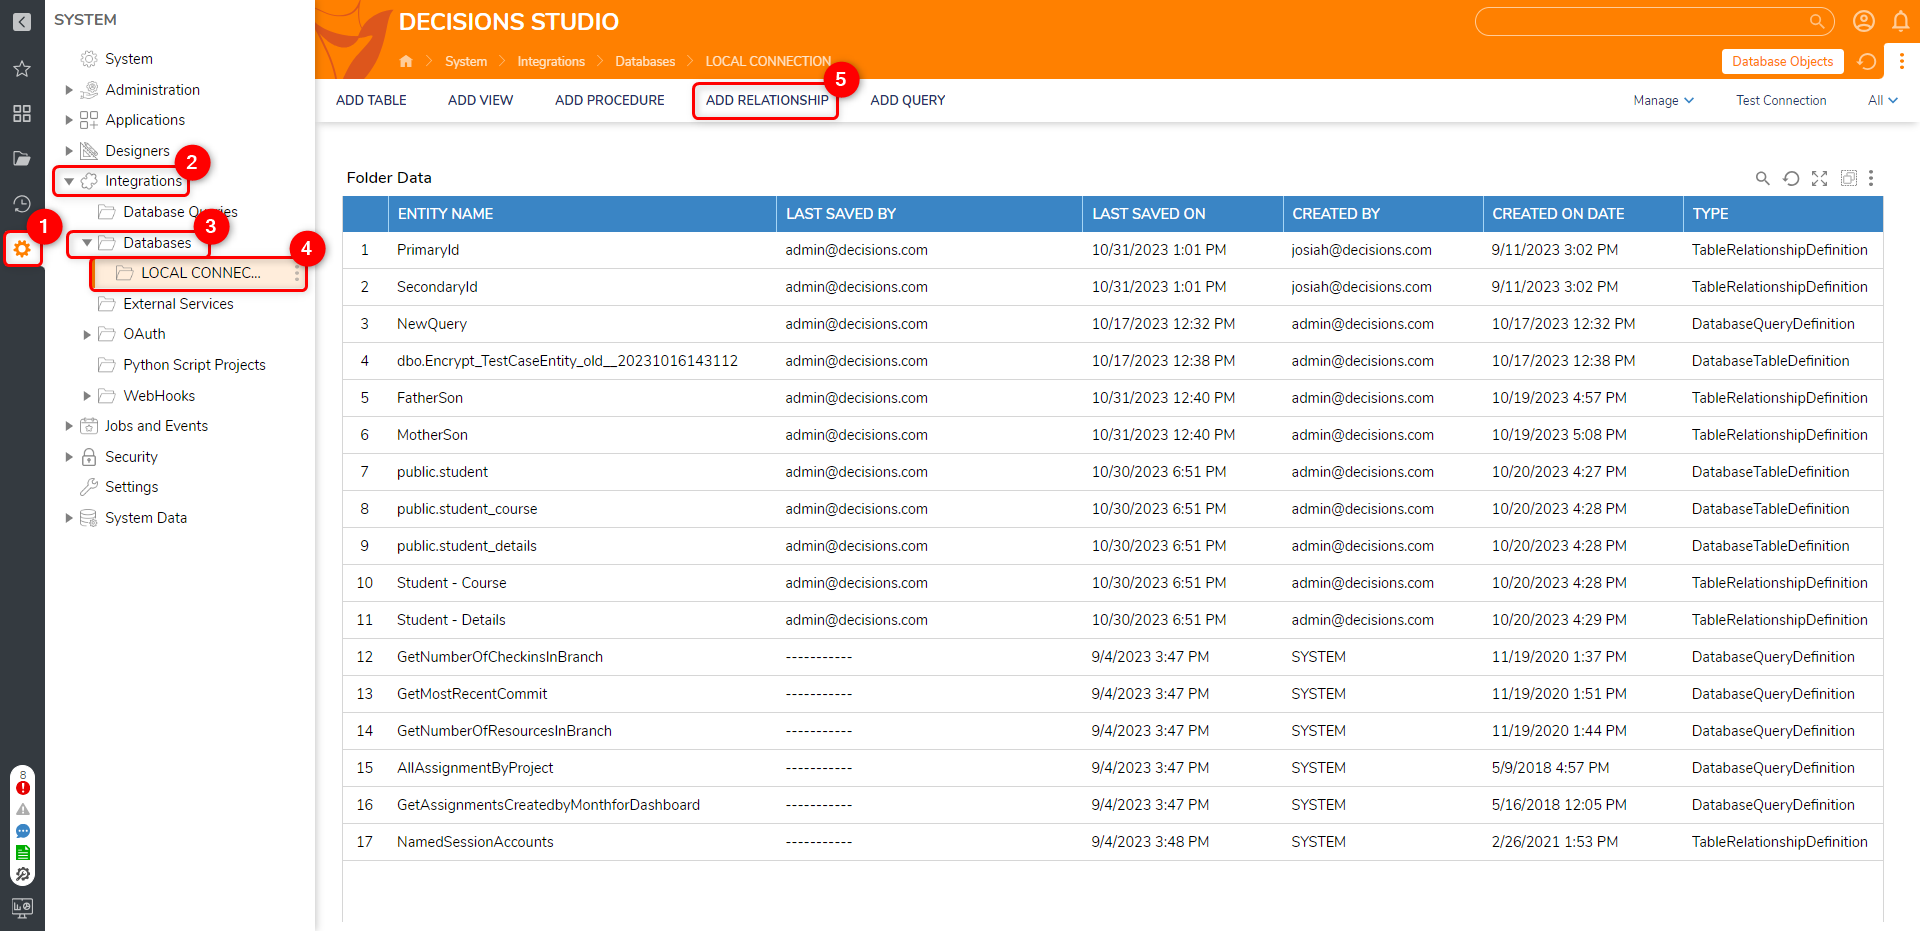
In the designer Folders, Navigate to System > Integrations > Databases folder in the Portal. This will show all the databases connected to the platform.
Click on any of the connected Database Folder. Navigate to the Actions Panel and select Add Relationship.
In the Add Relationship resulting window, give a Name to the Relationship.
Under the "From" and "To" sections, pick the Table and Fields that should be Related.
Click Save Relationship when finished.

This will add the Relationship with the given name under the Database folder.


Using the Relationship within the Report
This section demonstrates how to add the Relationship and their Data Fields in a Report.
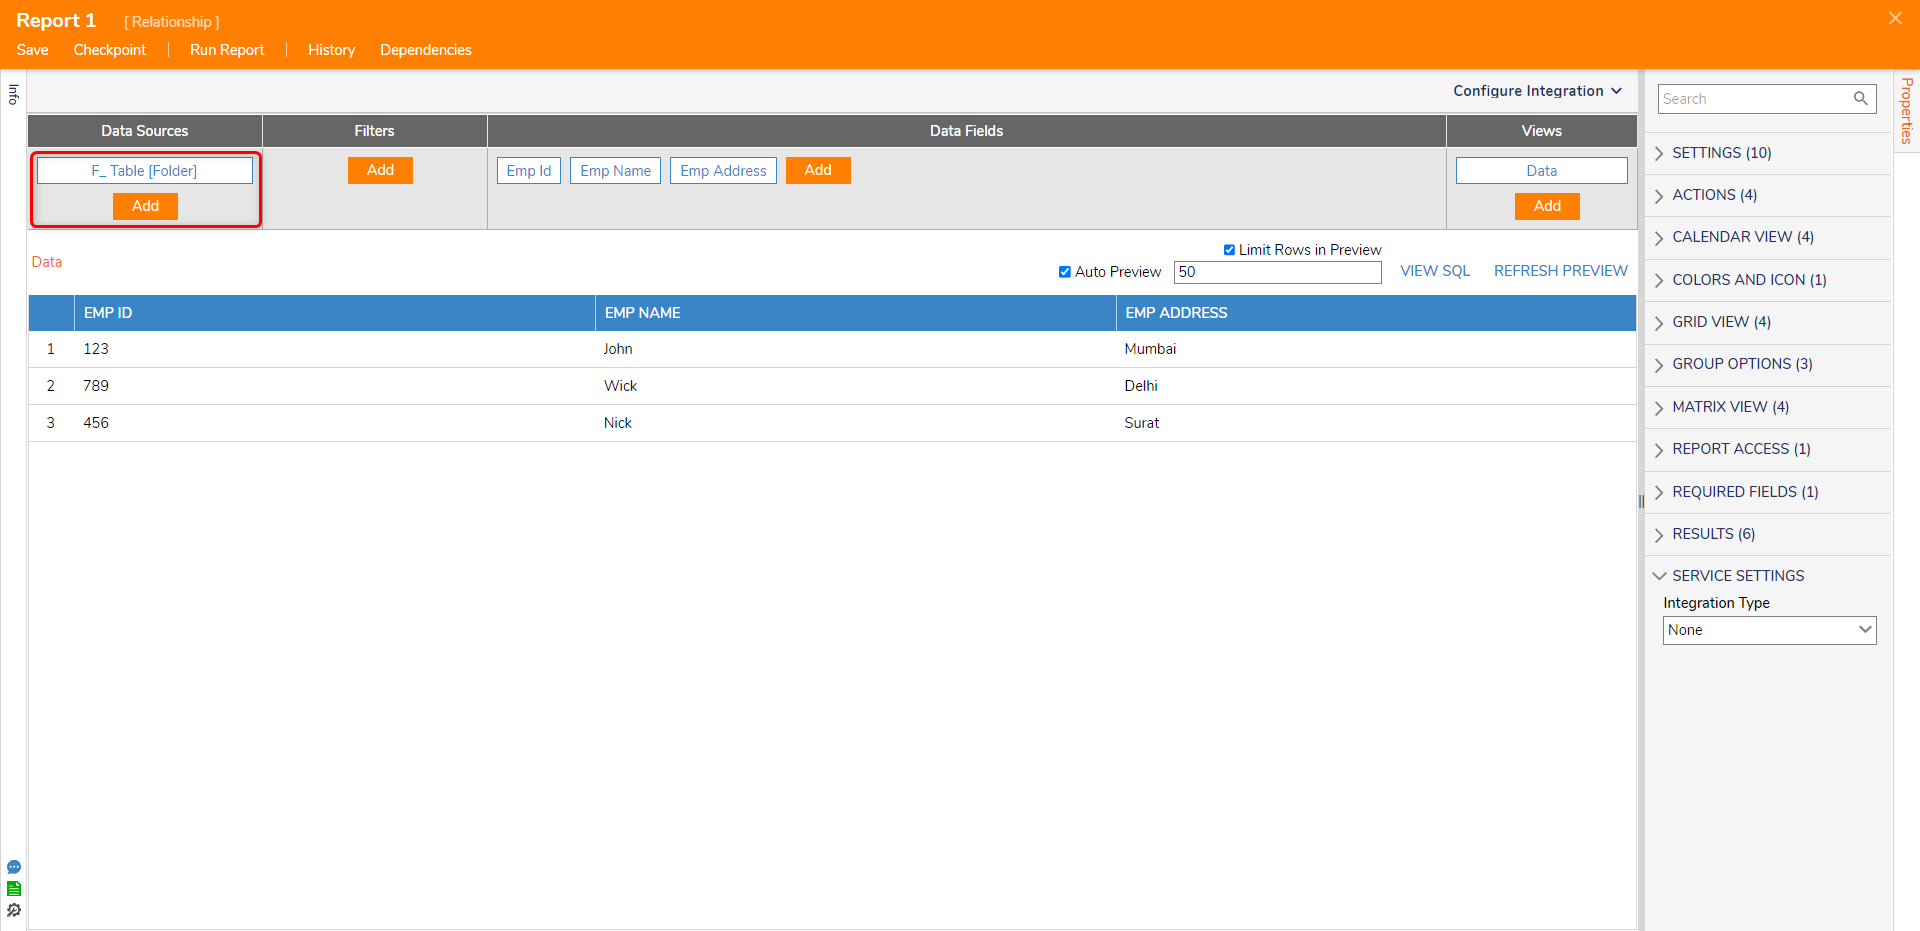
In the Report Designer, add the First table as Data Source. Add the corresponding Data Fields.
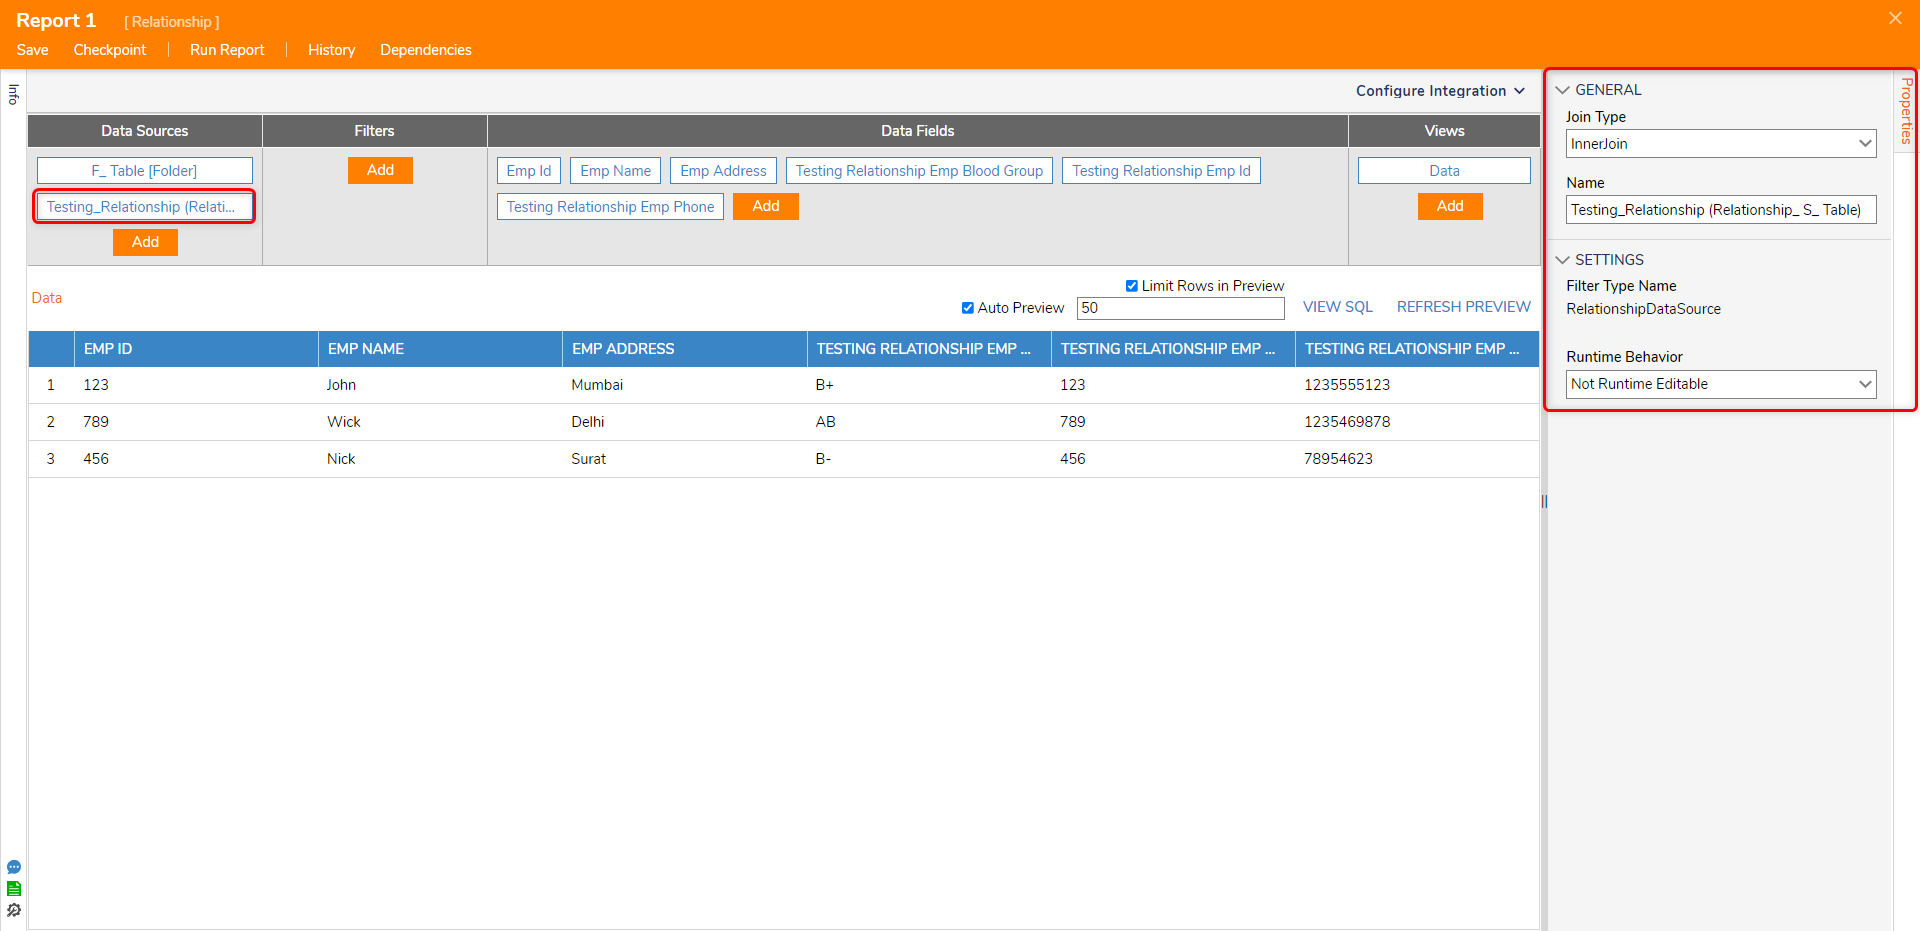
To add the Related table, from the Data Source > click Add> Add Related Table > Select the Relationship.
Under the Data Fields section, click on Add to display all fields associated with the Relationship. These fields follow a specific naming convention, which includes the name of the Relationship and the field name, e.g.
[RelationshipName] Relationship [FieldName].
Once the Relationship is added, the Report will populate the data from both tables, maintaining the Referential Integrity.


Properties on the Relationship Data Source
Adding the Relationship or clicking on the already added Relationship will expose its properties.
Property Name | Description |
|---|---|
Join Type |
|
Name | Allows for changing the name of the Data Source within the Report. |
Runtime Behavior | Allows changing the Join Type during Runtime. |
Troubleshooting Guide
Issue Description: A row is not getting selected even after clicking on it.
Step to Perform: In a one-to-many relationship where the relationship column contains repetitive values, it leads to multiple rows sharing the same Report ID. This creates confusion for the report when selecting rows manually.
Users can resolve it by configuring the "Override Action Context" located in the Report properties. This involves setting the "Action Context Type" to match the data source added in the report and configuring the "Action Context ID Field" to the column containing unique values.
Was this article helpful?