Overview
Assignment Roles are identifiers that are used to define user (individual Accounts) or Group responsibilities and positions. Such Roles may include:
- Designer
- Analyst
- Manager
- etc...
As the name suggests, Roles can be used to define a recipient for an Assigned Decisions Object such as a Task, Form, Report, Page, or Service Catalog Item. The following document discusses how to CREATE and utilize Assignment Roles within an Assignment Process.
Example
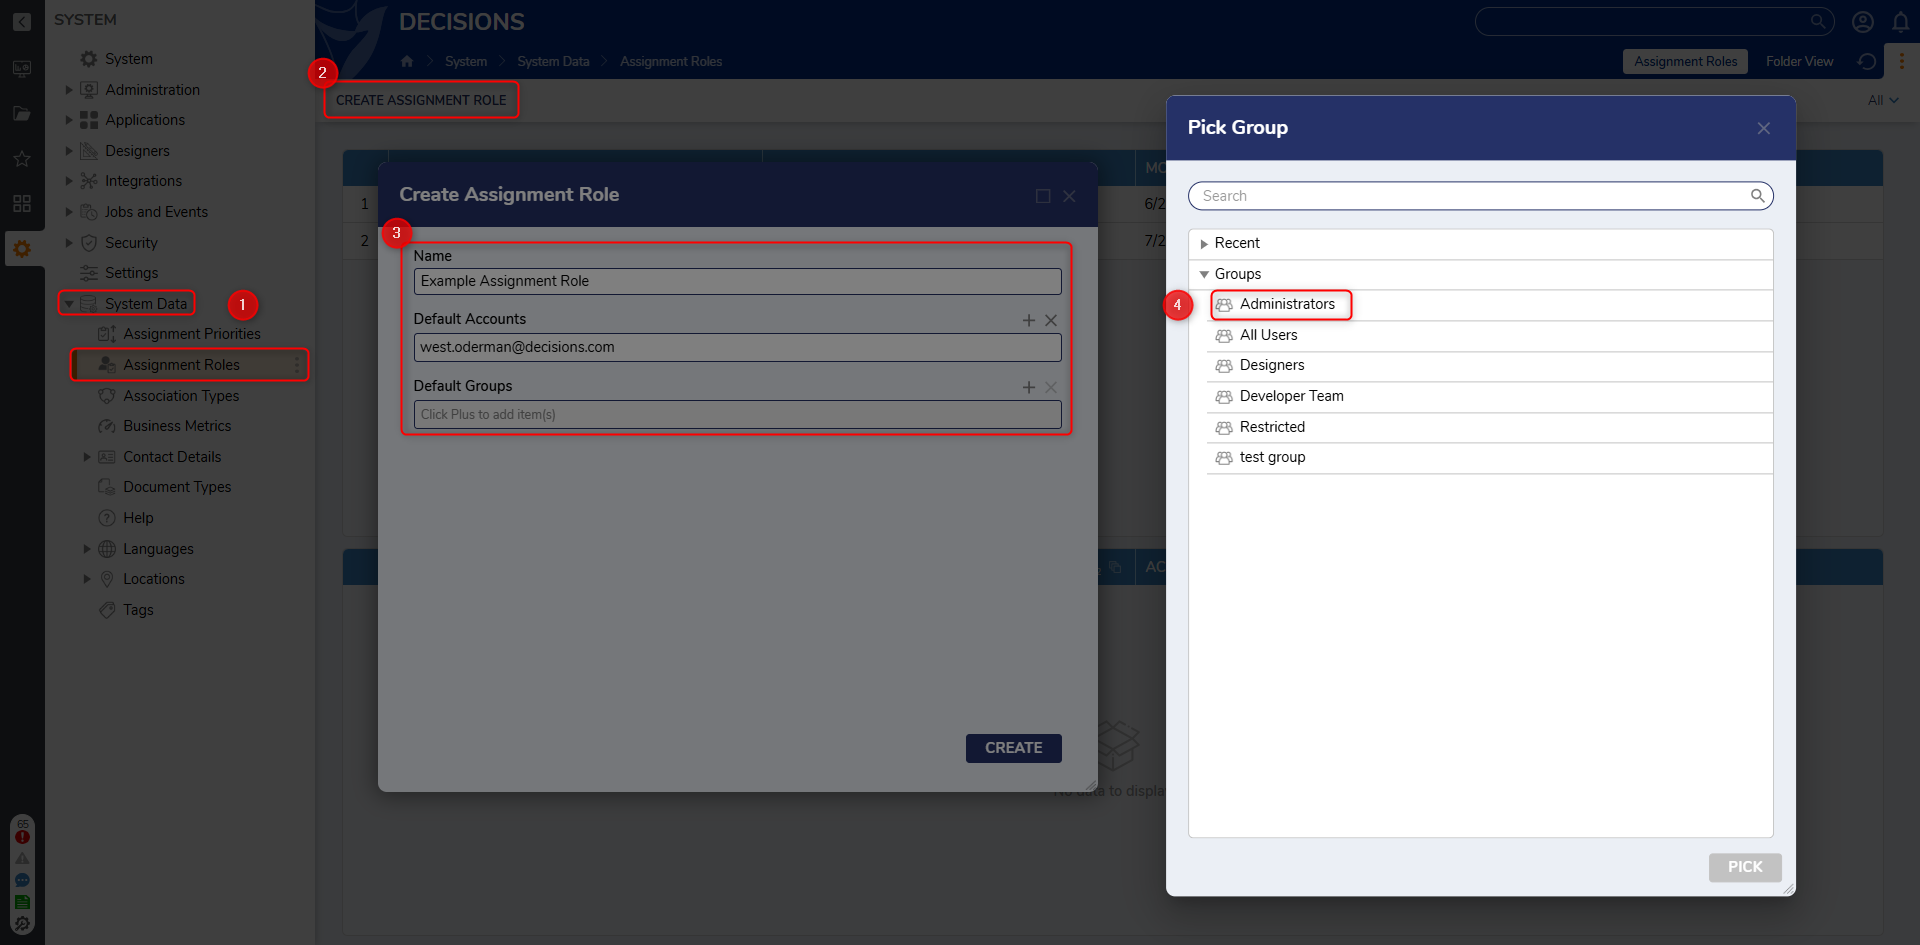
- From the Decisions Studio, navigate to System > System Data > Assignment Roles. Then, click CREATE ASSIGNMENT ROLE.
- Provide a Name in the respective text box. Then, under Default Accounts and Default Groups, select ADD NEW. Choose the default Accounts to add to the Assignment Role.
- PICK the desired Account and or Group, then click CREATE.

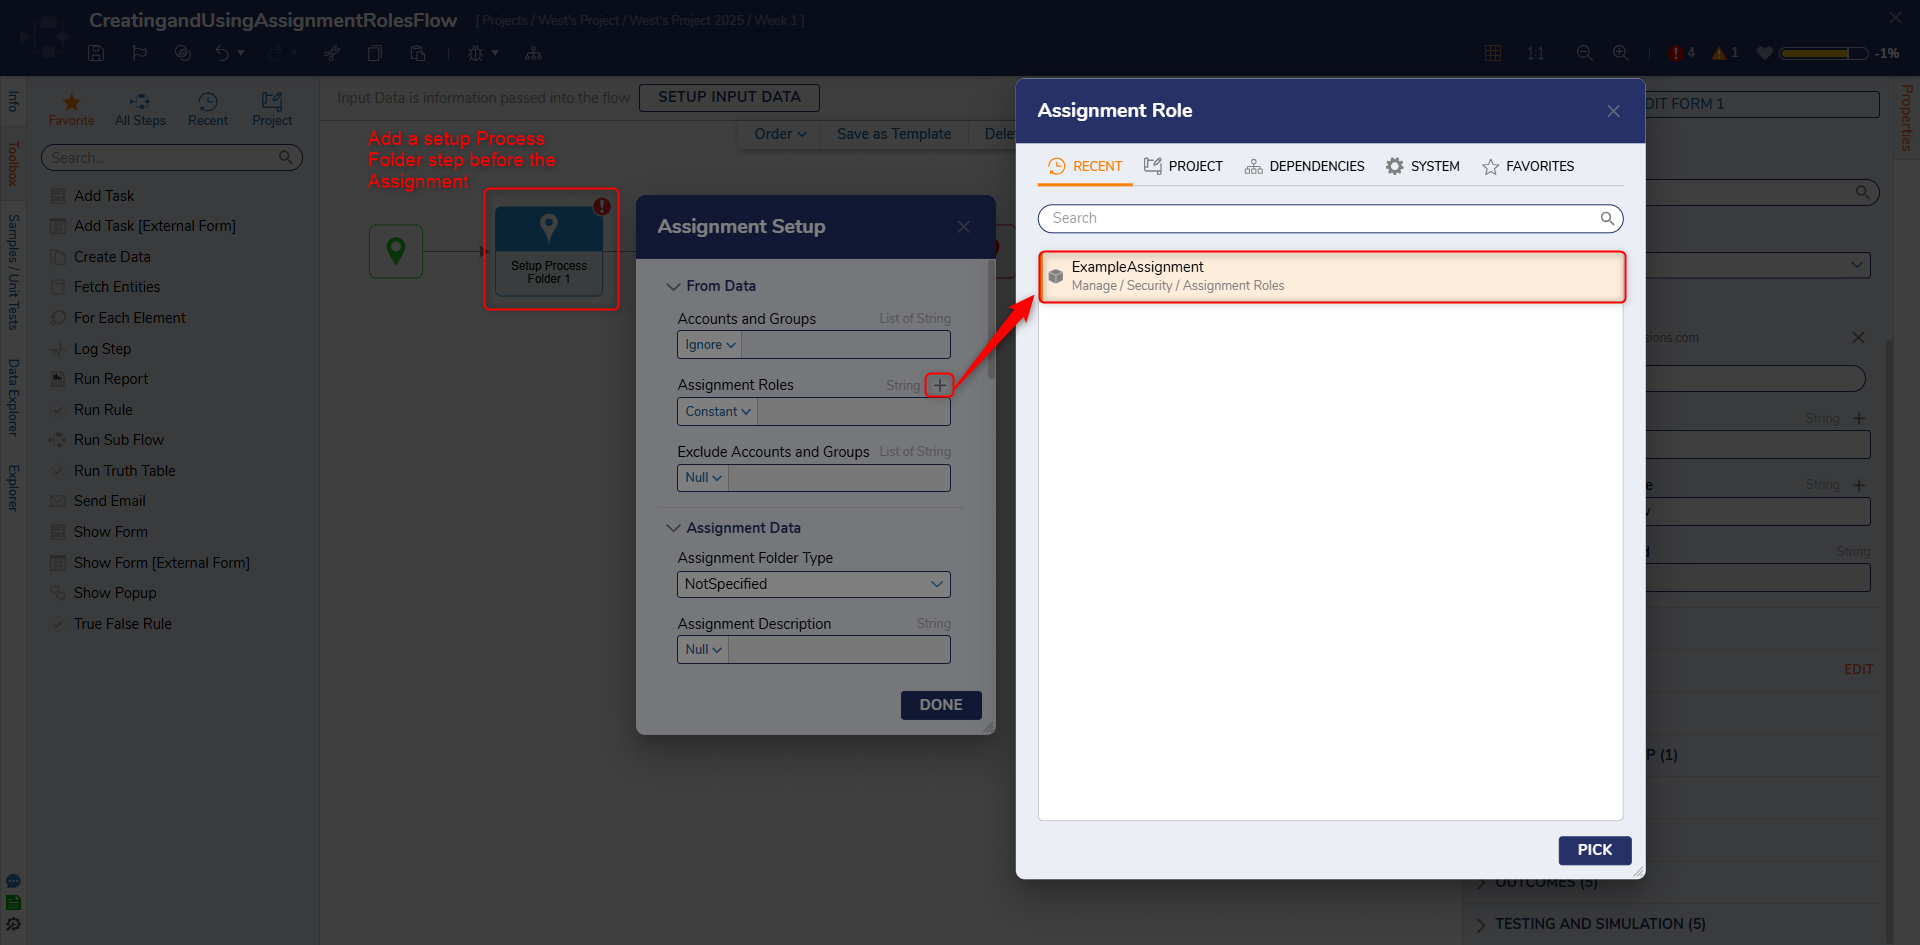
- From a Flow containing an Assigned Form, add and configure a Setup Process Folder step before the Show Form or Add Task step; this helps mitigate/track progress within a the Assignment Process.
- From the Properties of the Assigned Form, navigate to ASSIGNMENT SETUP and select EDIT.
- Under From Data > Assignment Roles, set the mapping to Constant, then PICK the Assignment Role that was previously created and click DONE.

- Save the Flow, then Debug it.
- After the running the Flow, navigate to the Process Folder that was created via Setup Process Folder. Verify that the Assignment Process Data displays the designated Assignment Role.
.png)
For further information on Administration, visit the Decisions Forum.