Overview
A Text Merge is data from multiple text sources combined (e.g., constant values and variable values) into a single text value. Users can create Text Merges by using the Text Merge Designer within a Project Folder, or by using the Merge Text Designer within Steps that reference Text.
Text Merges are utilized to define a message within a Step. Users must define Input Data to the Flow before it can be selected in either editor. Since Text Merges combine strings and data values, they can be utilized for various use cases, such as creating a custom subject line and displaying data from a database in the body of an email.
This article includes a walkthrough of creating a Text Merge using the Merge Text Editor and the Text Merge Designer.
Creating a Text Merge with the Text Merge Editor
There are a few ways Users can create a Text Merge with the Text Merge Editor.
- Utilizing the Create New action on the Pick or Create Text Merge Step.

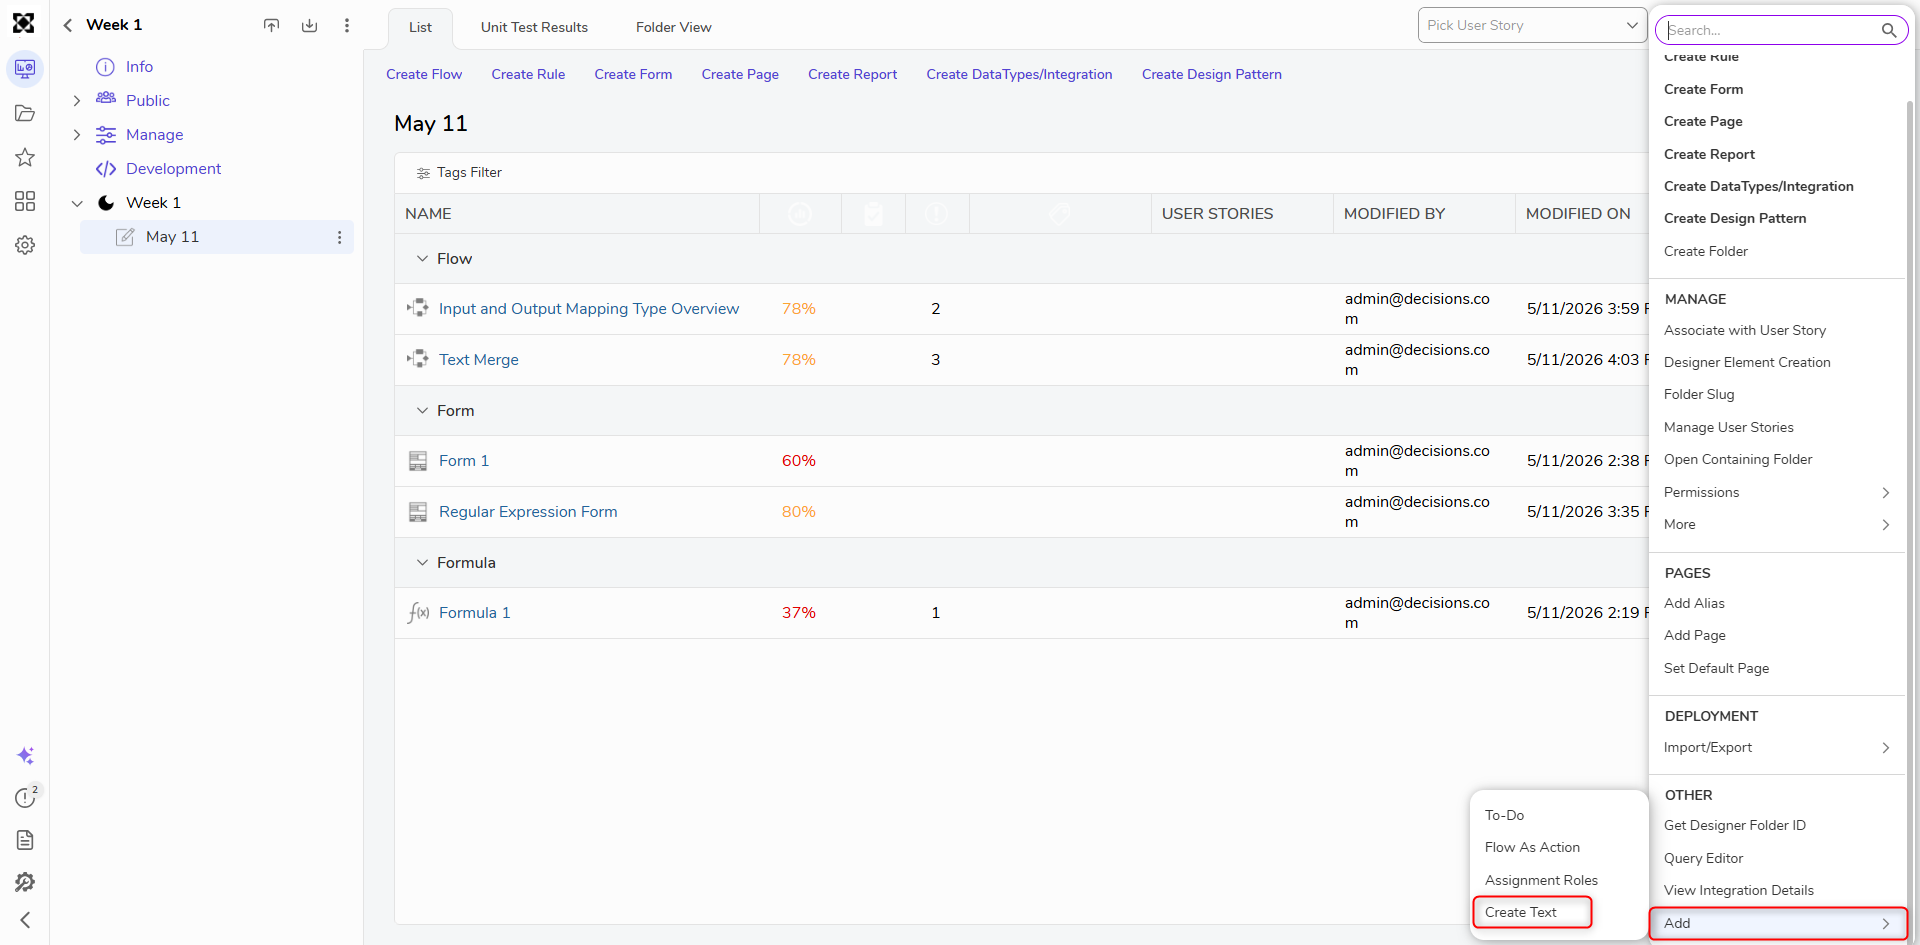
- Adding a Text Merge within a Project Folder by selecting All > Other > Add > Create Text.
In this example, the Pick or Create Text Merge Step is used.
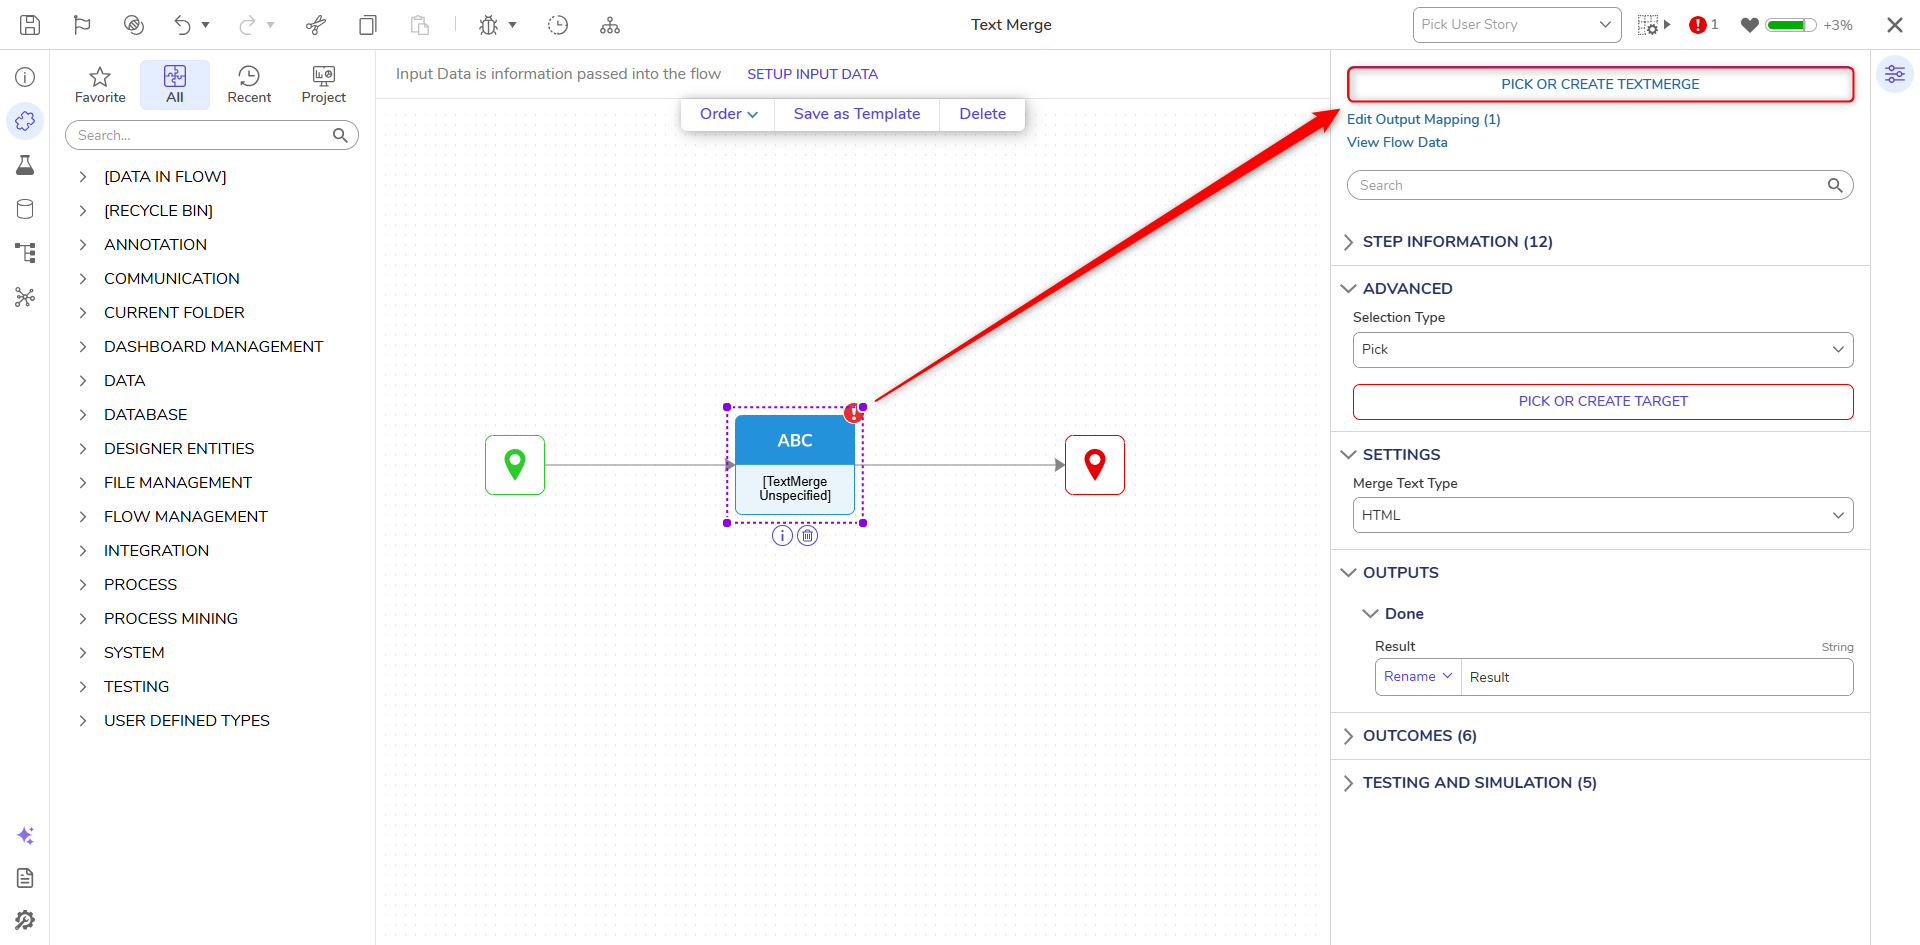
- Create a Flow and search for the Pick or Create TextMerge Step in the Toolbox.
- Drag and drop this Step onto the Workspace and select Pick or Create TextMerge.
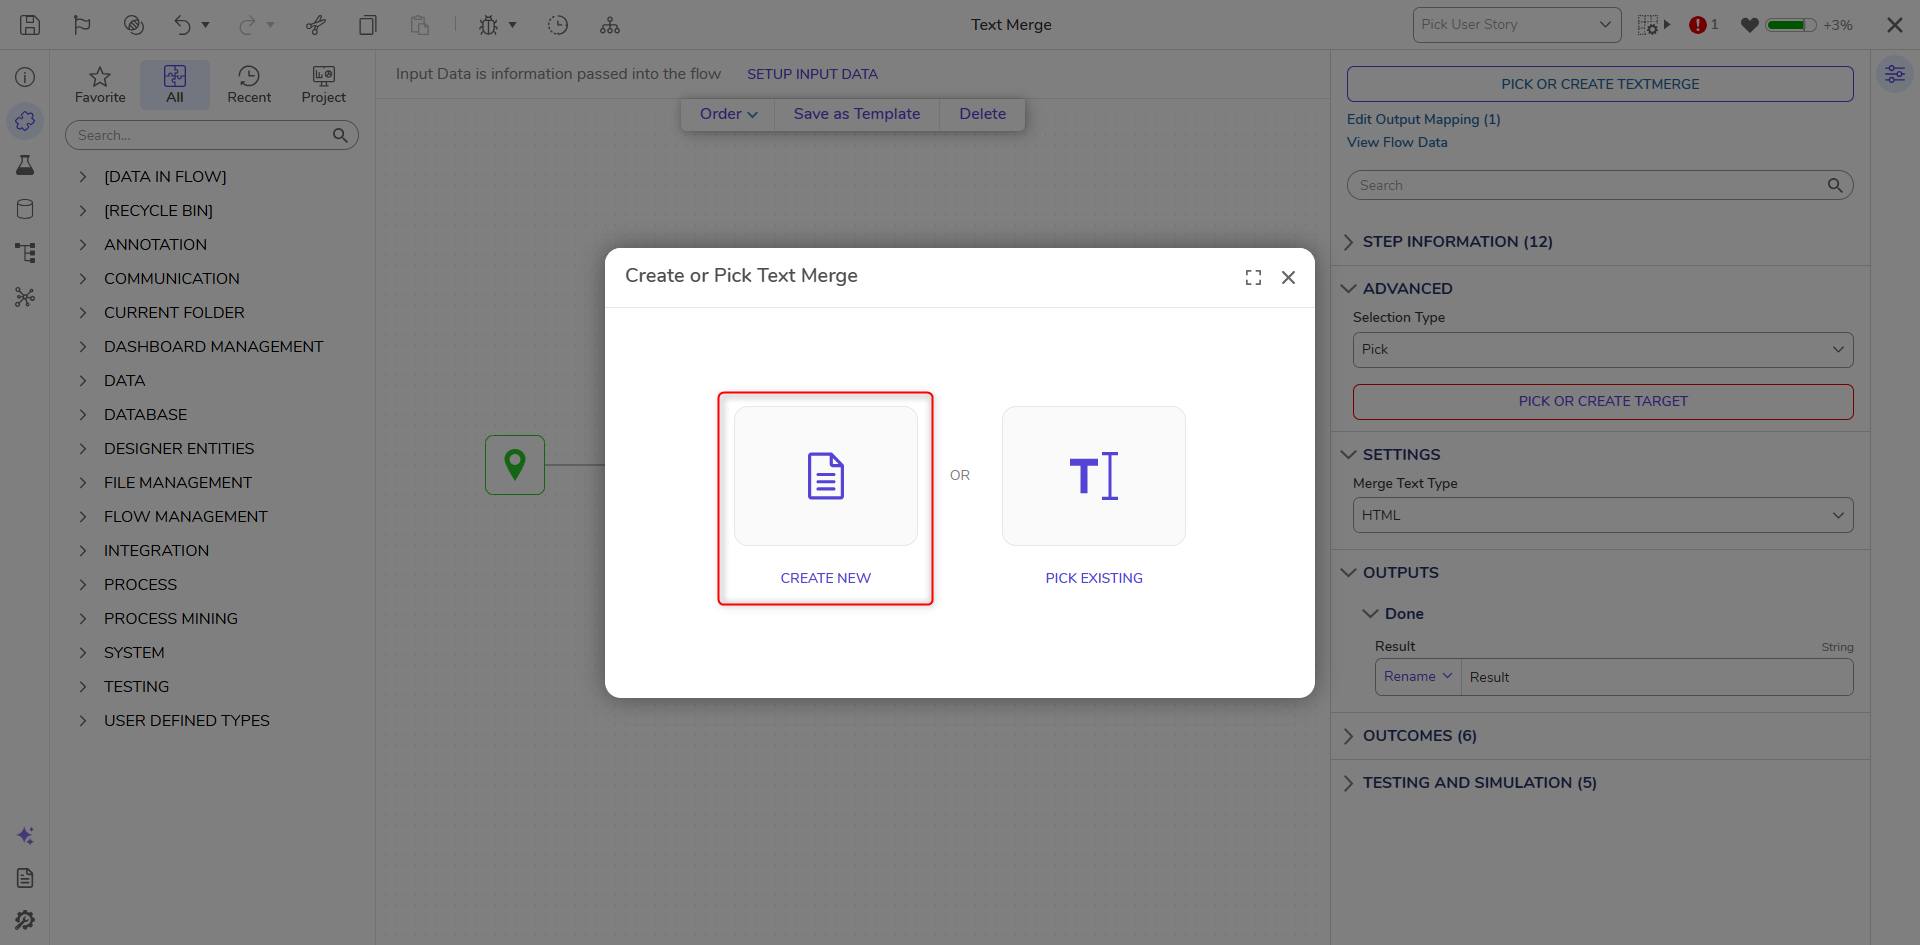
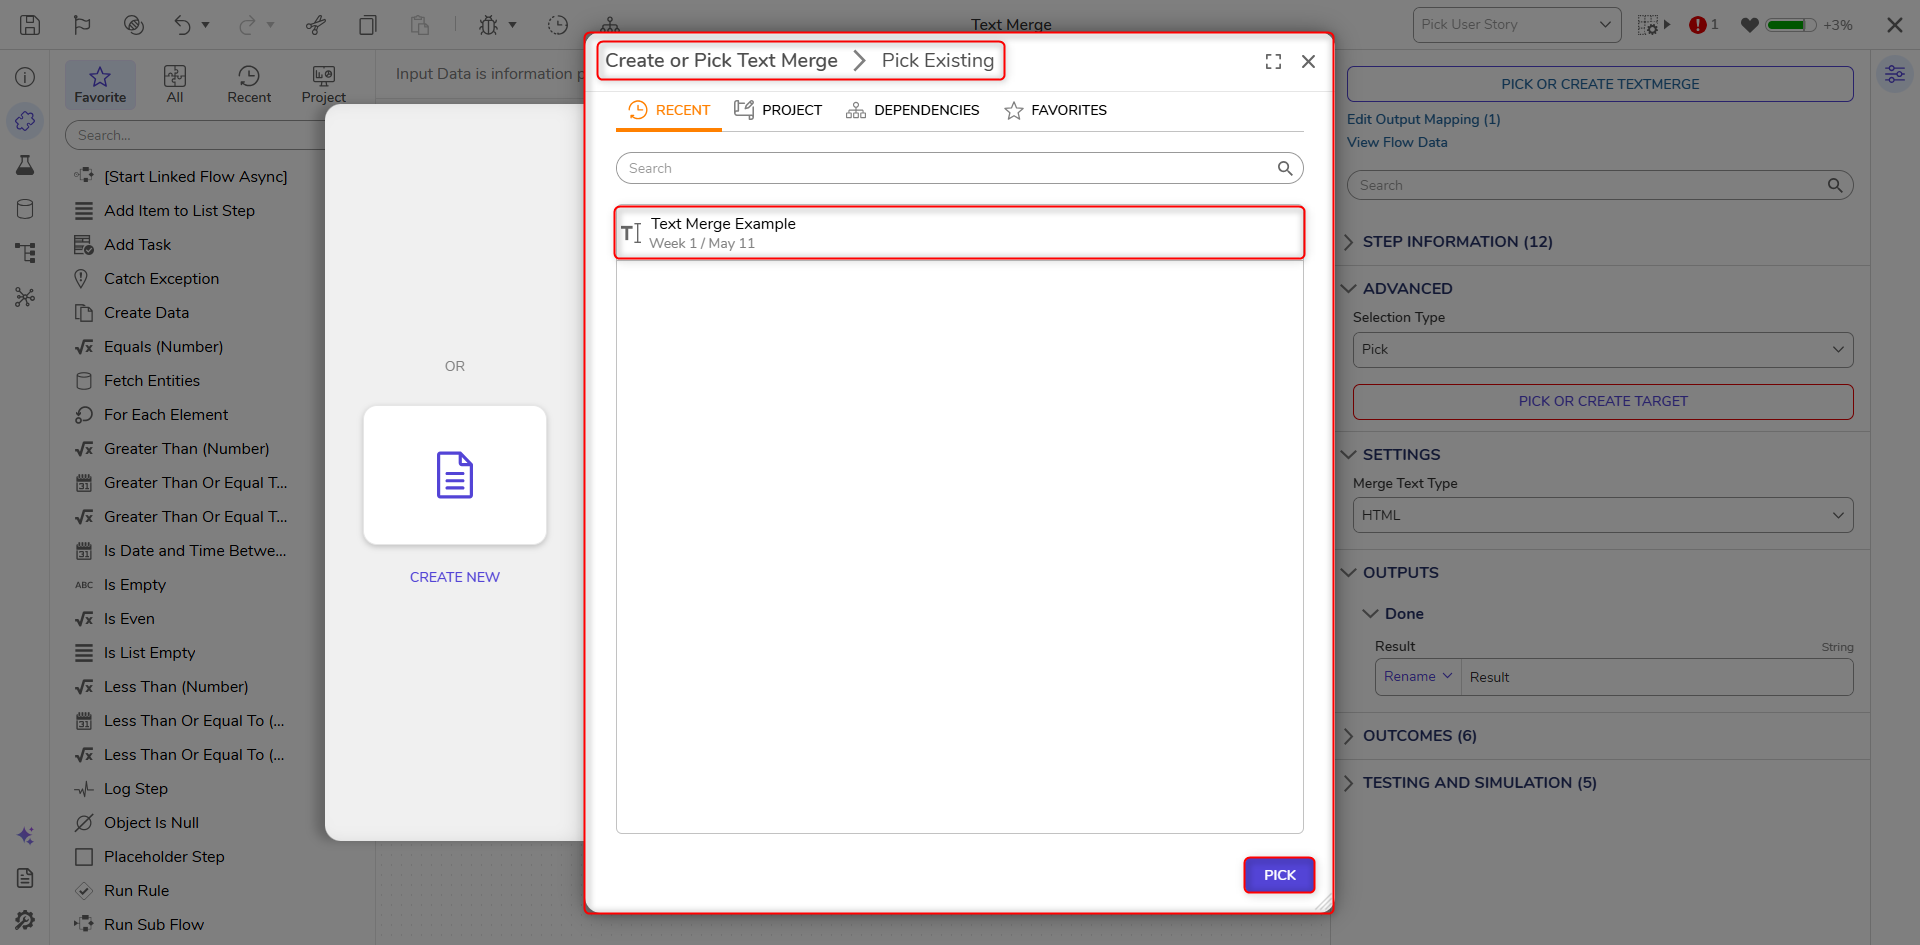
- From here, click Create New. Once a Text Merge has already been created, it can be referenced by selecting Pick Existing.
- Choose a name for the Text Merge and click Continue to proceed.
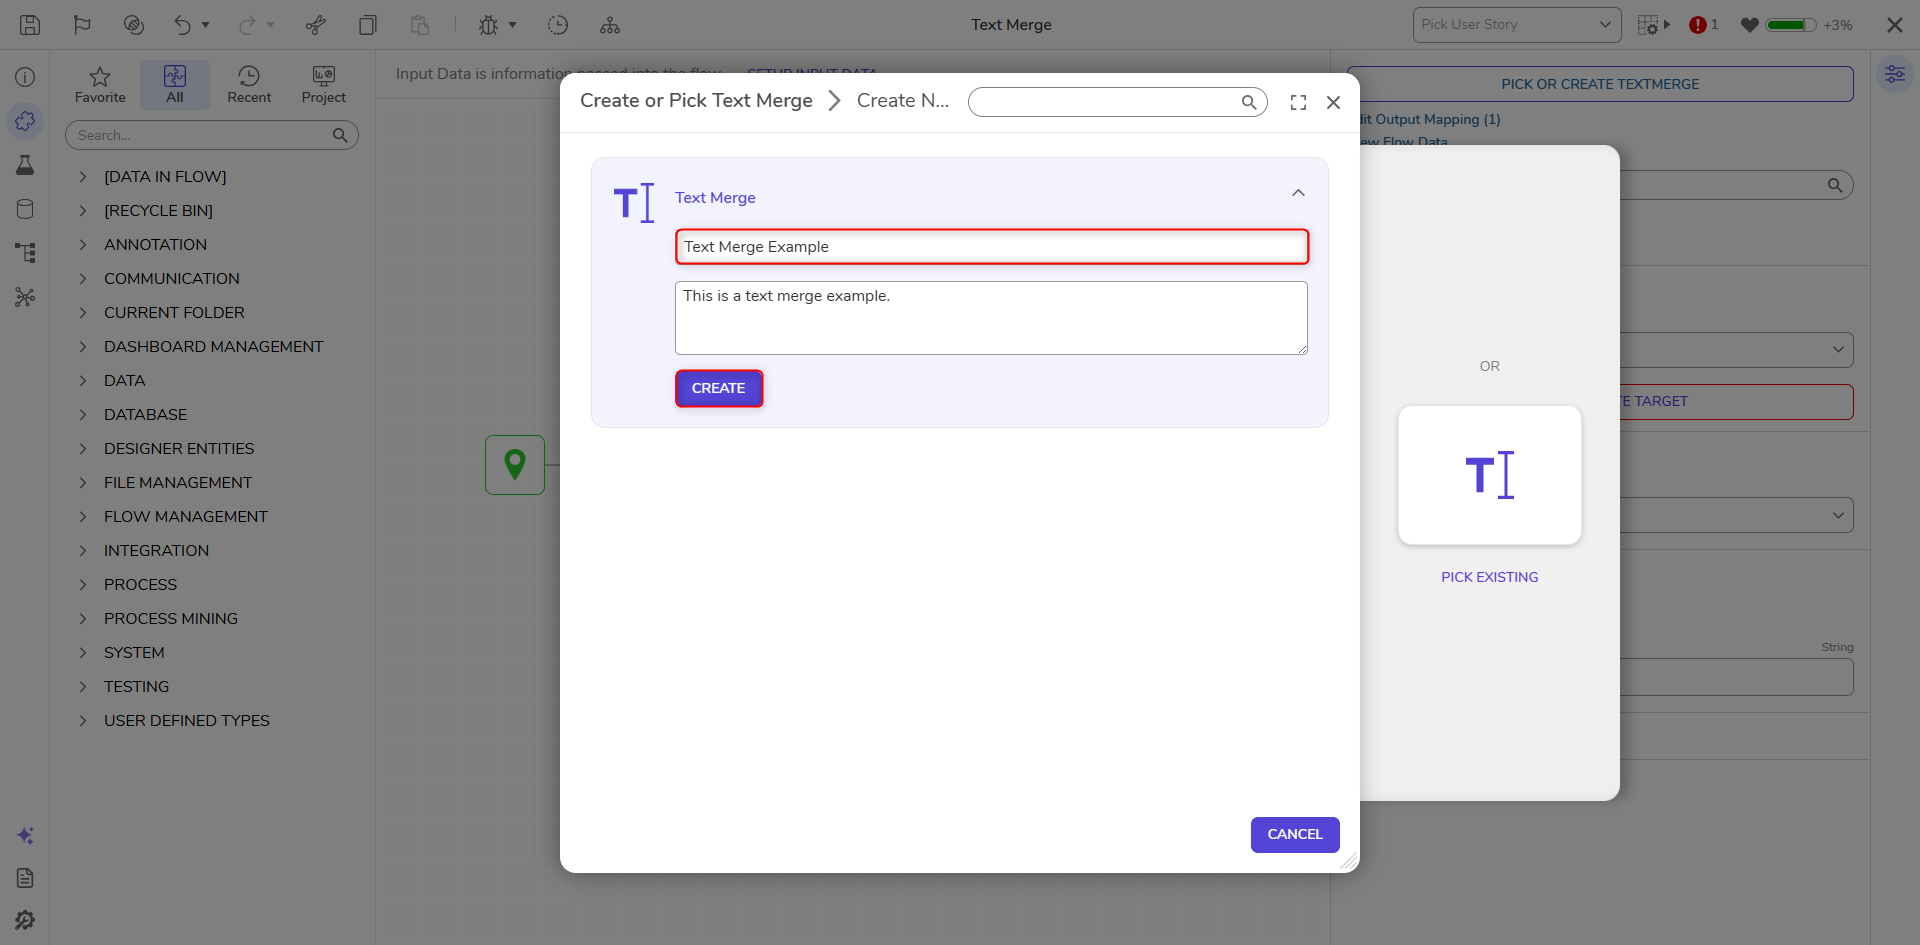
- This action will open the Text Merge Designer.
- From here, use the available controls to create a Text Merge.
Navigating the Text Merge Designer
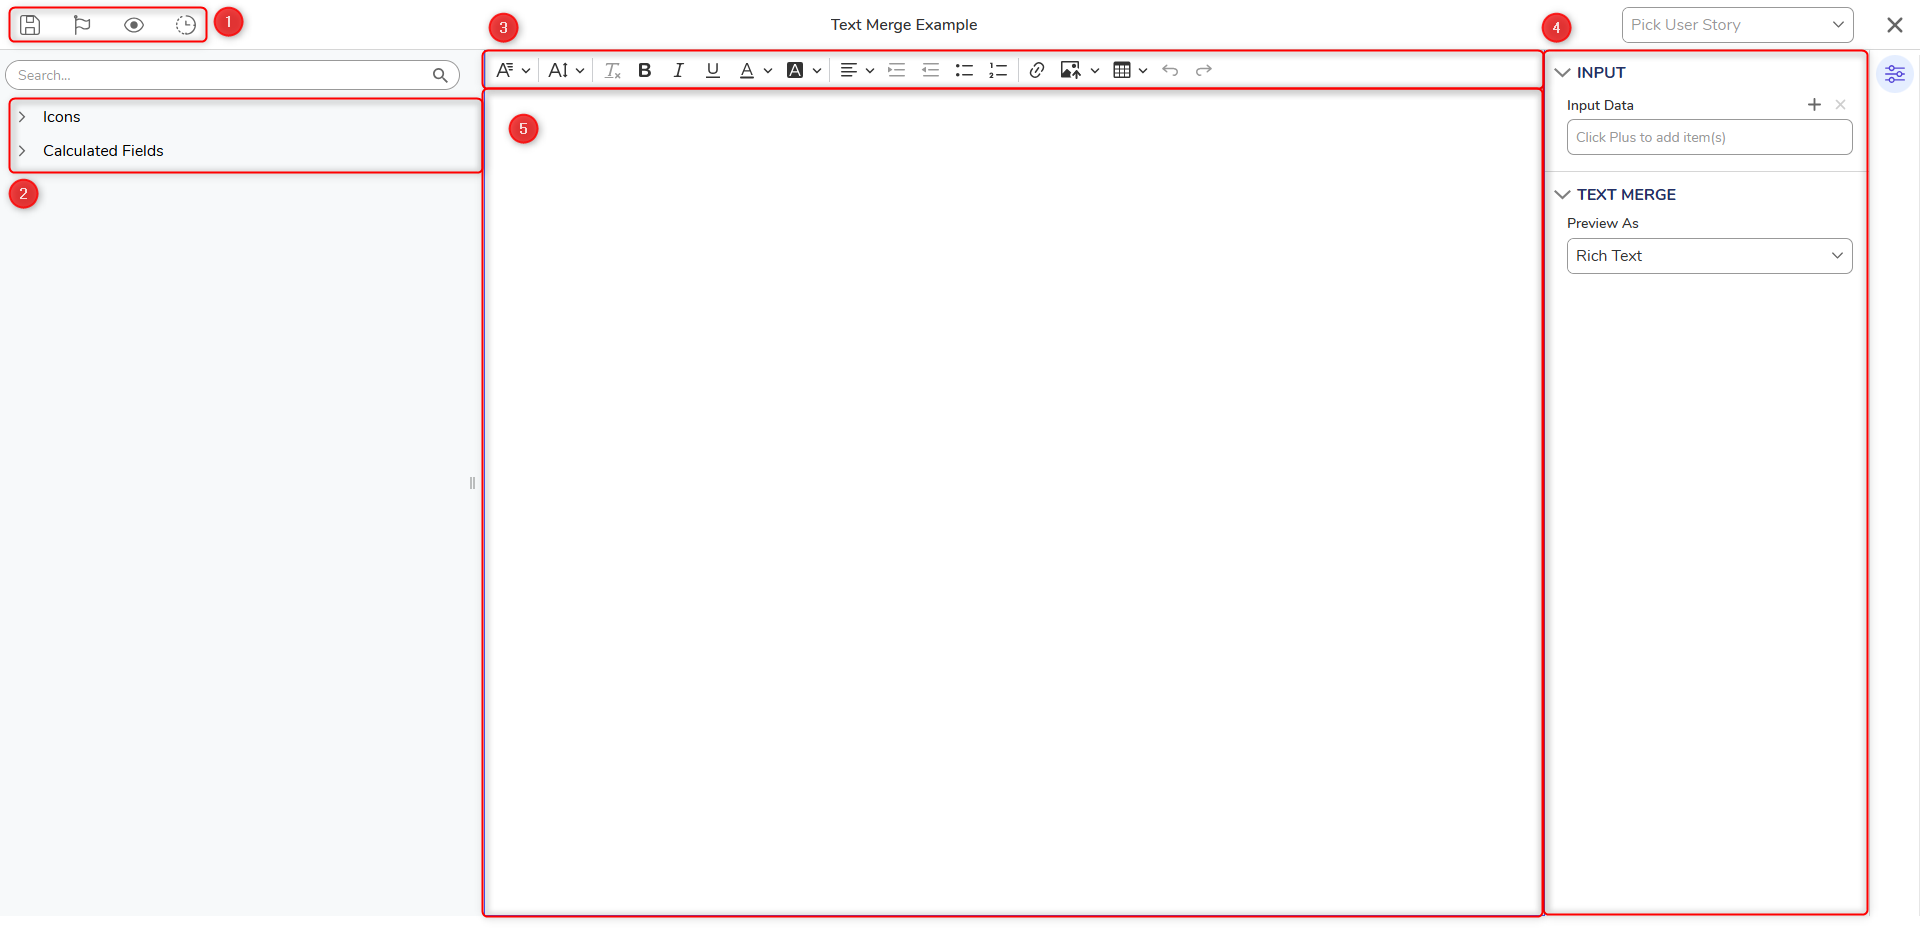
| Identifier | Name | Description | |
|---|---|---|---|
| 1 | Save, Checkpoint, Preview | Enables Users to save, perform a checkpoint, or preview the Text Merge. | |
| 2 | Icons, Calculated Fields | Enables Users to choose from a list of Icons and Calculated Fields to add to the Text Merge. | |
| 3 | Menu Bar | Houses several icons that allow Users to customize the Text Merge. | |
 | Font Family | Allows Users to adjust the Font. | |
 | Font Size | Allows Users to adjust the Font Size. | |
 | Remove Format | Once a format is selected, this icon allows Users to remove formatting from the Text Merge. | |
 | Font Customization | These icons allow Users to bold, italicize, underline, and adjust the color of the Text Merge. | |
 | Text Customization | These icons allow Users to align and indent text, as well as add a bulleted/numeric list to the Text Merge. | |
 | Link | Allows Users to add a link to the Text Merge. | |
 | Upload Image from a Computer | Allows Users to upload an image from a URL or computer to the Text Merge. | |
 | Insert Table | Allows Users to insert a table into the Text Merge. | |
 | Undo/Redo | Allows Users to undo/redo anything done on the Text Merge workspace. | |
| 4 | Properties Panel | Contains Input Data and Preview As controls. Input Data allows Users to assign input values and insert them into the Text Merge. Preview As allows Users to change the Text Merge Preview between Rich Text, Rich and Plain Text, and Plain Text. | |
| 5 | Workspace | This is where Users will create the Text Merge. | |
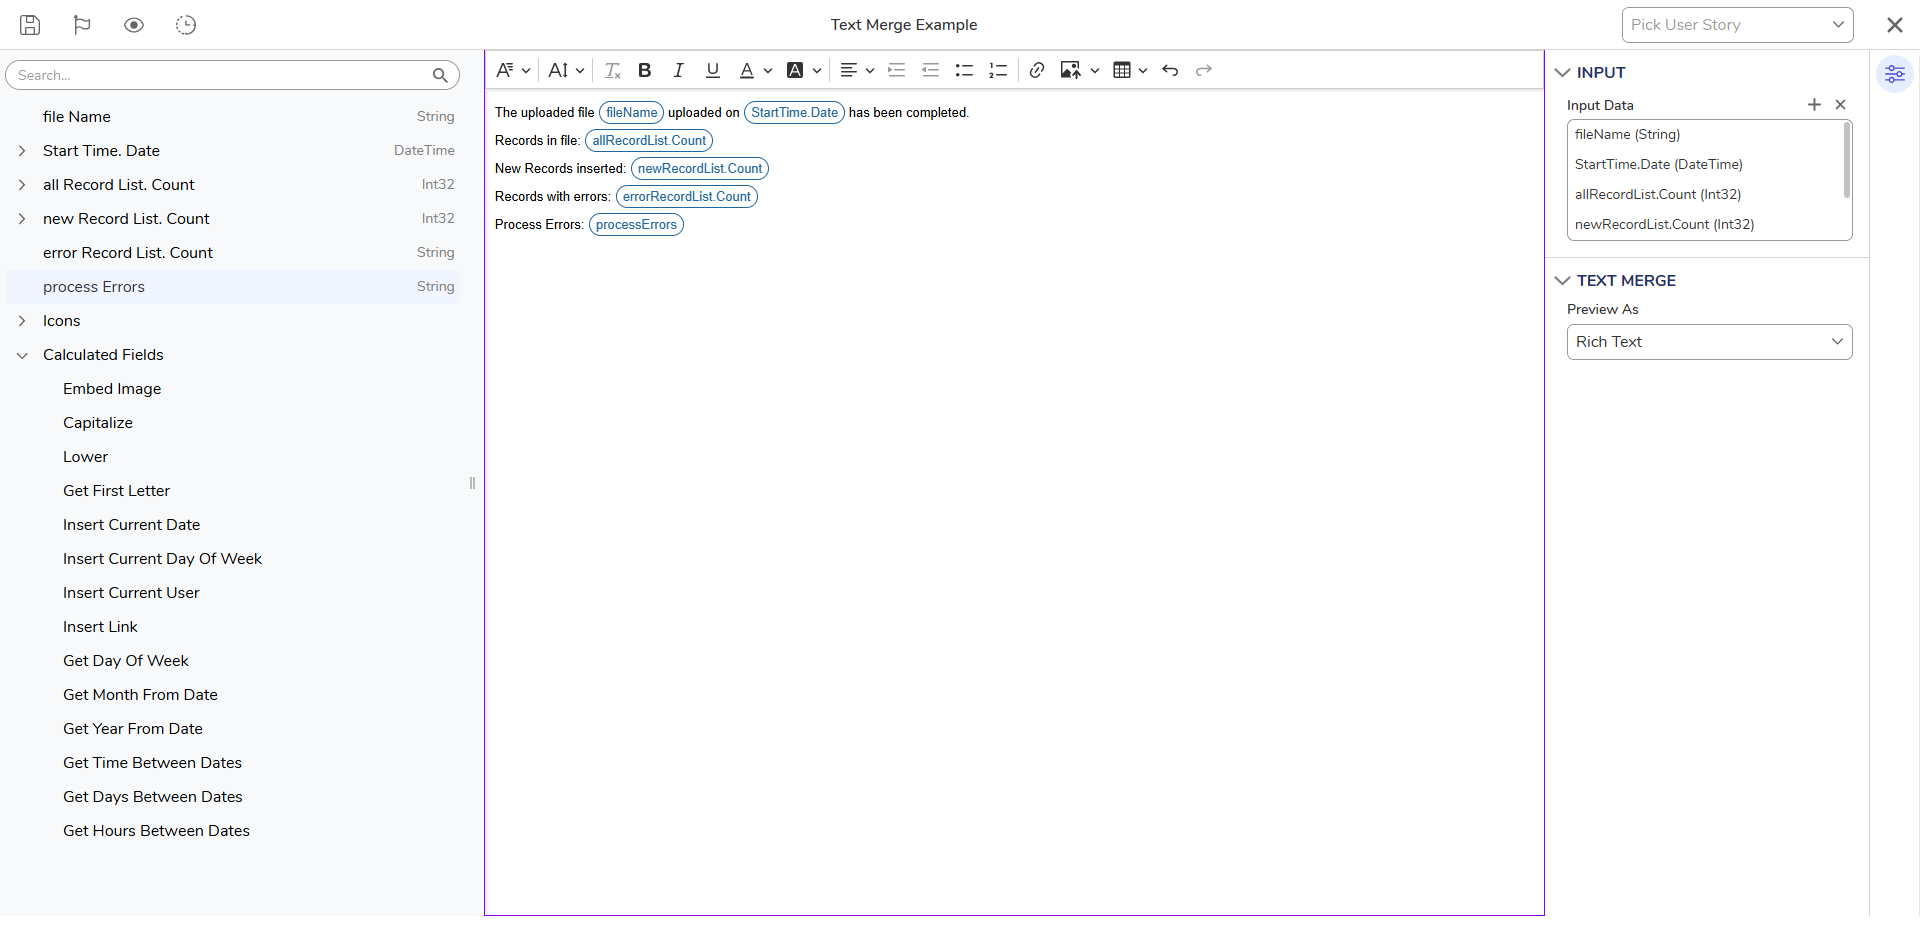
Example
The following image demonstrates how the Text Merger Designer can display record information for an uploaded file in an email.
- Users can add desired Input data as constant values on the right-hand side of the screen and drag and drop those values onto the workspace.
- The Input values used are Filename, StartTime.Date, allRecordList.Count and newRecordsList.Count.
- The Input values used are Filename, StartTime.Date, allRecordList.Count and newRecordsList.Count.
- Once the values are added in the appropriate position, Users can click the preview icon. This will first open the Edit TextMerge Input Dialog window, allowing Users to add data to the constant values.
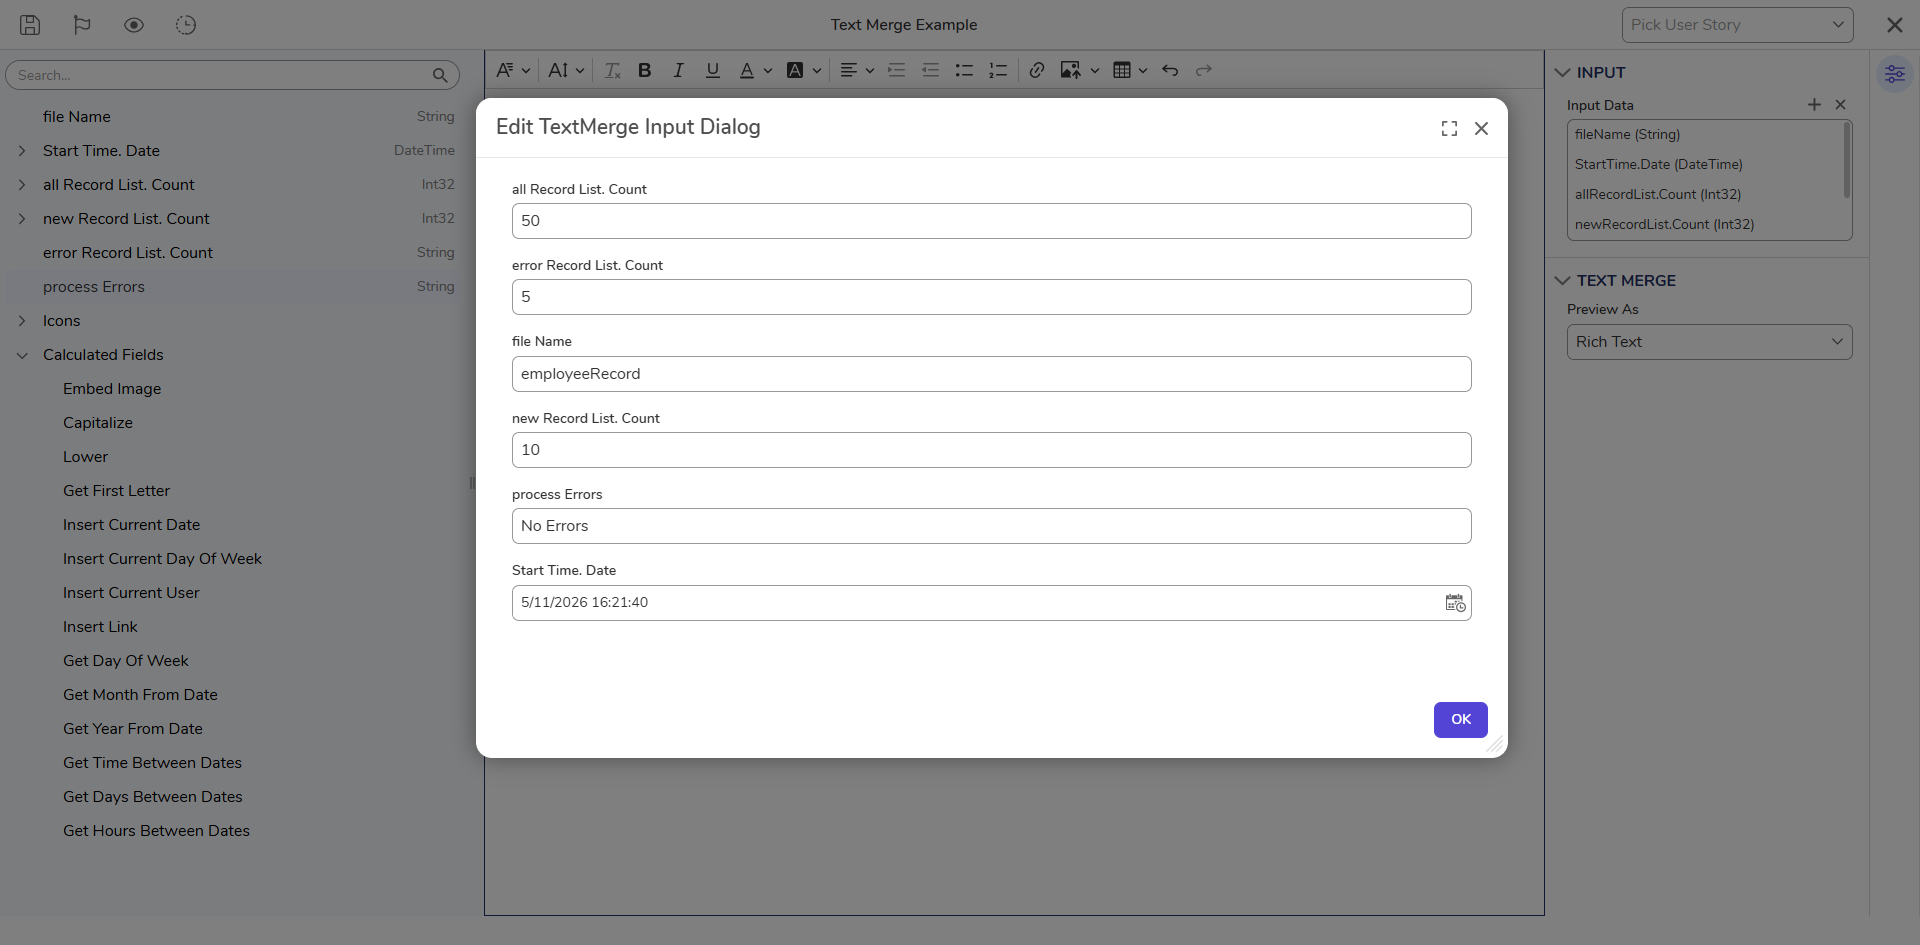
- Once the desired data has been added, click Ok to preview the Text Merge.
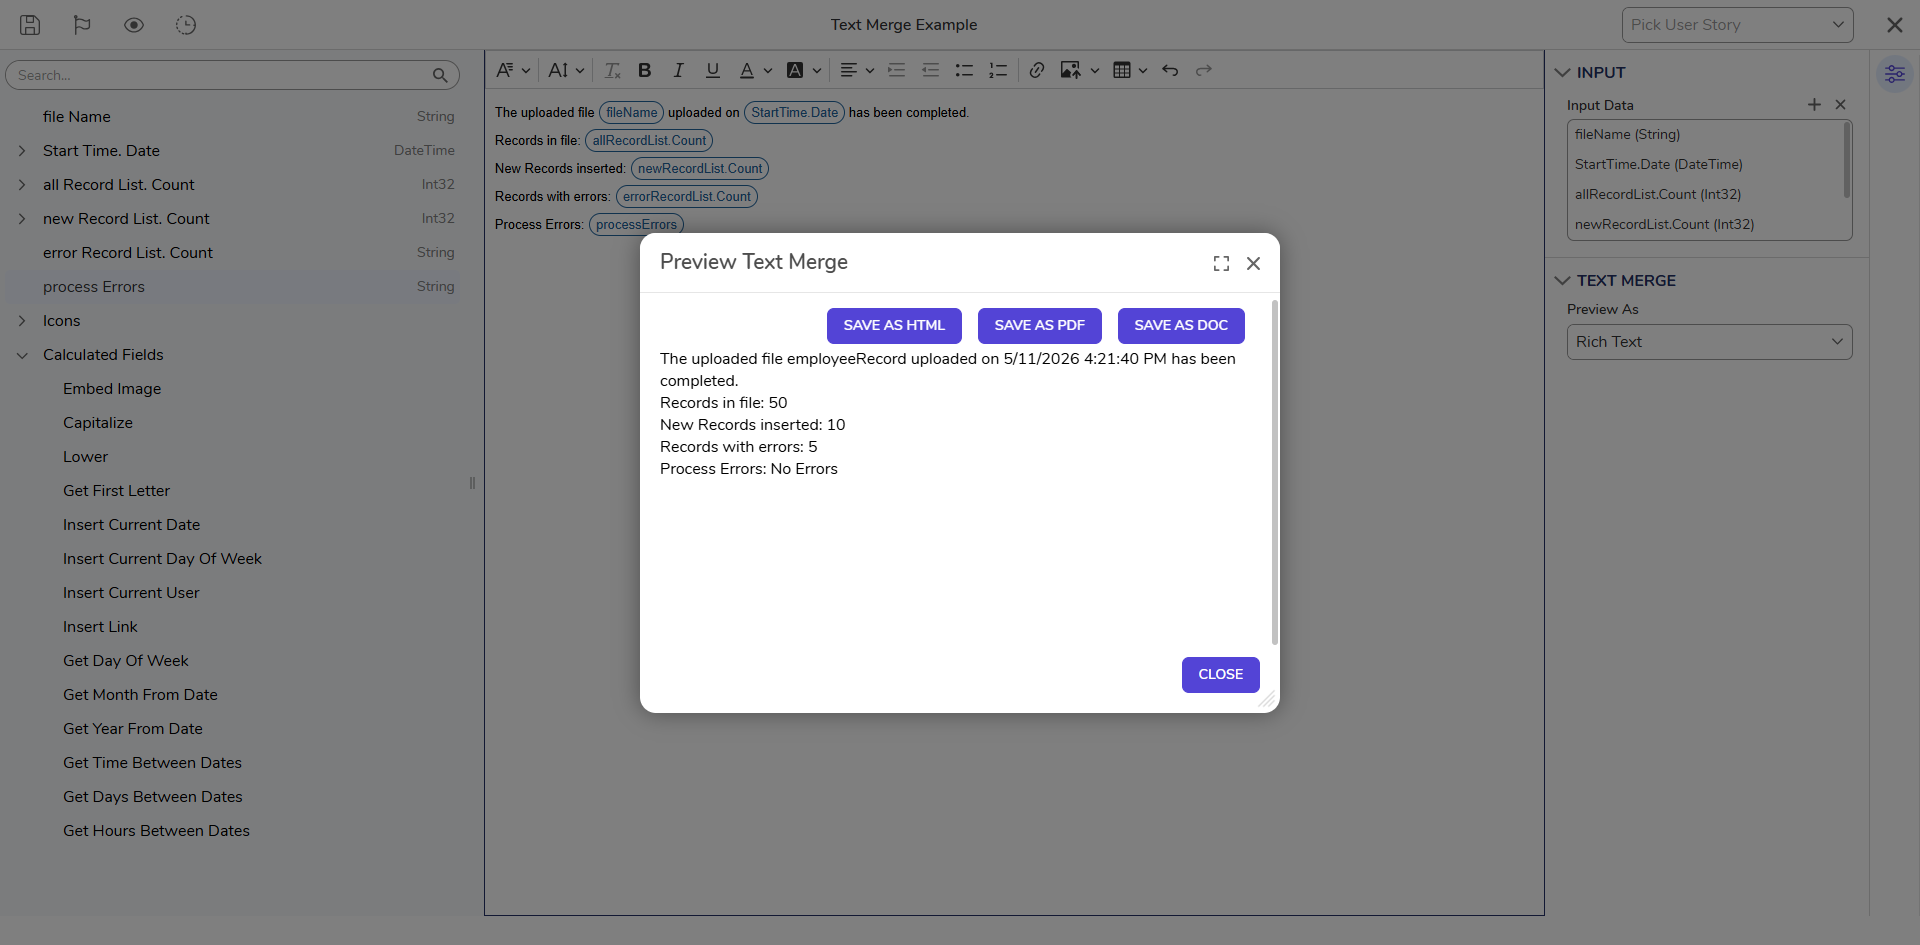
- Once the desired data has been added, click Ok to preview the Text Merge.
Referencing Text Merge Objects
- Once a Text Merge Object has been created, it can be referenced by navigating to the Project it was created.
- Designers with access to the associated Project can reference the Text Merge.
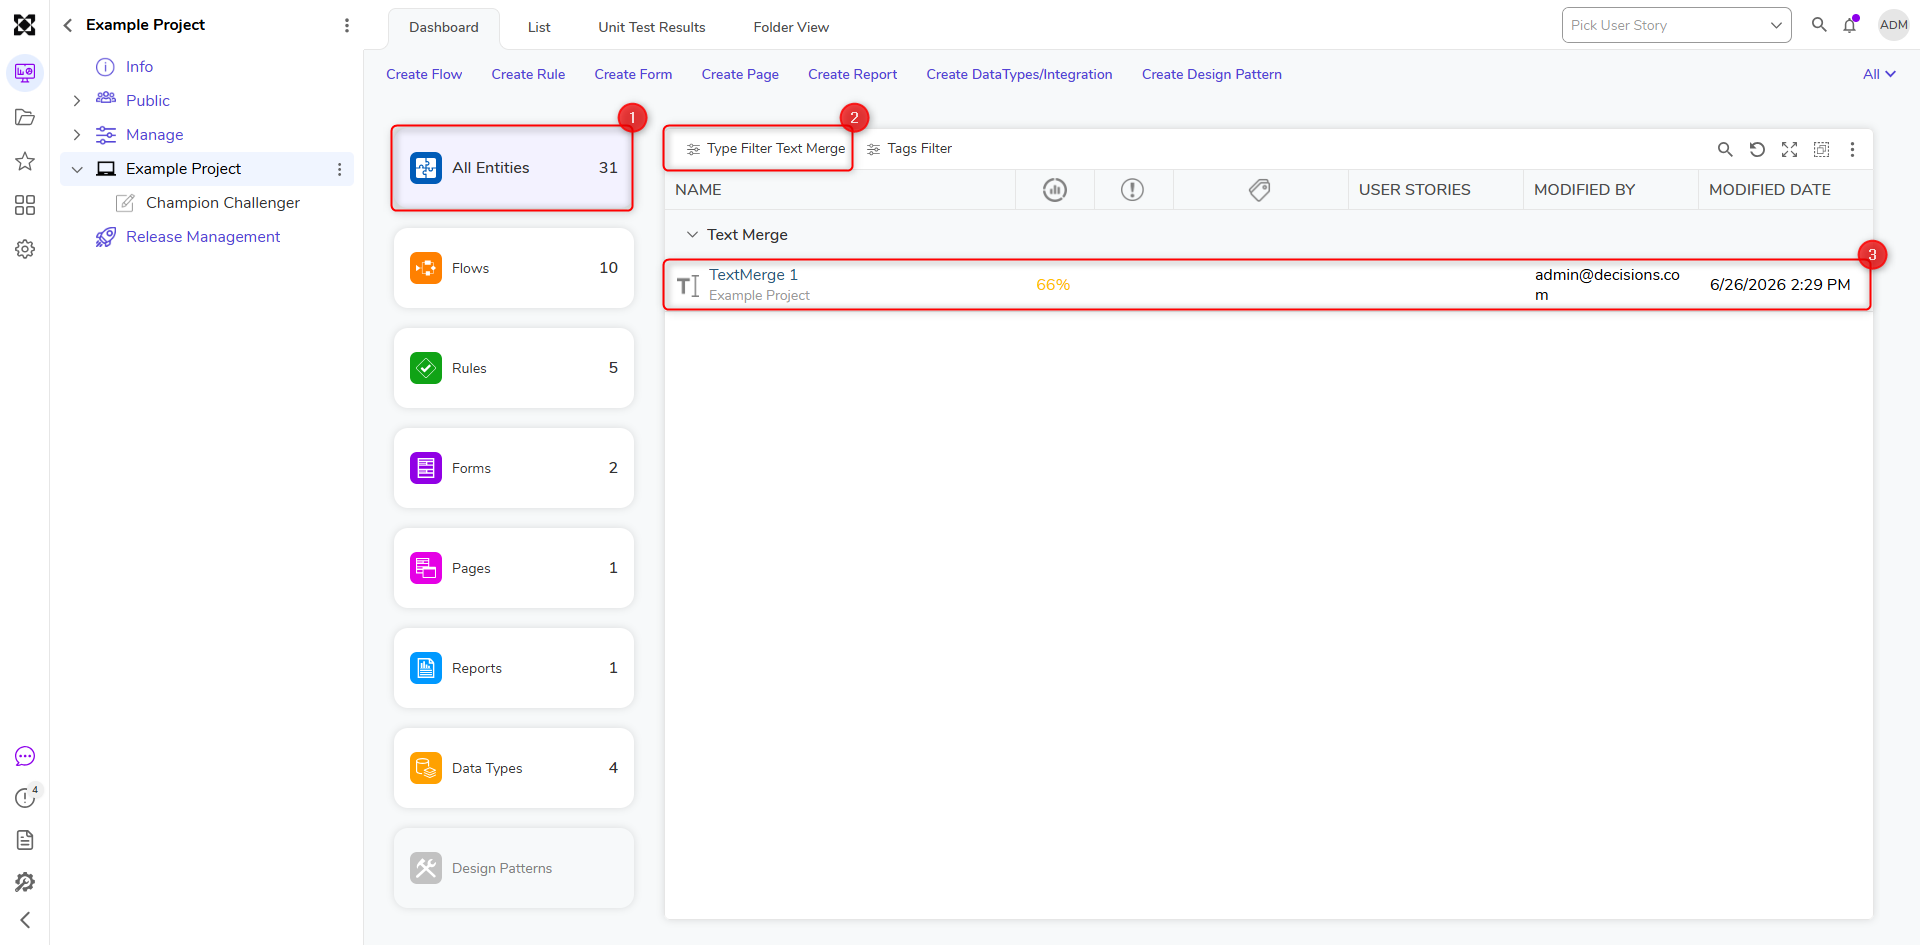
- Navigate to the desired Project, then select All Entities, and select the Text Merge Tag Filter.
- This will retrieve a list of all Text Merge Objects that have been created within the current Project.
- This will retrieve a list of all Text Merge Objects that have been created within the current Project.
- Text Merge Objects can also be referenced within the Flow Designer by:
- Selecting Pick Existing on the Create or Pick Text Merge Step.
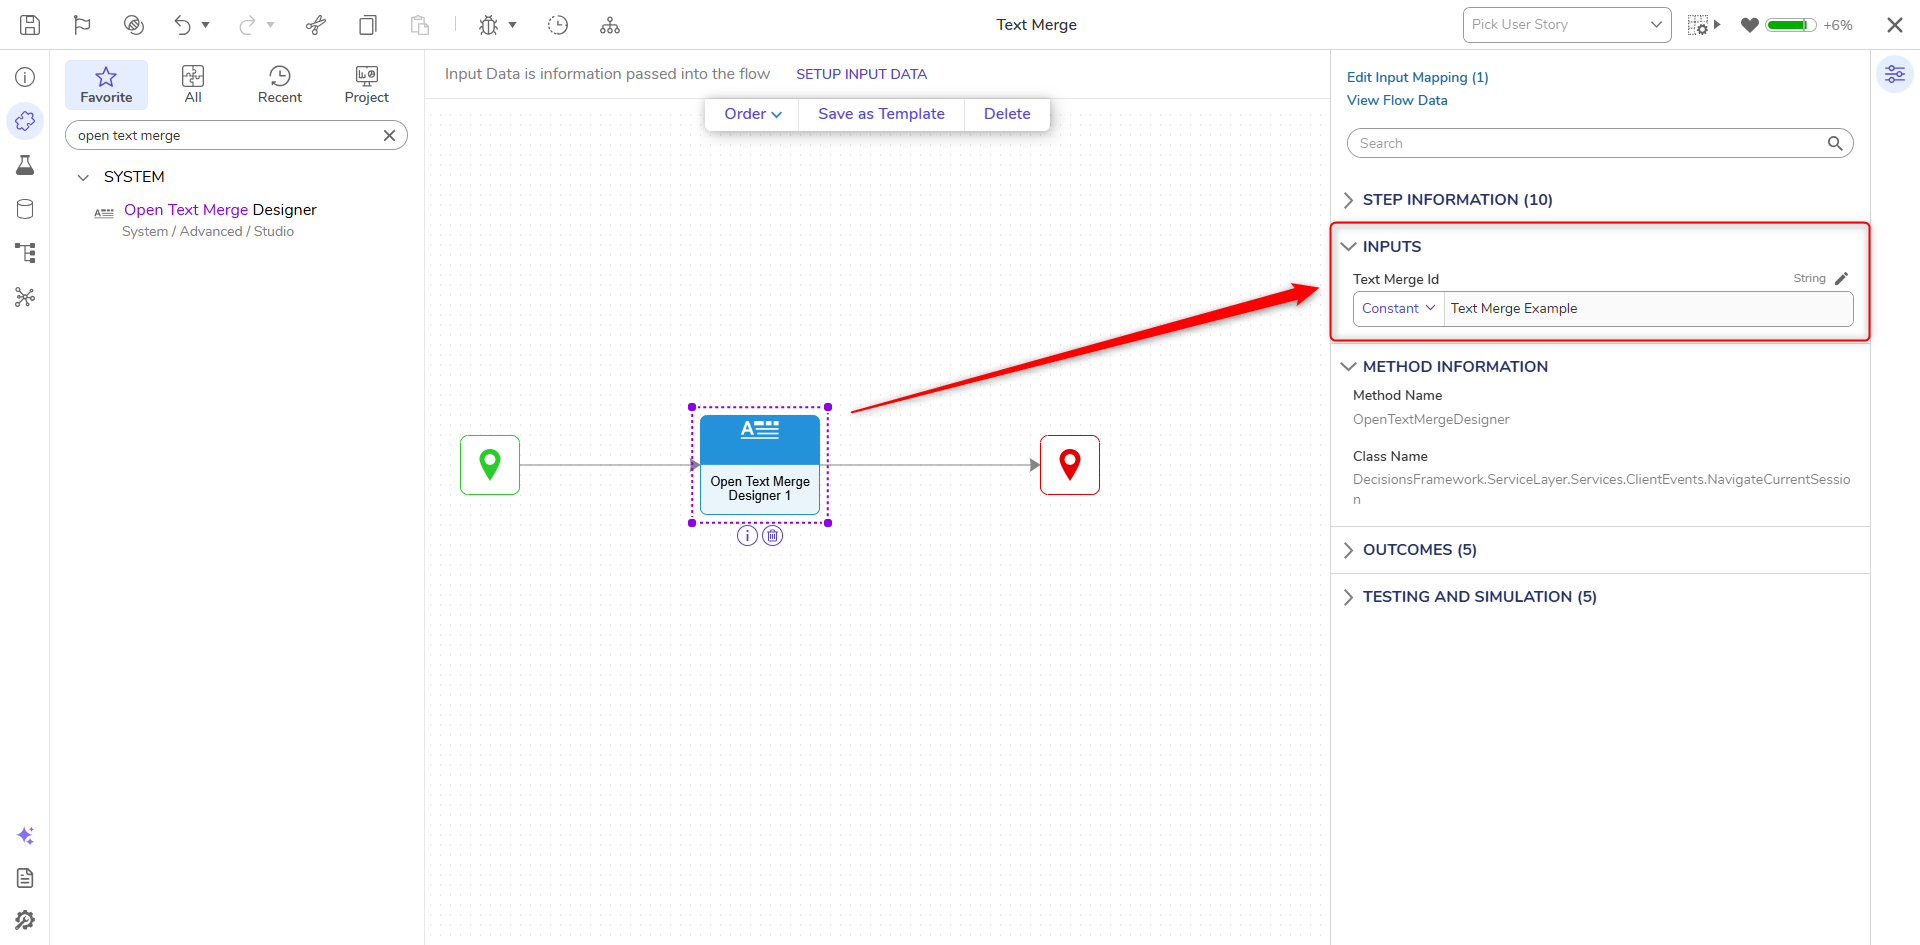
- Copy and paste the Text Merge ID into the Open Text Merge Designer Step.
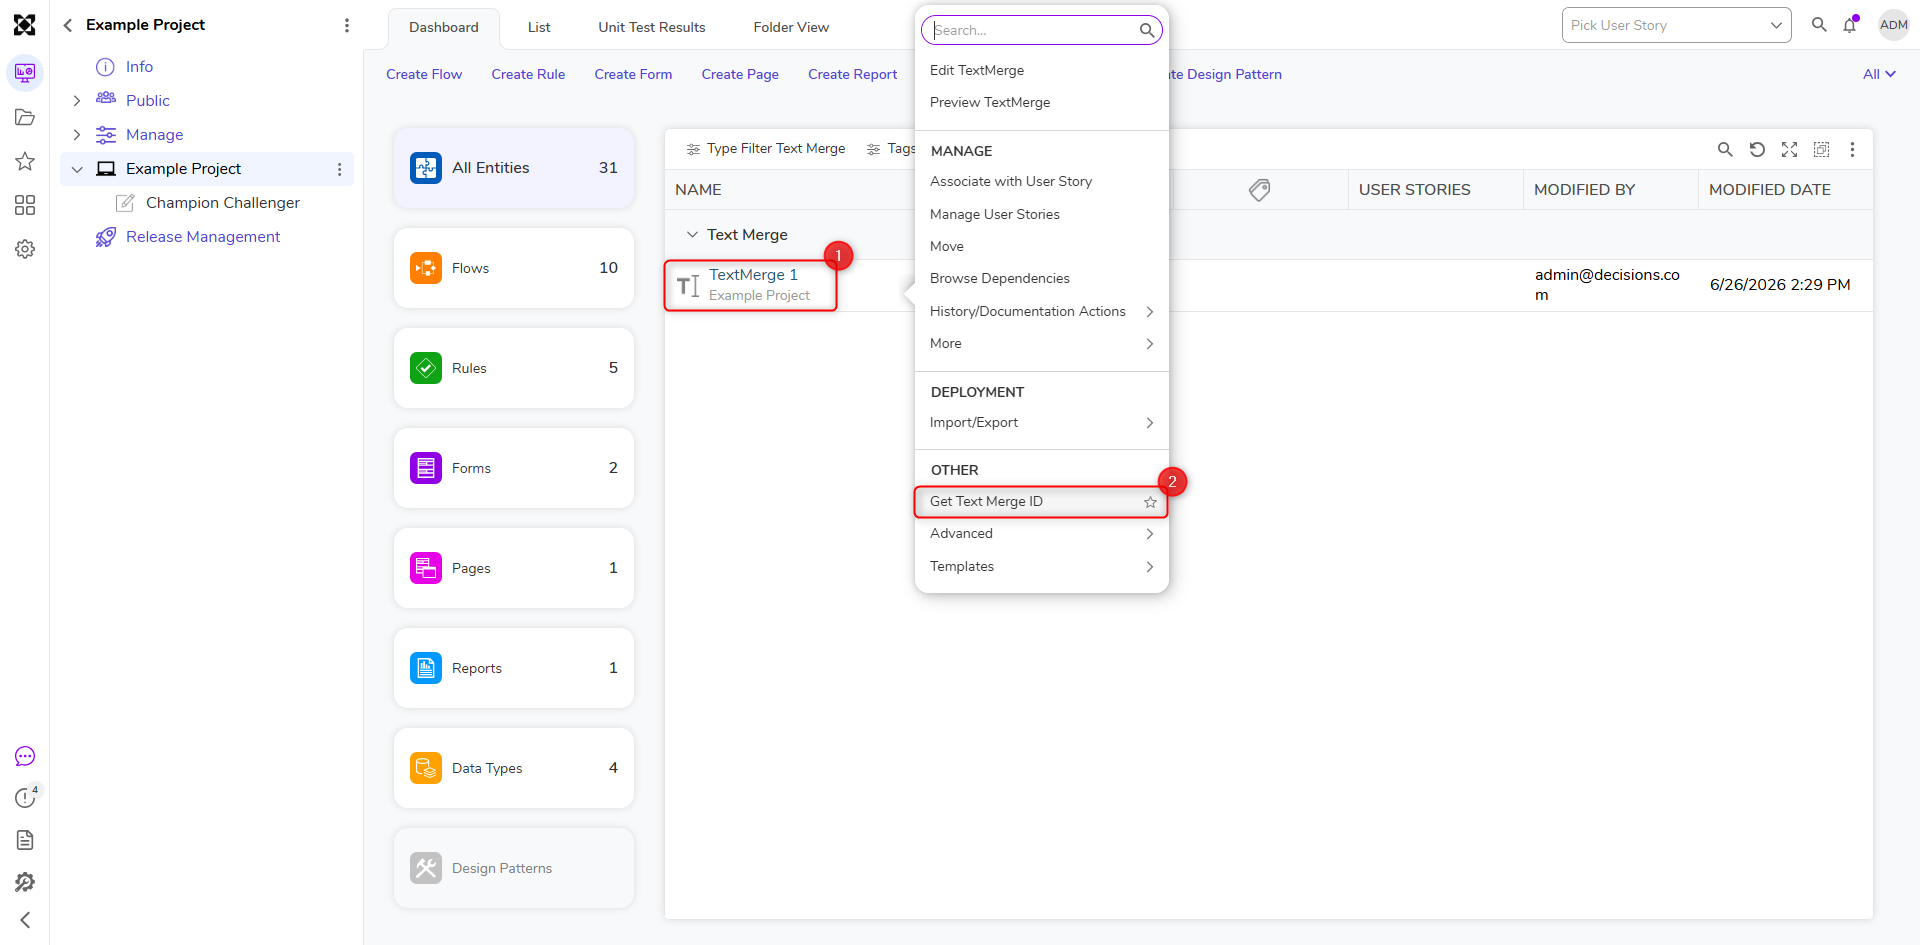
- The Text Merge ID can be found by right-clicking on a Text Merge Object and selecting Get Text Merge ID.
- The Text Merge ID can be found by right-clicking on a Text Merge Object and selecting Get Text Merge ID.
- Selecting Pick Existing on the Create or Pick Text Merge Step.
Creating a Text Merge in the Merge Text Designer
The Merge Text Designer can be utilized in Flow Steps.
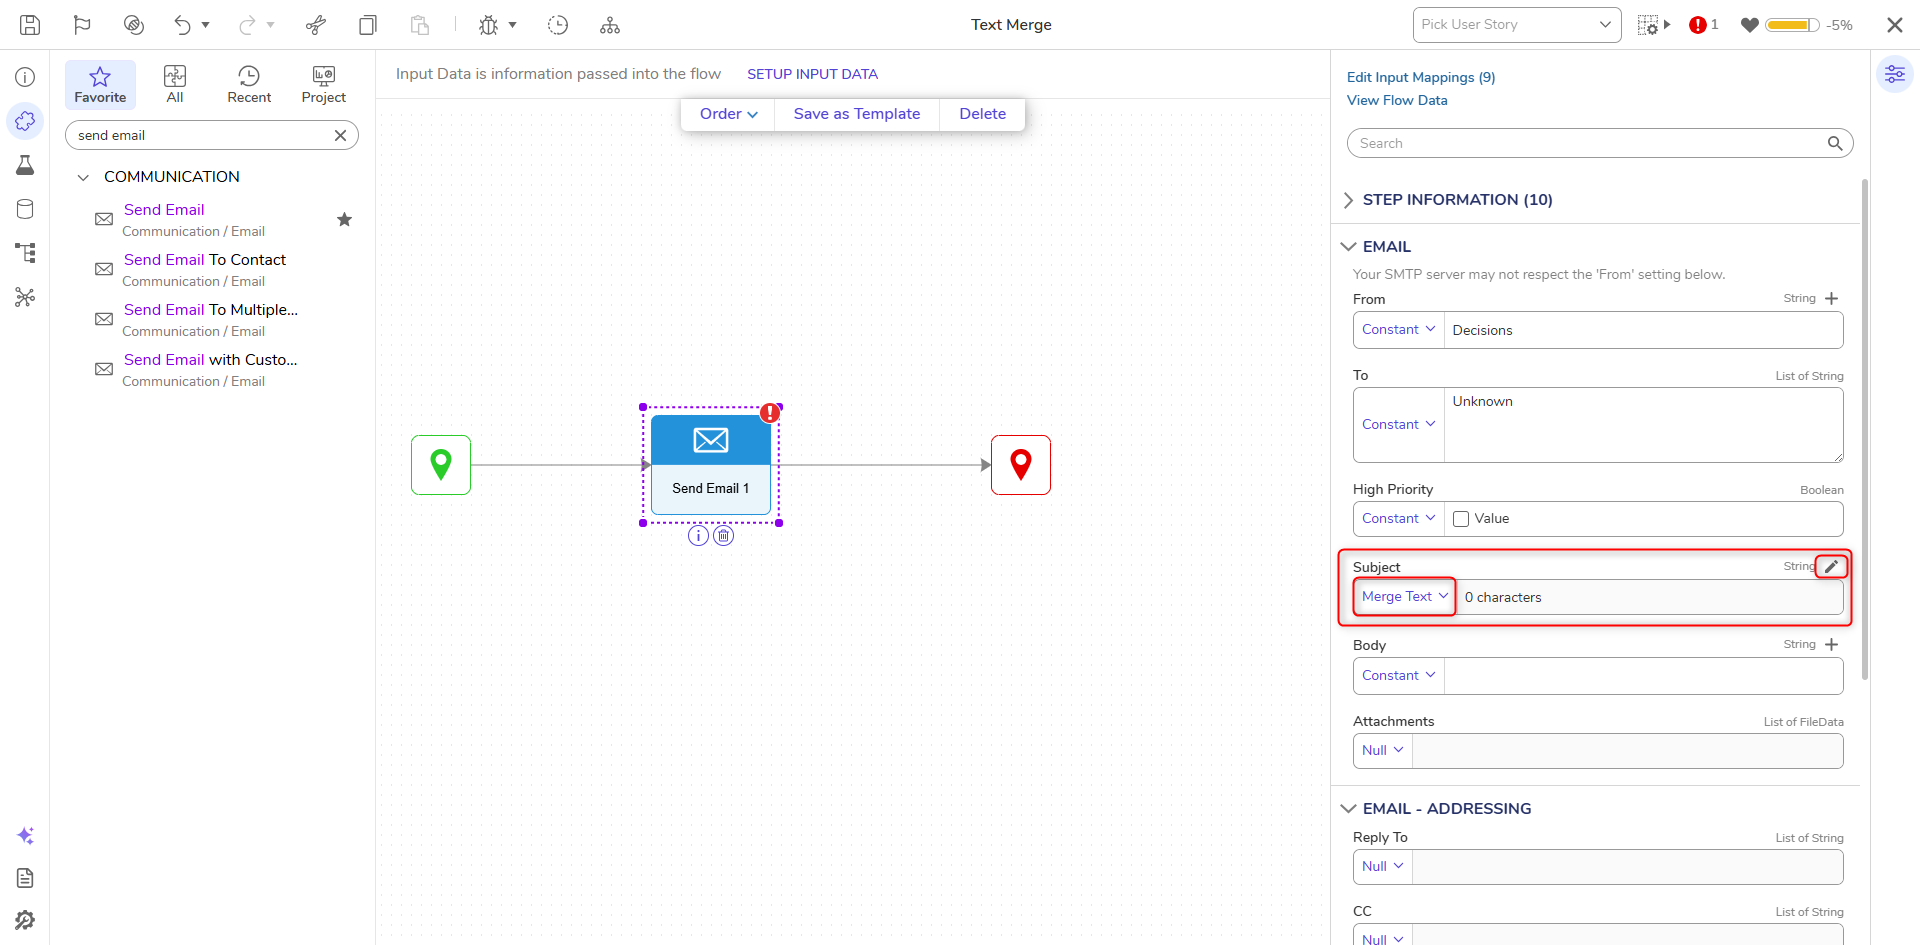
- Users can create a TextMerge in a Flow by selecting the Merge Text on a Step that allows a Text input. For example, the Send Email Step, pictured below, allows Users to create a TextMerge on fields such as the Subject line.
Example
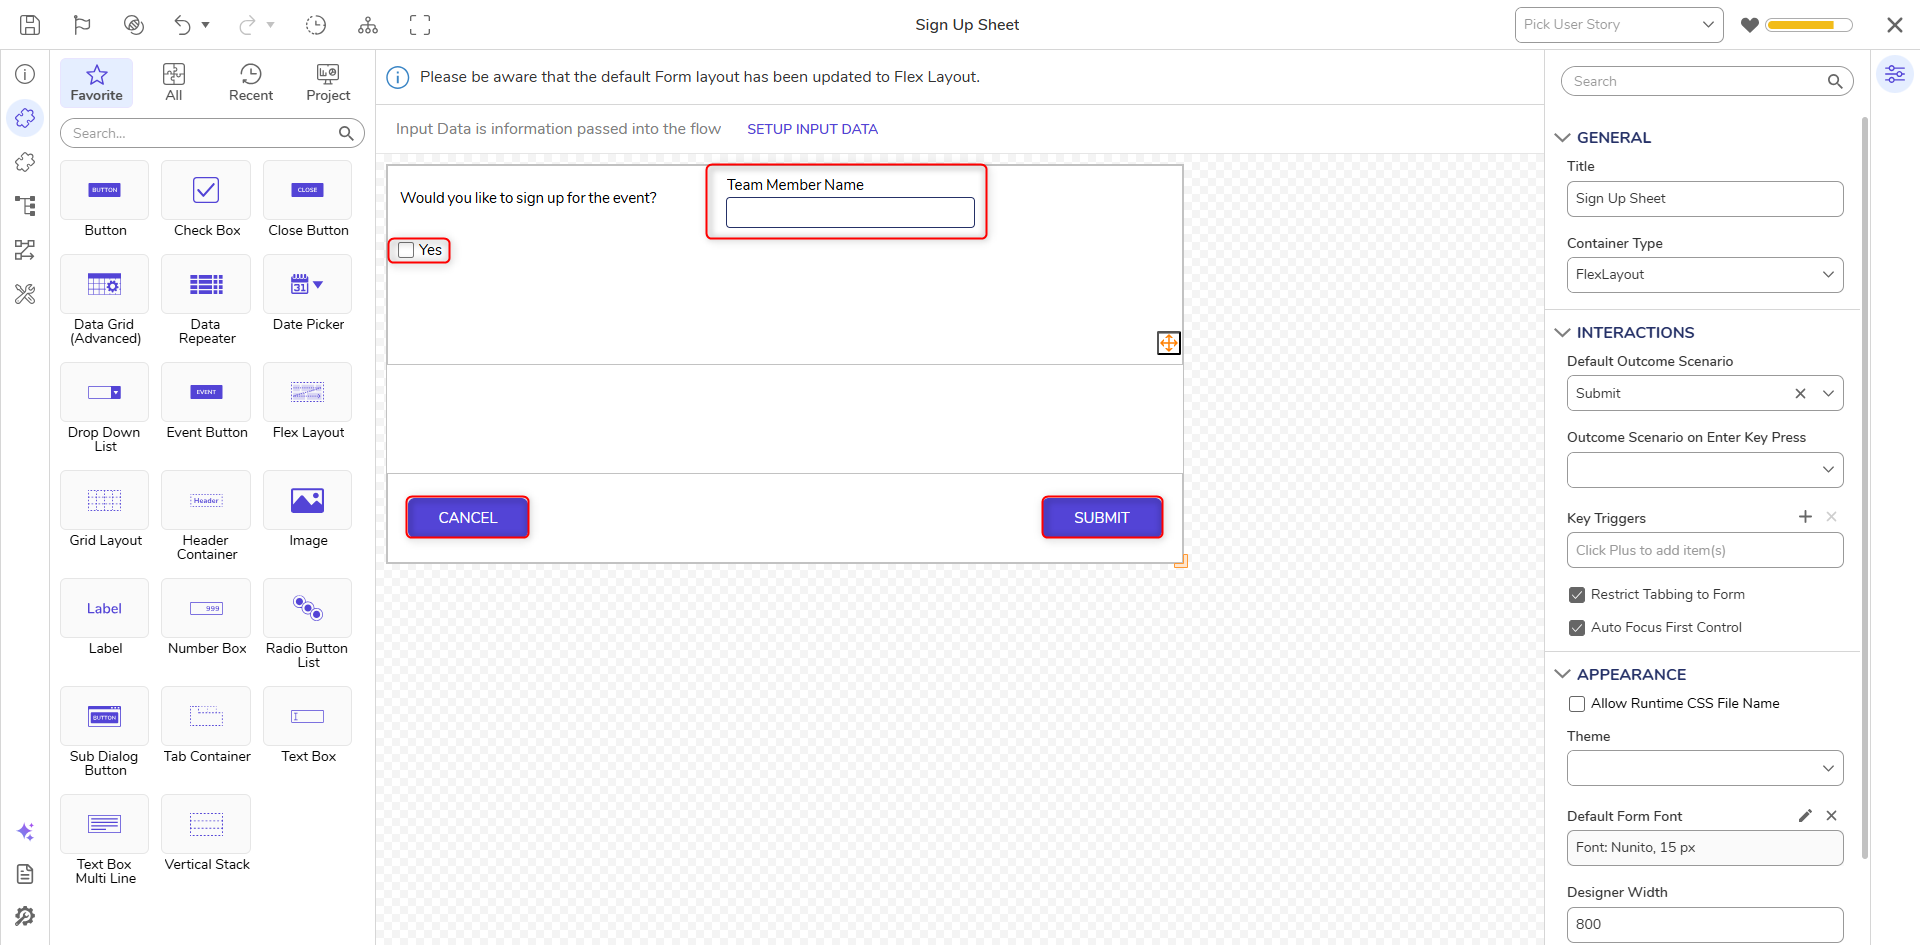
The following example uses a Show Form and Send Email Step. The Show Form is used as a sign-up sheet that will take in a Team Member's name. The Send Email Step will then use the Merge Text Editor to pass through this Team Member Name and add it to the body of a welcome email.
- Create a Flow and drag a Show Form Step to the workspace. The Form can be customized as desired, but the following fields are required for it to function properly:
- Textbox (For Team Member's Name)
- Checkbox (To track responses)
- Buttons (One to submit responses and one to cancel the Form)
- Once the Form has the required features, exit the Form and add a Send Email Step to the Workspace. This is where Users will create a TextMerge.
- On the Send Email Step, scroll down to the Body field and select Merge Text on the Input. Click the pencil icon to open the Merge Text Editor.
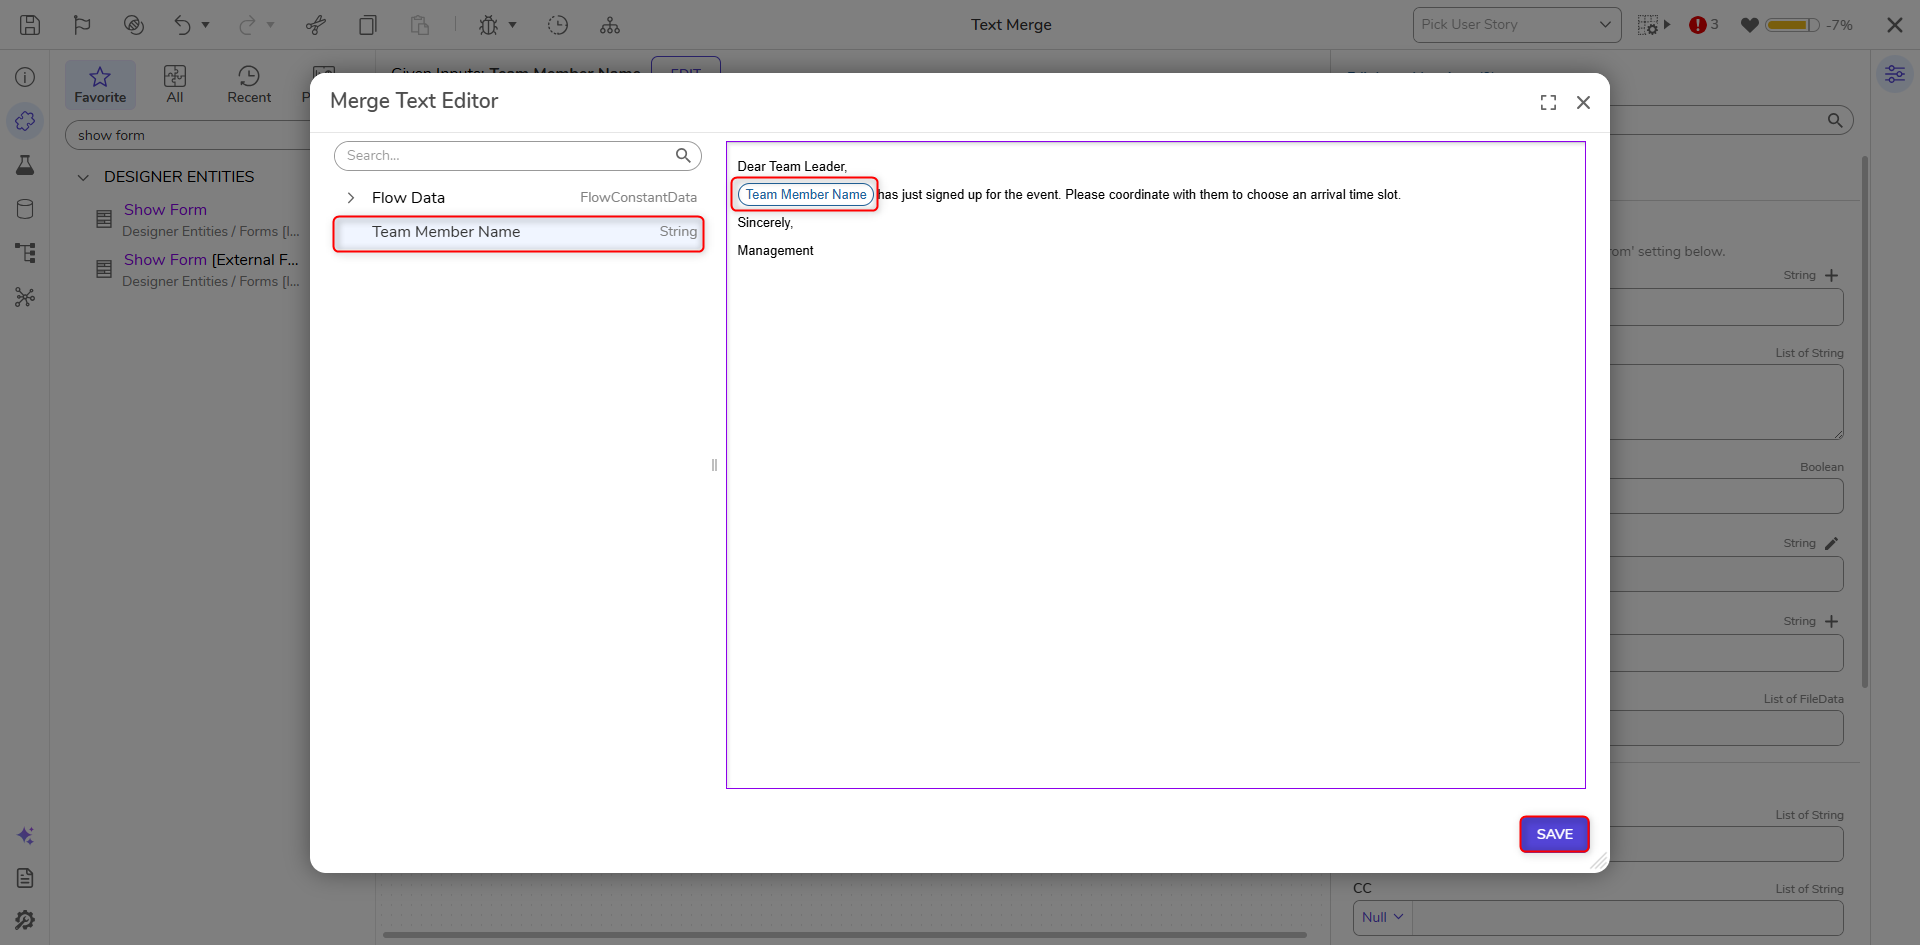
- From here, Users will see available data on the left-hand side of the editor. Drag Team Member Name and drop it at the top of the workspace.
- Once the Flow is debugged, the name inputted on the previous Form will appear wherever this name is placed, so place it accordingly.
 PII/Encrypted Fields Validation WarningUsers with v9.12 and above will receive a validation warning when a field marked as PII or Encrypted (in the original data structure) is selected using the Merge Text Editor.
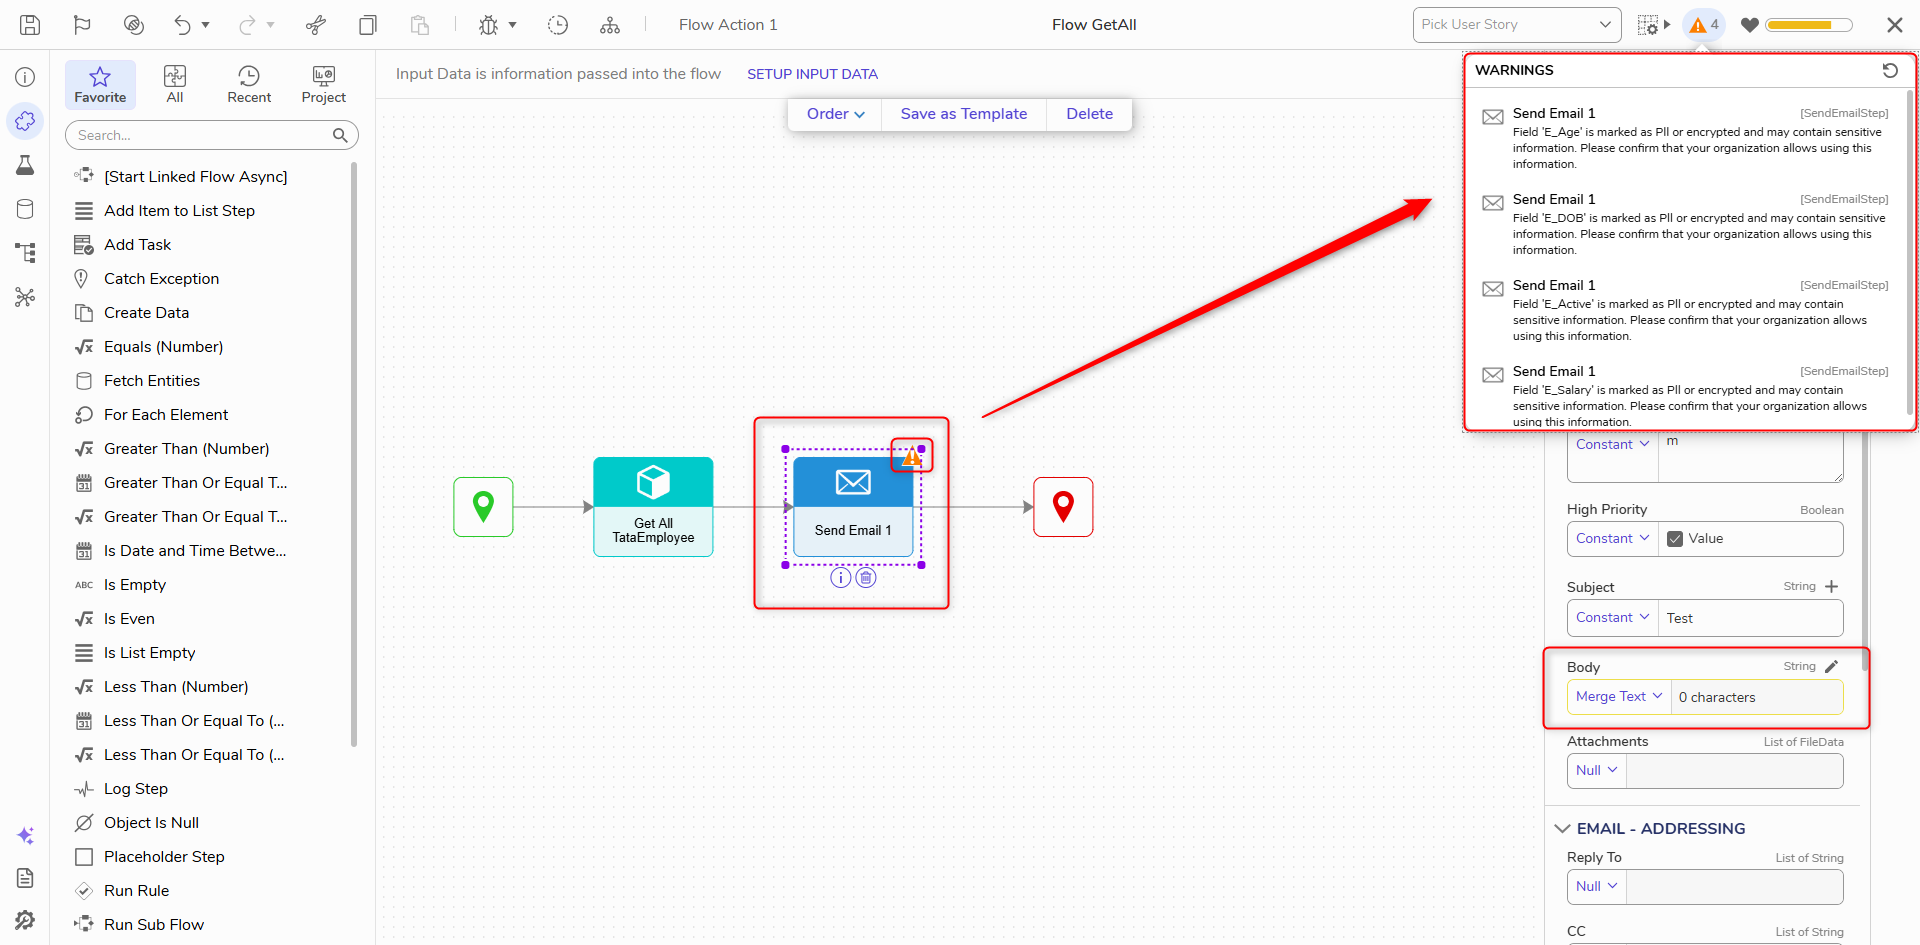
- Once the Flow is debugged, the name inputted on the previous Form will appear wherever this name is placed, so place it accordingly.
- Fill out the other fields on the Step as desired. Then connect the outcome to the End step.
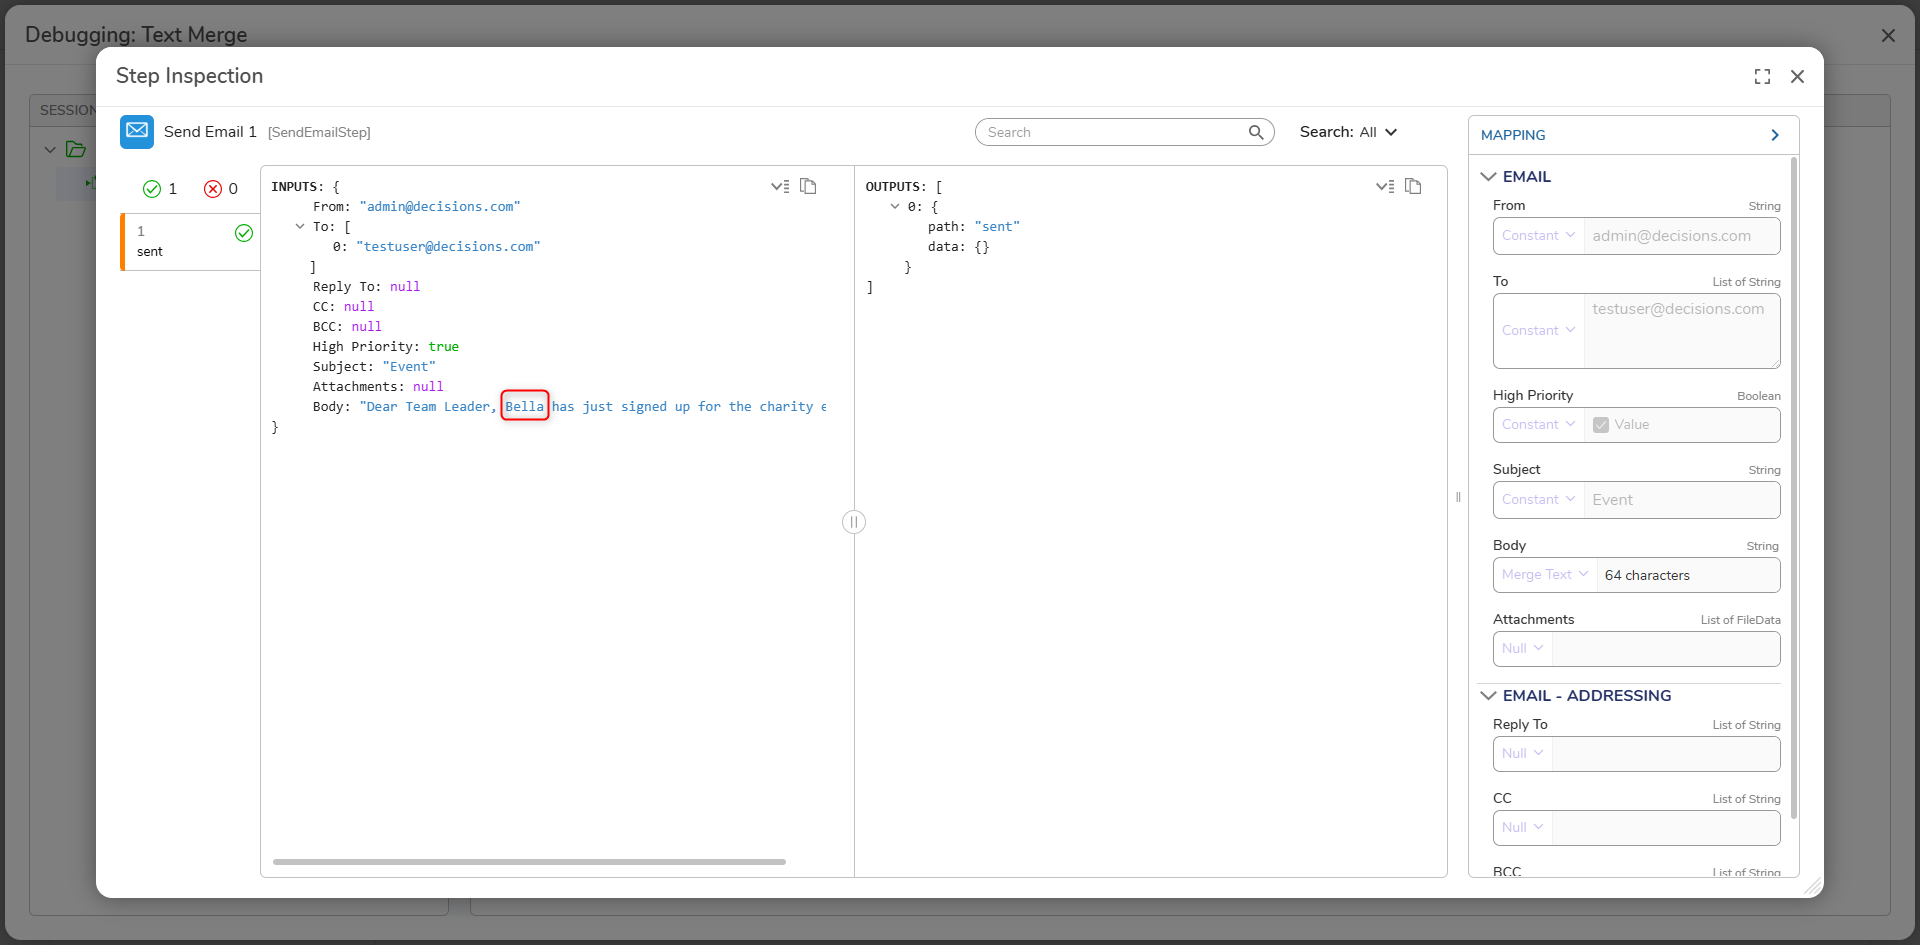
- Click Debug. The Flow should take in a name and output to the body of an email using the Text Merge created in the Send Email Step.
Feature Changes
| Description | Version | Release Date | Developer Task |
|---|---|---|---|
| Attempting to use encrypted text within a Text Merge as part of a Step's properties will trigger a validation. | 9.12 | July 2025 | [DT-044594] |
| The Text Merge Step will now respect enter key line breaks. | 9.17 | November 2025 | [DT-045874] |