Assigning a Project to a Designer Element
- 21 Apr 2022
- 1 Minute to read
- Print
- DarkLight
Assigning a Project to a Designer Element
- Updated on 21 Apr 2022
- 1 Minute to read
- Print
- DarkLight
Article Summary
Share feedback
Thanks for sharing your feedback!
Overview
Projects are collections of Designer Elements associated within the same process.
Projects help organize multiple processes in an instance, especially those in the latter case, while also supporting transporting files via Repository servers or manual Imports/Exports.
Designer Elements of the same project are typically kept in the same Designer Folder or are otherwise dispersed across several Folders within the instance.
When exporting a Designer Element, other Designer Elements in the same project will be suggested for export as well. This is to ensure any exported process functions since Designer Elements under the same project are likely dependent on one another to work.
The following article details how to remove a Designer Element from a previously assigned Project such as those from a Repository and then details how to assign a new project.
Removing from Project
Designer Elements can only belong to one project at a time.
If wishing to add a Designer Element to a new project, it must first be released from its original project.
- Navigate to a Designer Project.
- Right-click a Designer Element, then navigate to Designer Repository > Remove From Project [Project Name].
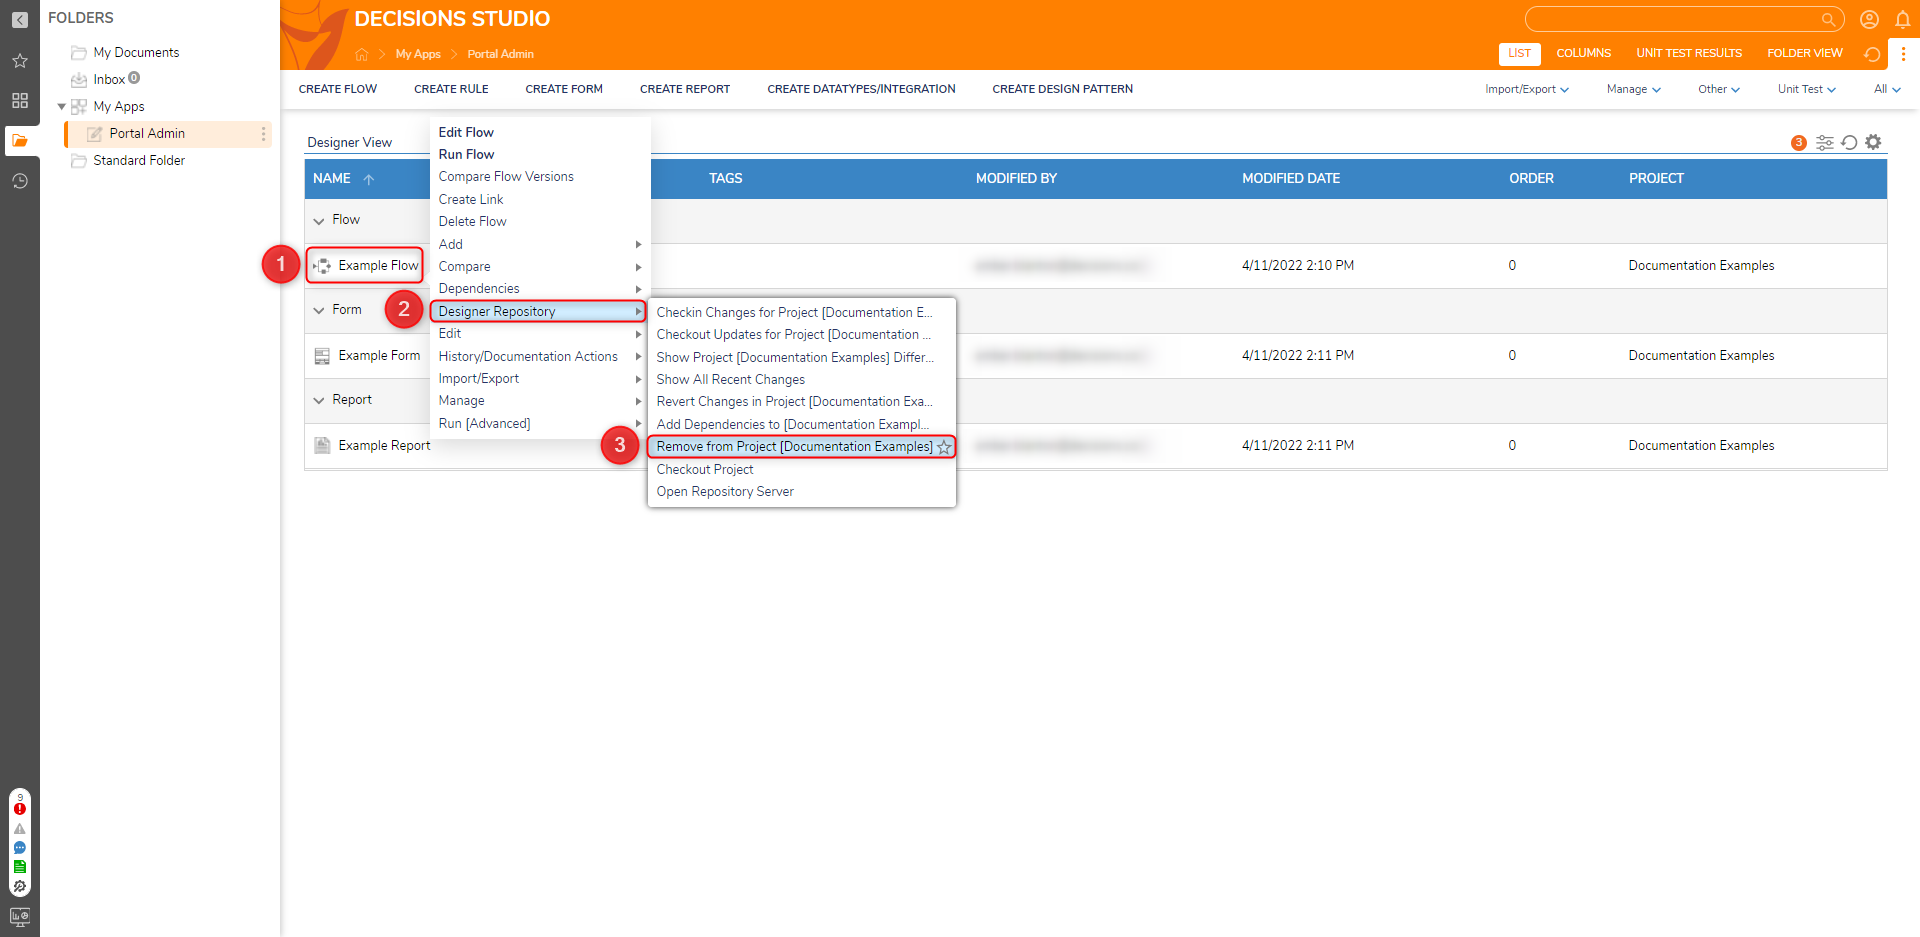
- Confirm the removal by clicking YES.
- Select or deselect the desired Designer Element (and/or its dependencies), then click REMOVE.
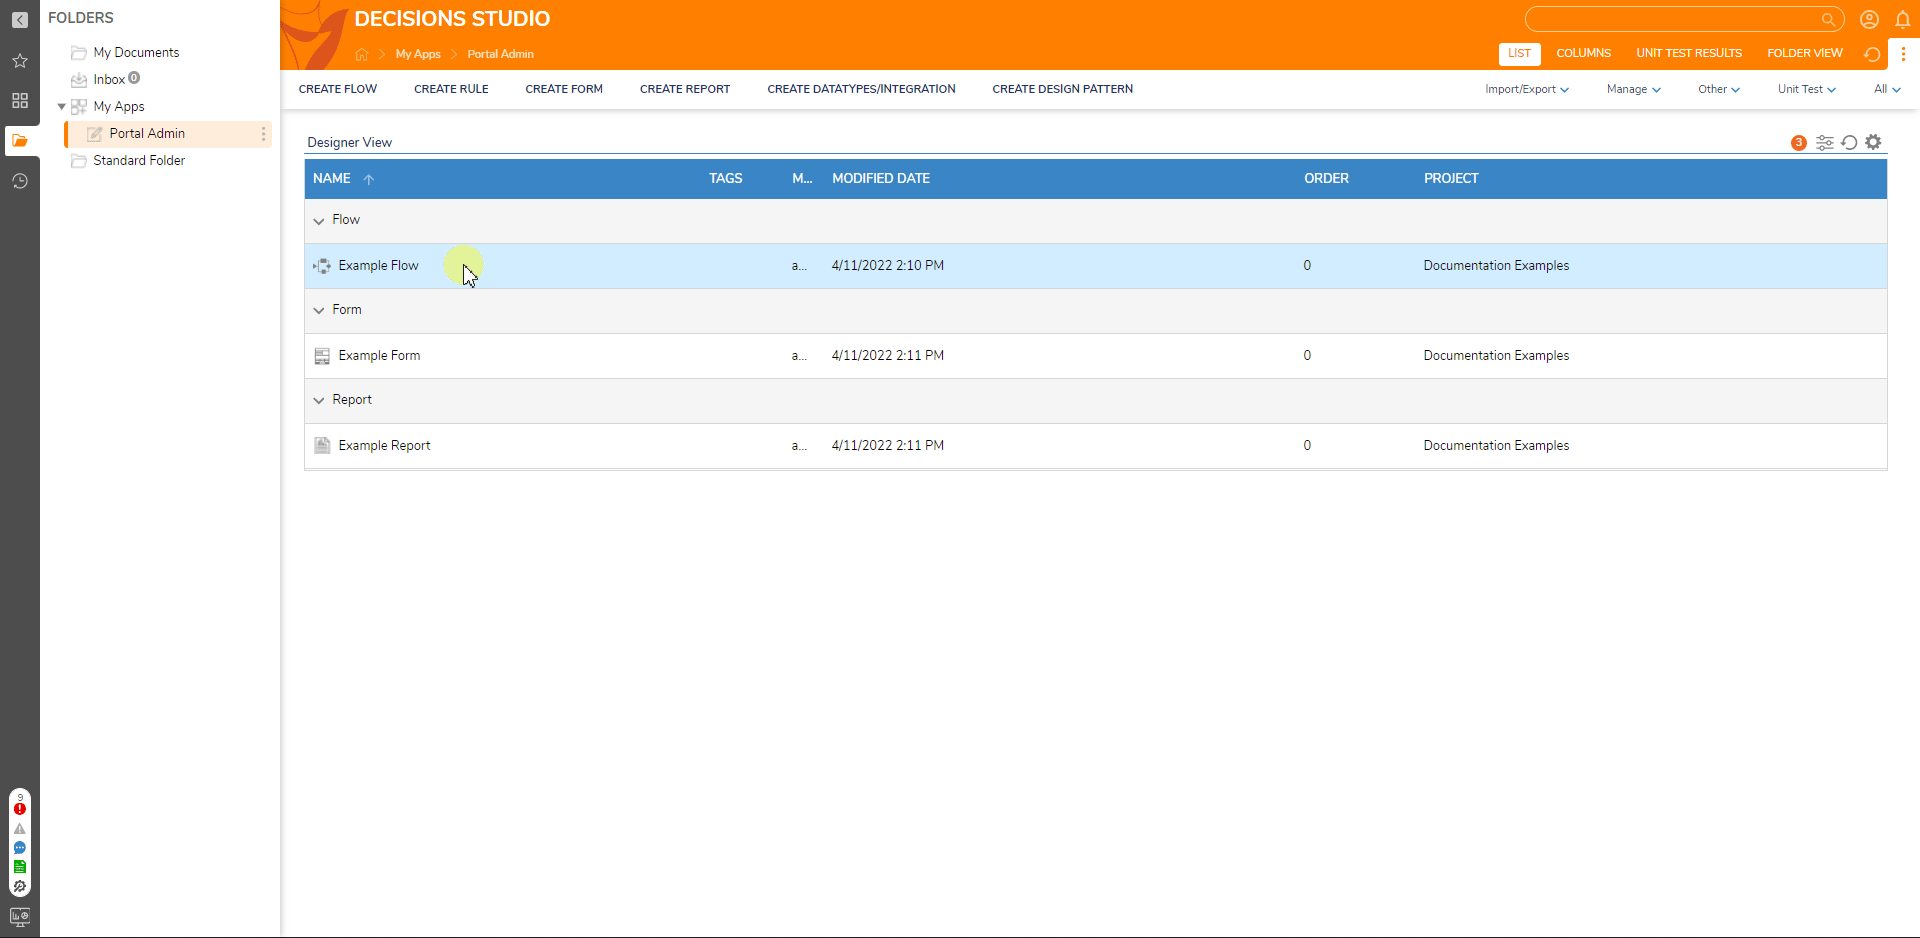
- Return to the Designer Project to verify that the Designer Element has been removed from the Project.


Removing After Repository Installation
After installing a Repository, the Remove from Project Action relocates to the Designer Repository Action menu. Selecting this action allows users to remove a project similarly to the Remove From Project action.

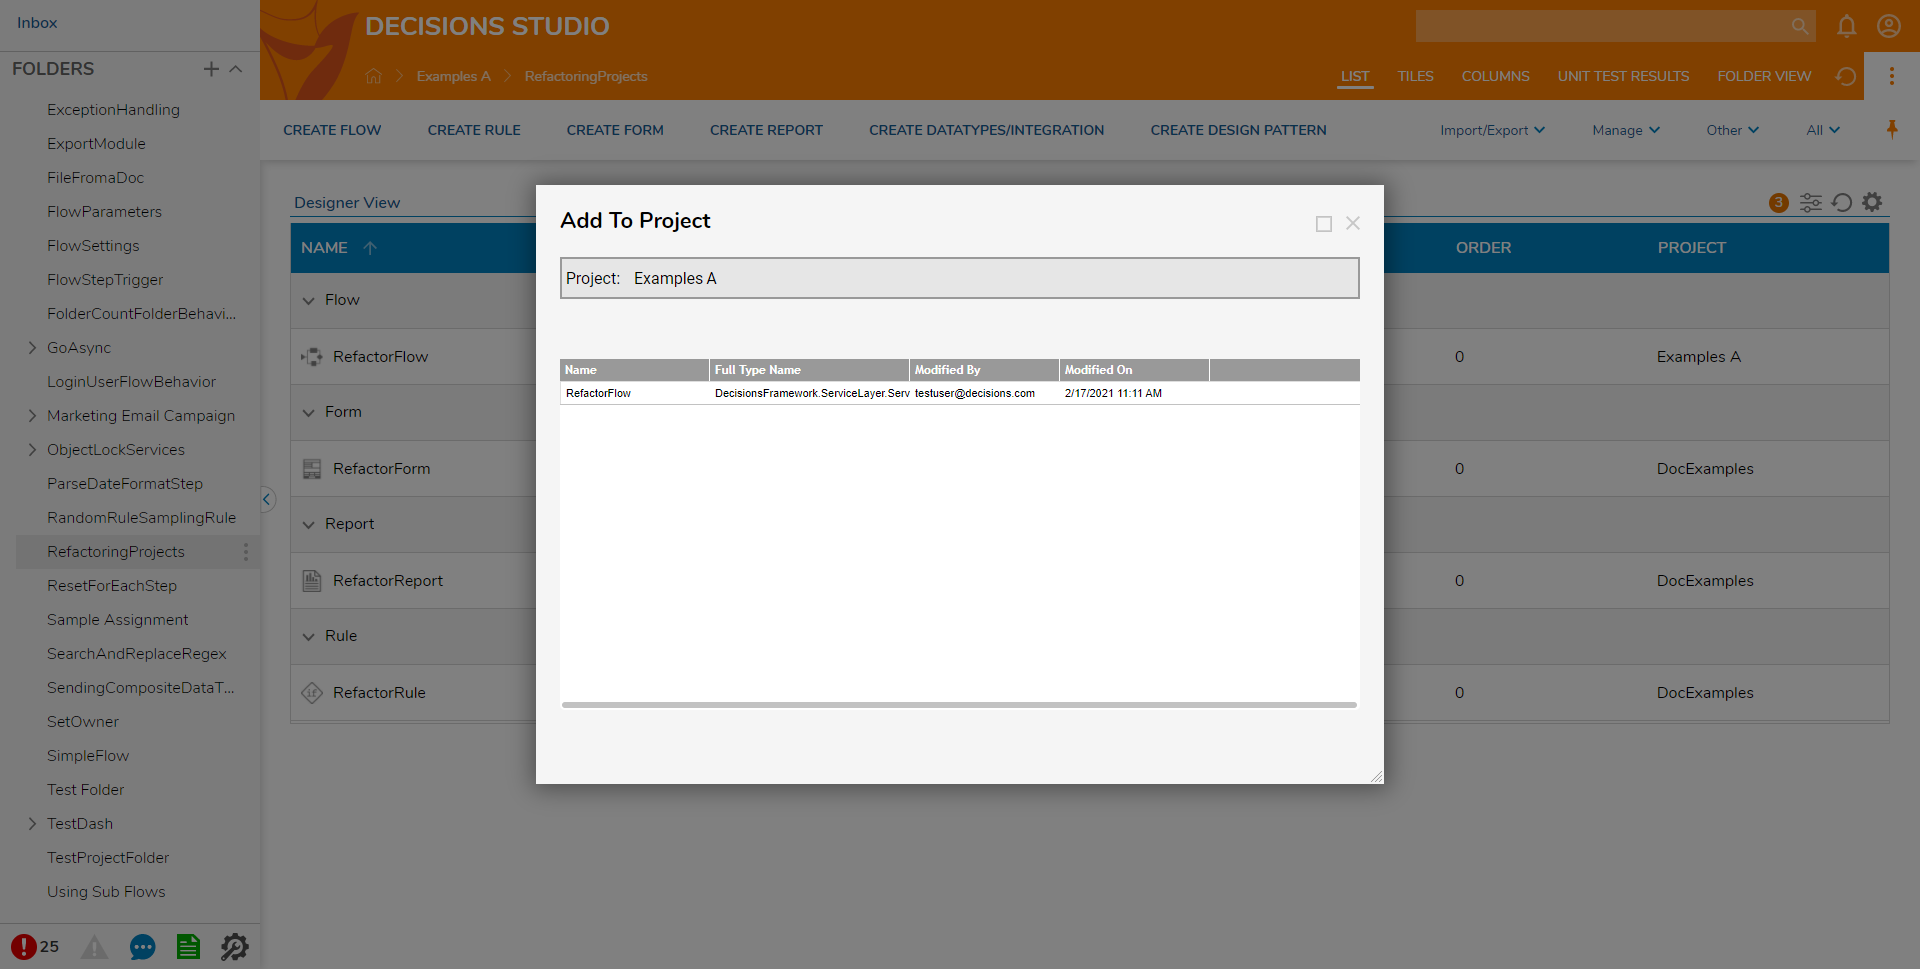
Adding to Project
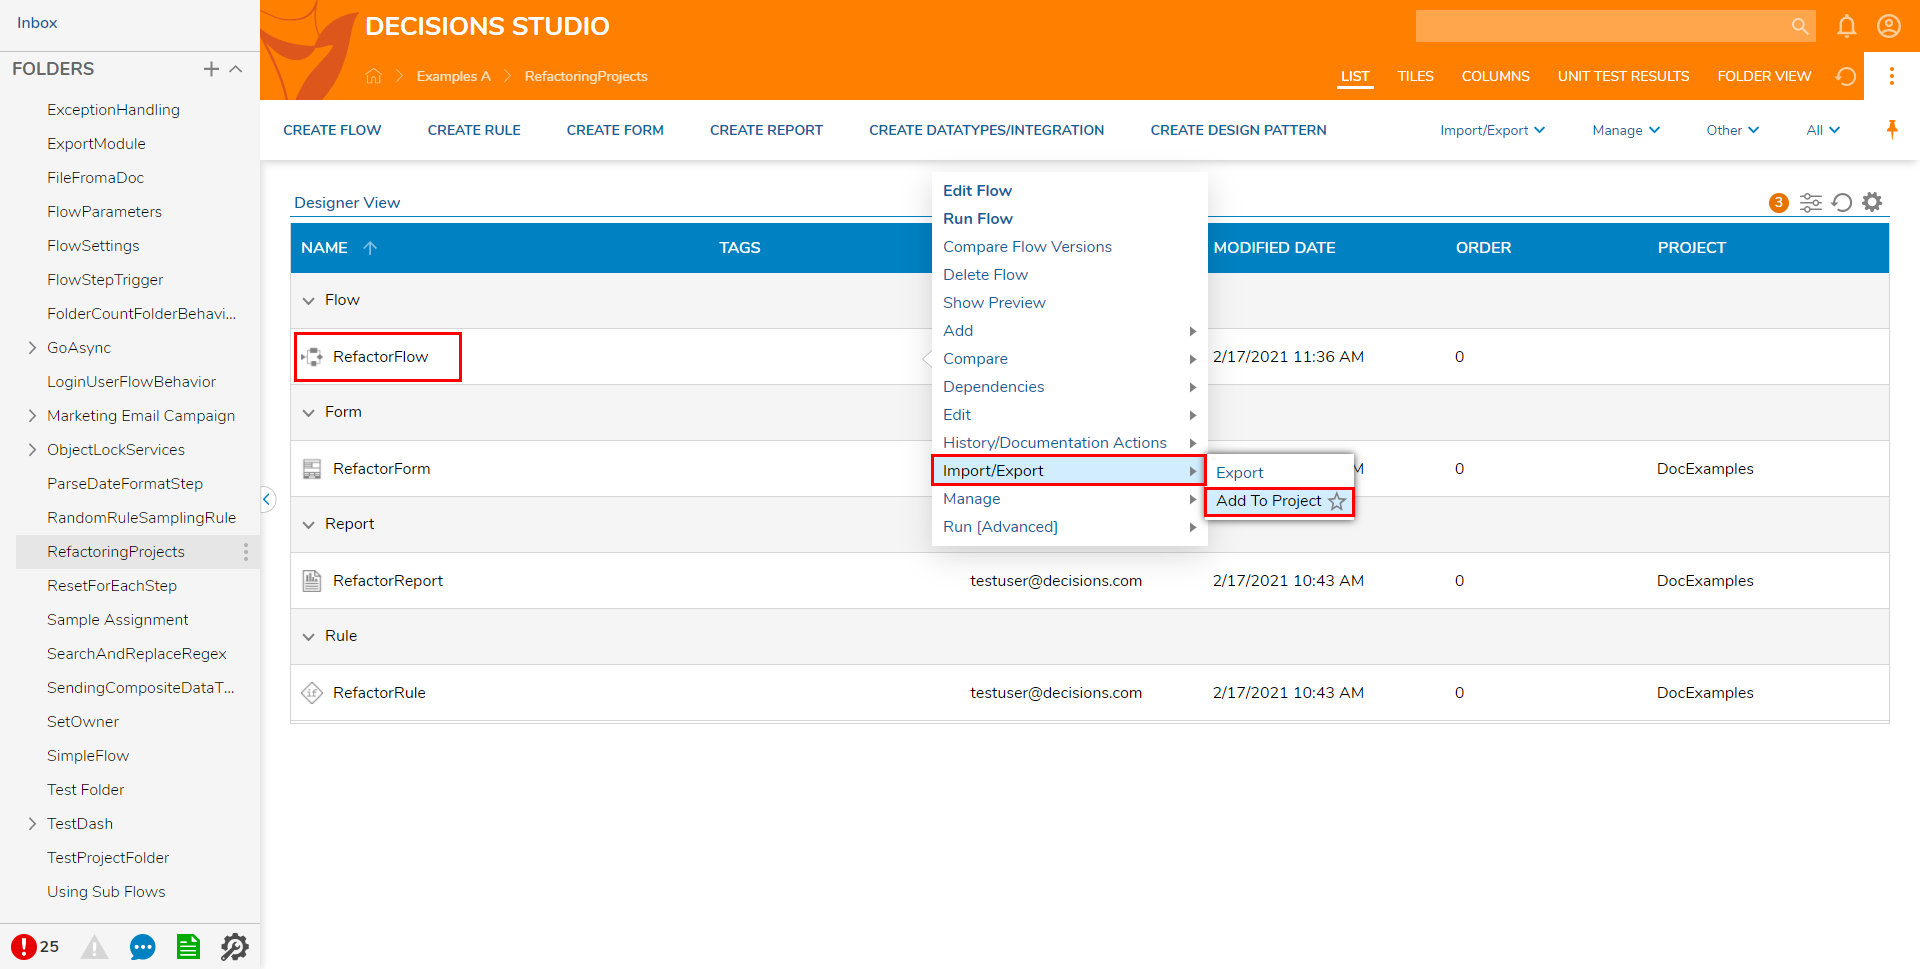
- Navigate to a Designer Project.
- Right-click the desired Designer Element. Select Import/Export > Add To Project.
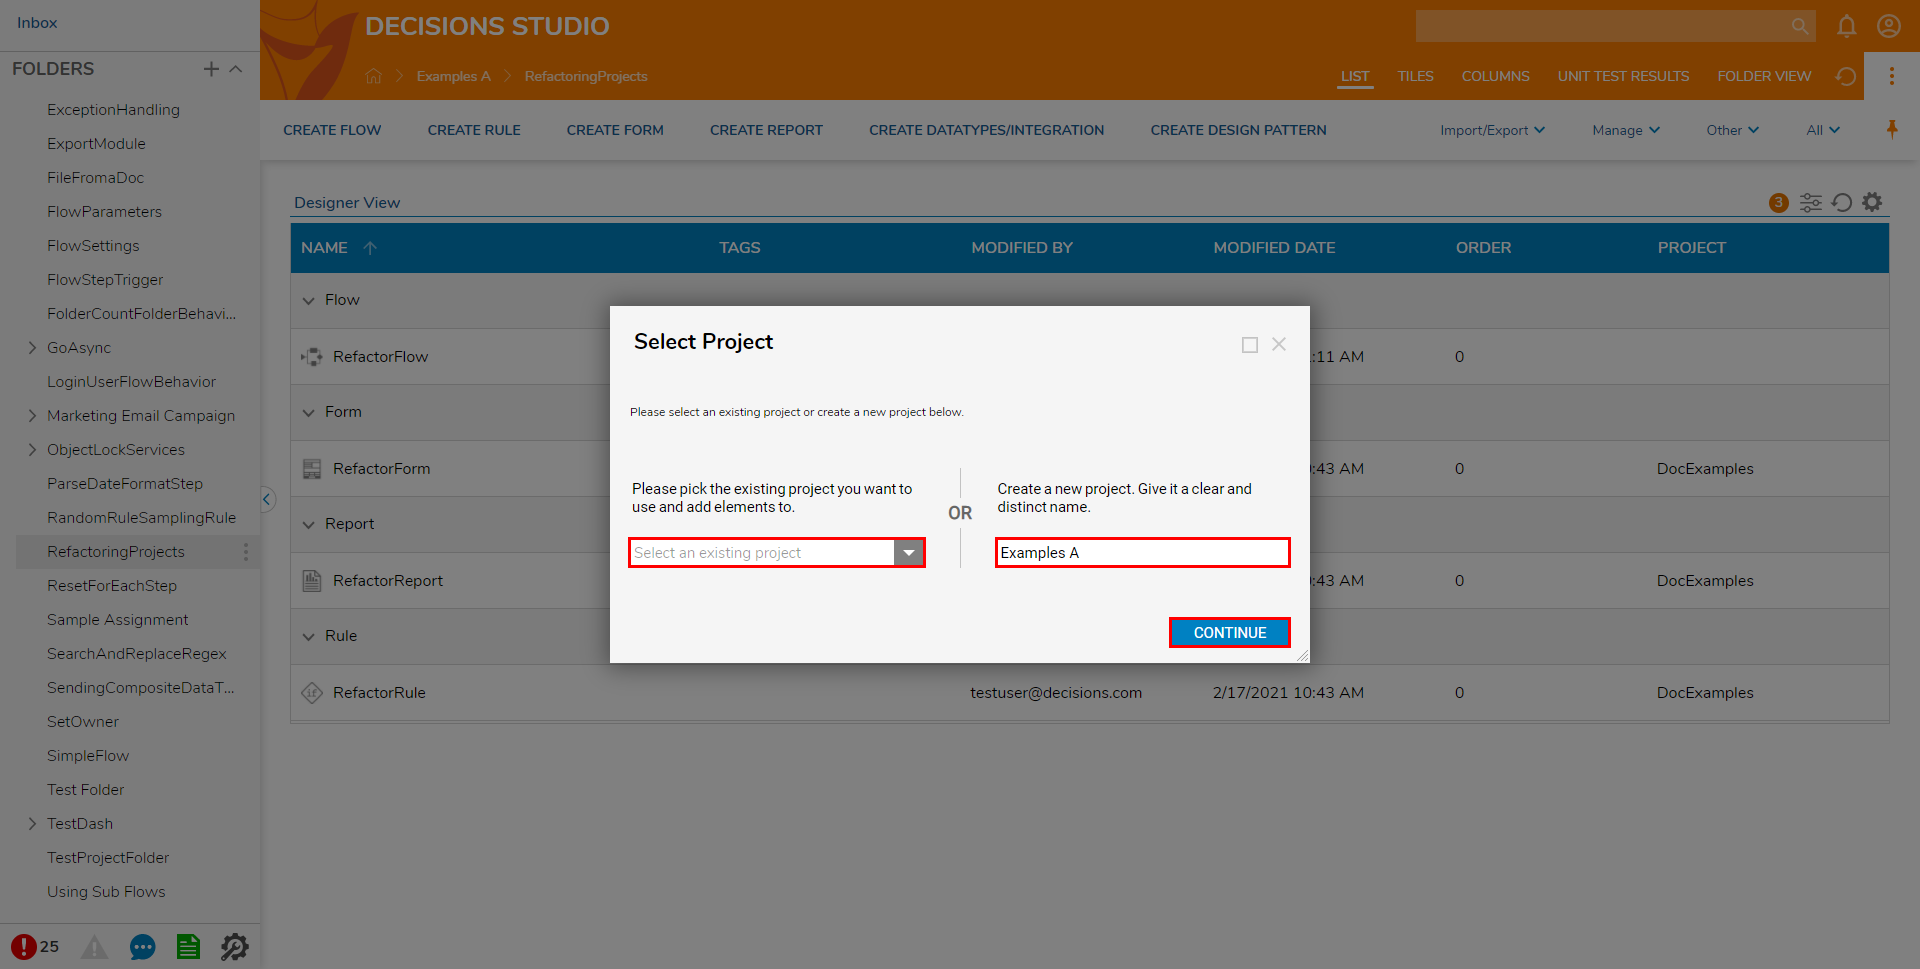
- Either select a pre-existing Project from the dropdown menu on the left, or Create a new one by providing a name on the right. Then, click CONTINUE.
- Verify the Project name, then close the Add To Project window. The Project now belongs under the project as noted by the new value populating the "Project" column in the Designer View.


For further information on the Portal, visit the Decisions Forum.
Was this article helpful?