Overview
The most common use cases of Active Form Flows involve either validating data to ensure accuracy before submission or hiding/showing Form controls to dynamically populate a Form depending on the end user's selection.
The following article details how to configure an Active Form Flow for validation. Refer to Active Form Flow - Visibility to learn more about hiding/showing Form controls.
Validation
- In a Designer Folder, create a Flow and add a Show Form step to create a new Form in the Flow. It will automatically open in the Form Designer.
- In a Form, add a Textbox with a Label named 'Validate'.
- Navigate to Form Properties > Form Rules > Active Form Flows. Select ADD.
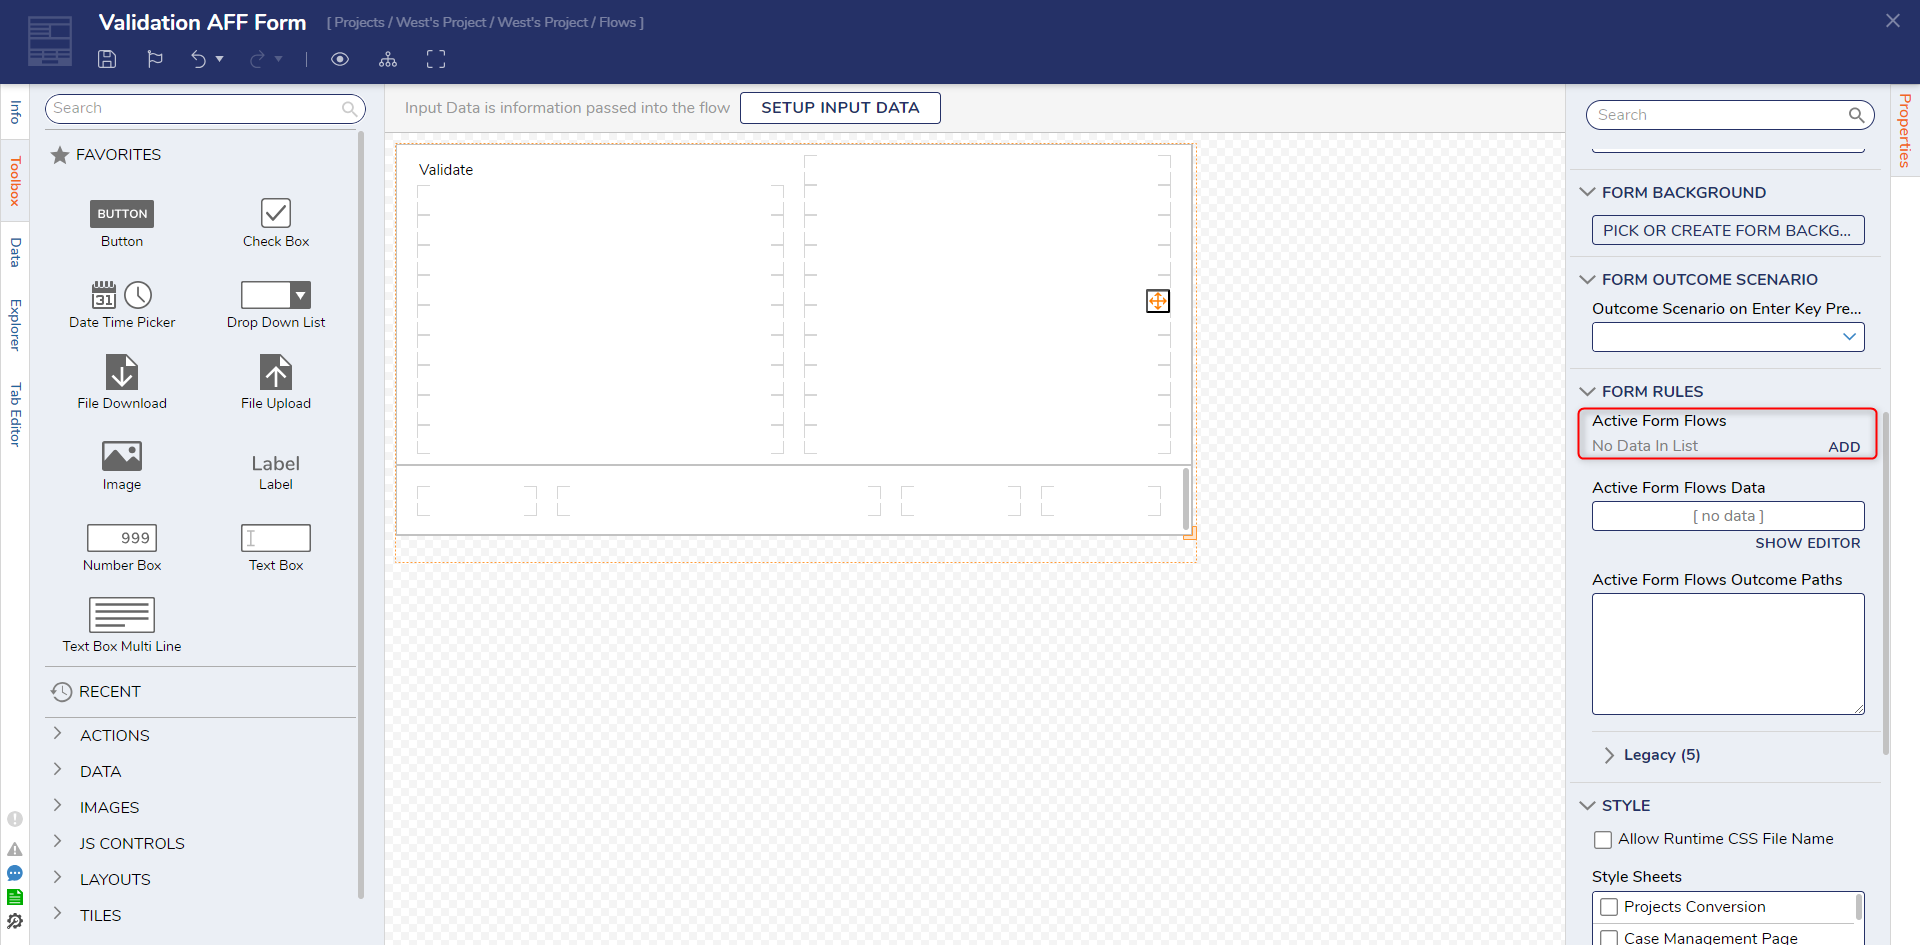
- In the Add Active Form Flows dialog, name the Rule Flow, then select EDIT RULE FLOW.
- In the Rule Flow Designer, add a Text Contains Rule step from the Designer Entities > Rules > System Defaults > Default Form Validation Rules category after the Start step.
- With the Text Contains Rule step selected, navigate to Properties > Inputs.
For the contains String input, change the mapping type Constant. Enter 'ABCD'. For the string Value input, change the mapping type to Select From Flow and choose Form Data > Validate Text Box > Value.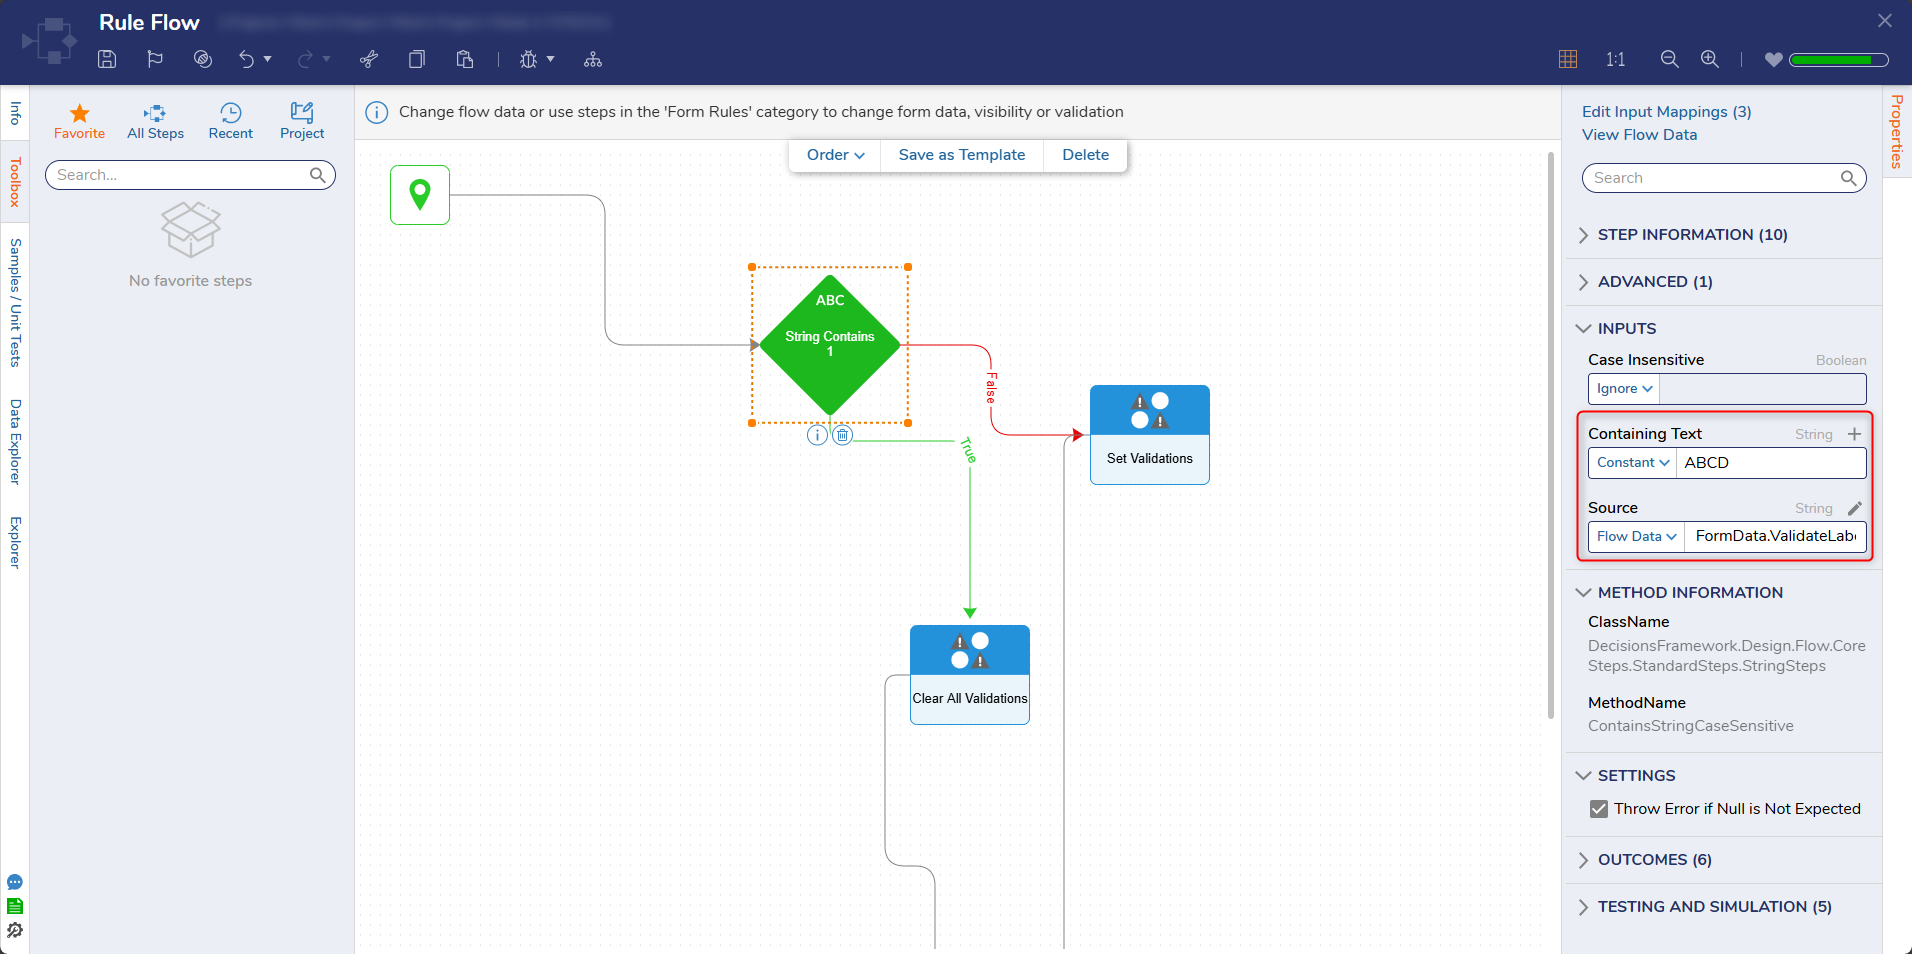
- Add a Set Validations step on the False outcome path on the Text Contains Rule step from the Form Rules category in the Toolbox.
- With the Set Validations step selected, navigate to the Properties panel.
Under Inputs > Form Control, change the mapping type to Select From Flow and choose Form Data > Validate Text Box. Under Inputs > Validation Issues, change the mapping type to Constant, then select ADD. - In the Add Value dialog, change the BreakLevel to Fatal. Type a Message that will appear when users trigger the validation error, then select OK.
Validation Issue Properties Description BreakLevel Warning Boxes in the control in a yellow box; the Flow can progress if validation is not met. Fatal Boxes in the control in a red box; the Flow will not proceed until validation is met. Ignored Does not box in or highlight control; the Flow can progress if validation is not met. Message This message will display on hover if the validation is not met. This message is meant to give guidance on what the requirements are. 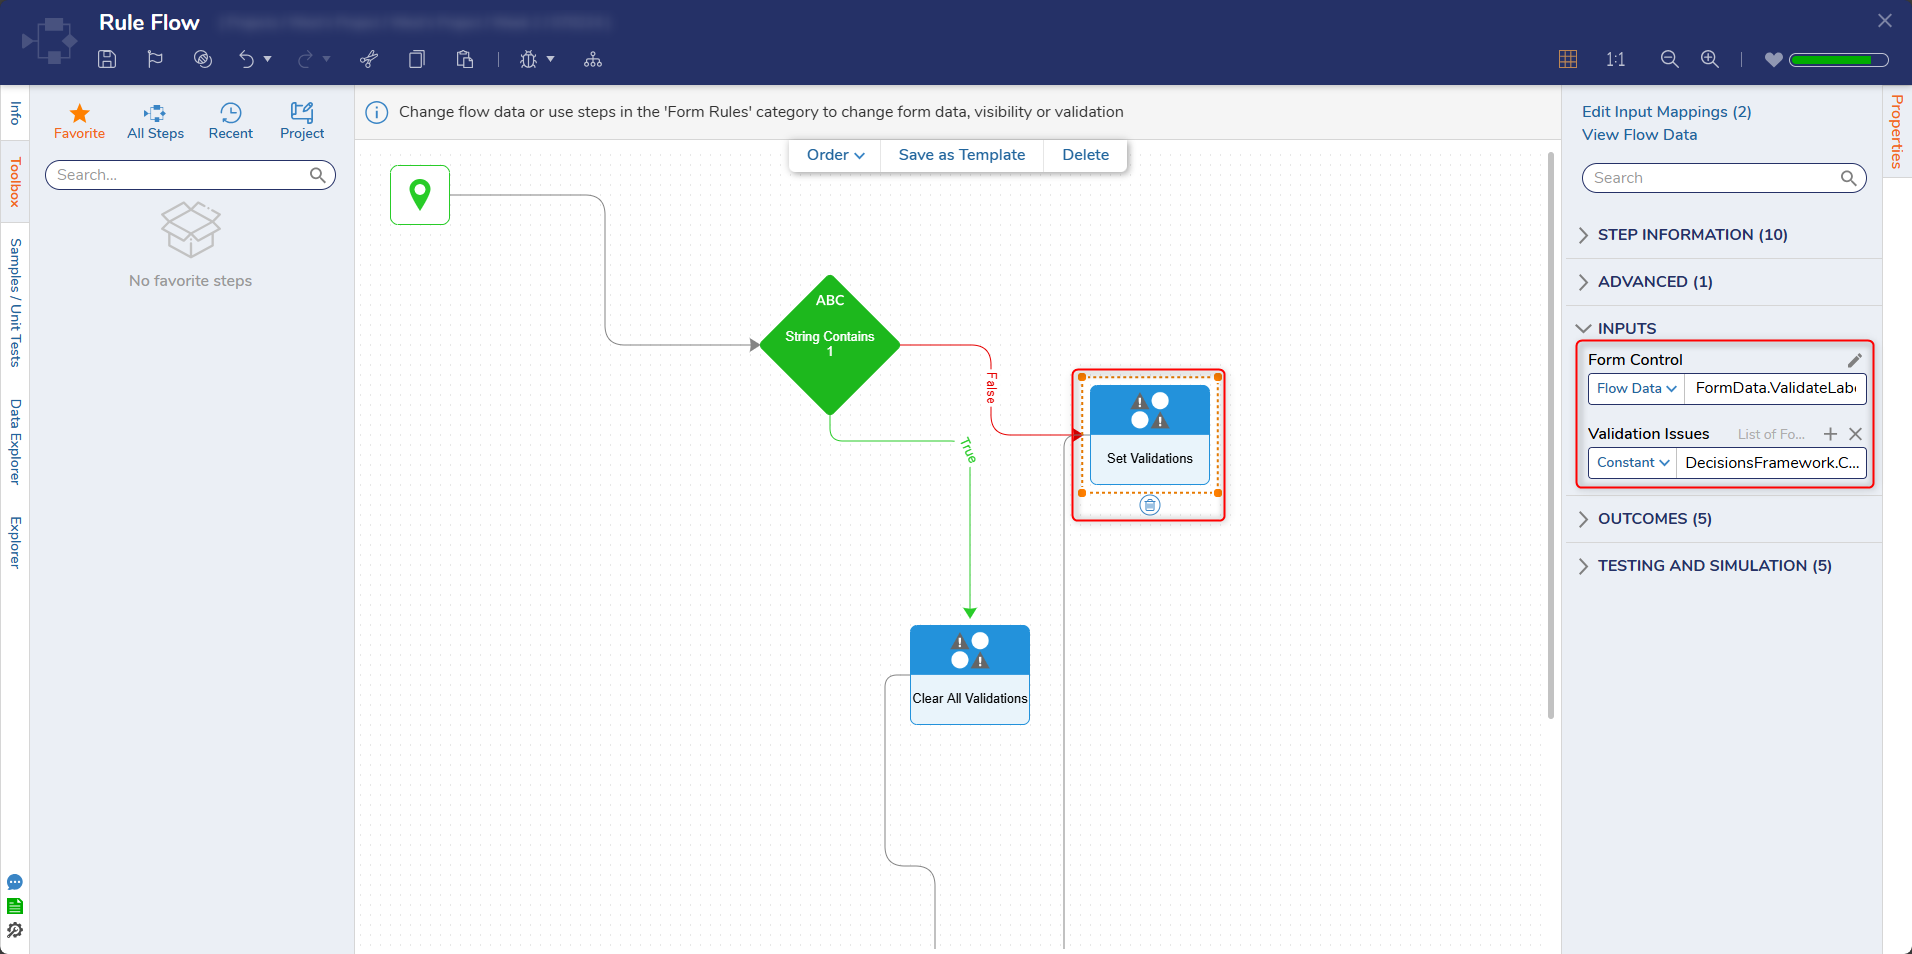
- On the True outcome path from the Run Rule step, add a Clear All Validations step from the Form Rules category in the Toolbox.
- Connect all outcome paths to the End step. Save and close the Rule Flow Designer.

- Save and exit the Active Form Flow Designer to return back to the Add Active Form Flows dialog.
- Under Advanced > Triggers, set 'Validate [Textbox]' to trigger on StoppedTyping. For Run For Outcomes, select the 'Submit' outcome.
- Select OK to return to the Form Designer. Save and exit the Flow Designer.

Debug
- Select the Debug Action in the orange Action Bar.
- Select START DEBUGGING.
The created validation Active Form Flow will now check if the Textbox contains the specified 'ABCD' string value each time typing occurs within. If the value does not match this, the validation error prevents submission down the specified outcome path.
Once 'ABCD' is entered, the validation issue resolves, thus allowing Form submission.
For further information on Forms, visit the Decisions Forum.