Branching and Merging Flows
- 01 Jun 2023
- 2 Minutes to read
- Print
- DarkLight
Branching and Merging Flows
- Updated on 01 Jun 2023
- 2 Minutes to read
- Print
- DarkLight
Article Summary
Share feedback
Thanks for sharing your feedback!
Overview
Branching and Merging allows the ability to process multiple Flow steps at the same time, rather than one after the other. Branching creates multiples assignments and the Flow is set to wait for each assignment to be completed before the Flow continues. These assignments can be given out individually so that different employees can handle different tasks.
For example, a company has a new hire onboarding system that requires work from both the HR department and the IT department. A Flow is started with basic information about the employee - name, start date, etc. The HR department needs to collect employment documentation from the new employee and IT needs to order the employee a laptop before they start. The Flow can be configured with the Branch Step to create an Assignment for HR (perhaps with a Form using the Multiple File Upload control) to collect the documents. At the same time IT has gotten an Assignment telling them to put in a purchase request for that laptop. Once HR and IT have finished their respective assignments the Flow merges with the Merge Step and then completes.
A Flow can only be branched once. This is a design limitation within Decisions to prevent Flows from becoming unmanageably complex.
Threading
Branching Flows and parallel Assignments are not in any way related to Multi-Threading.
Branch and Merge Restriction
Branch and Merge Steps do not create Parallel Processes and should only be used with Assigned Forms to create Parallel Approvals.
Any steps that are anchored between the Branch Step and Merge Step will run in parallel. However, this is not a true parallel. The steps will not run at the same time, but each step will be able to accept the same Input and send their Output to the steps within their Branch.
Canceling Branch Assignments
The Merge Step can be used to cancel an assignment. For more information see the step page.
Example
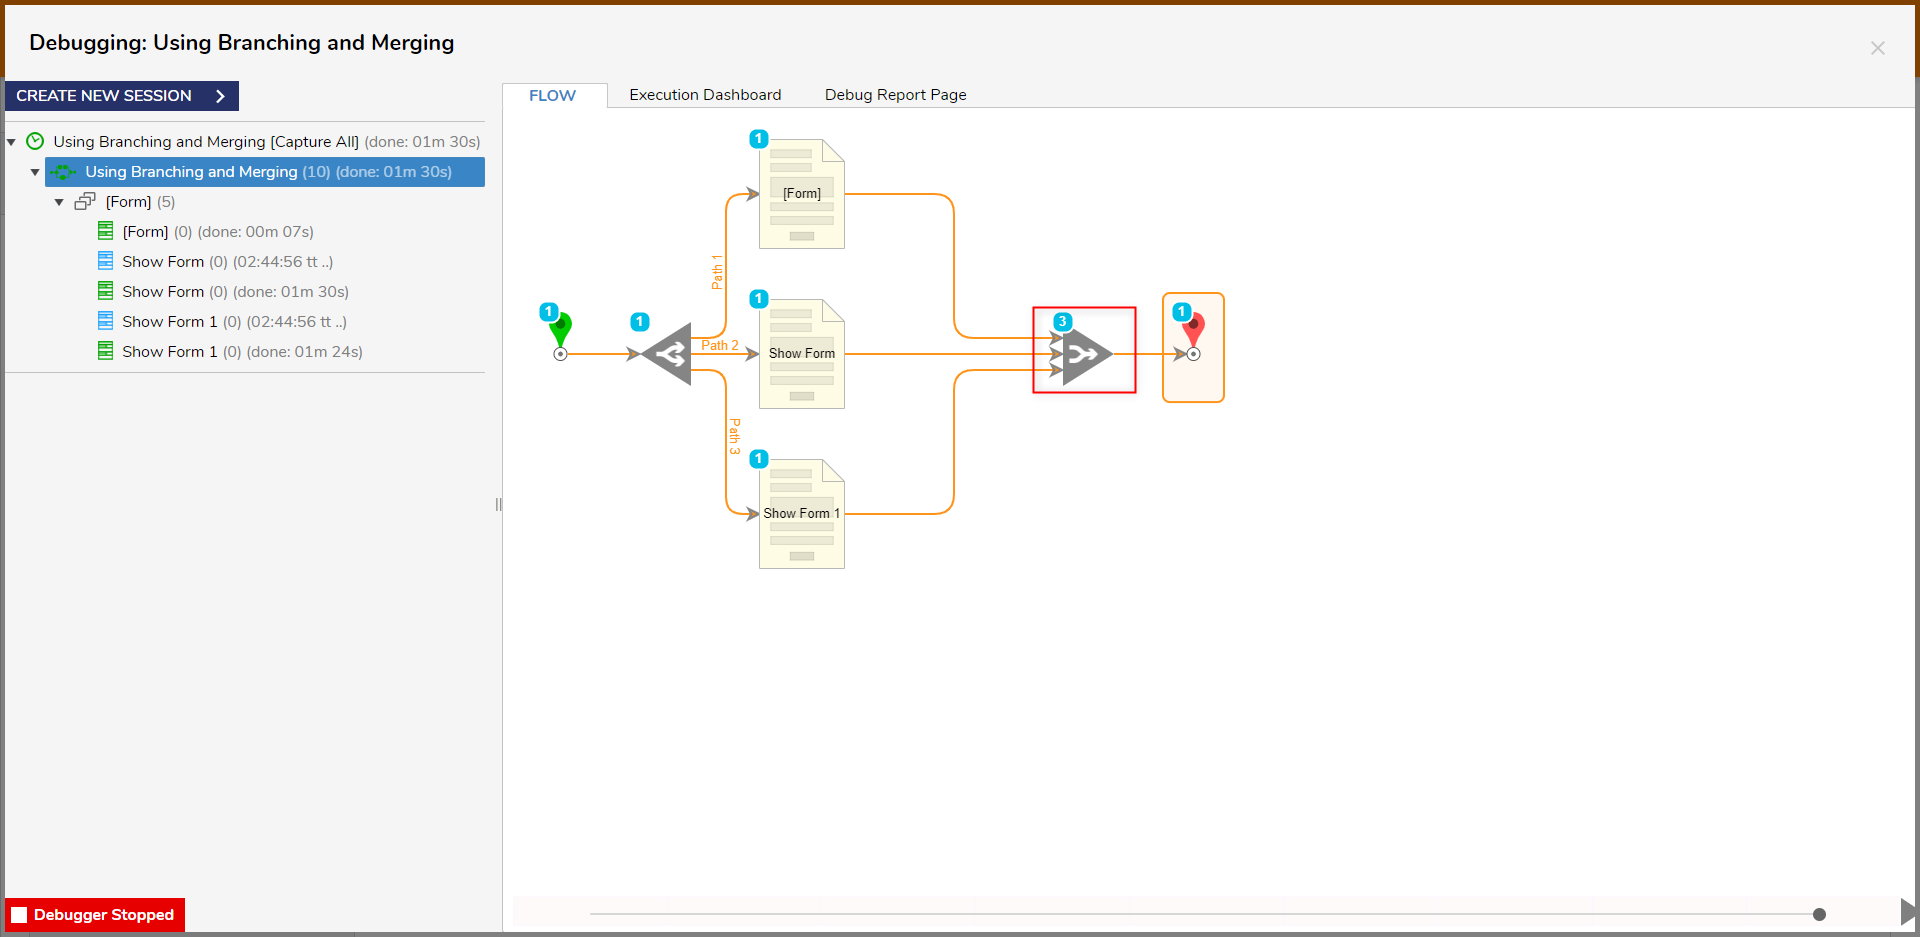
- From the Flow Designer, navigate to Toolbox > FLOW MANAGEMENT > BRANCHING. Then, attach a Branch Step to the Start step, and a Merge Step to the End step.
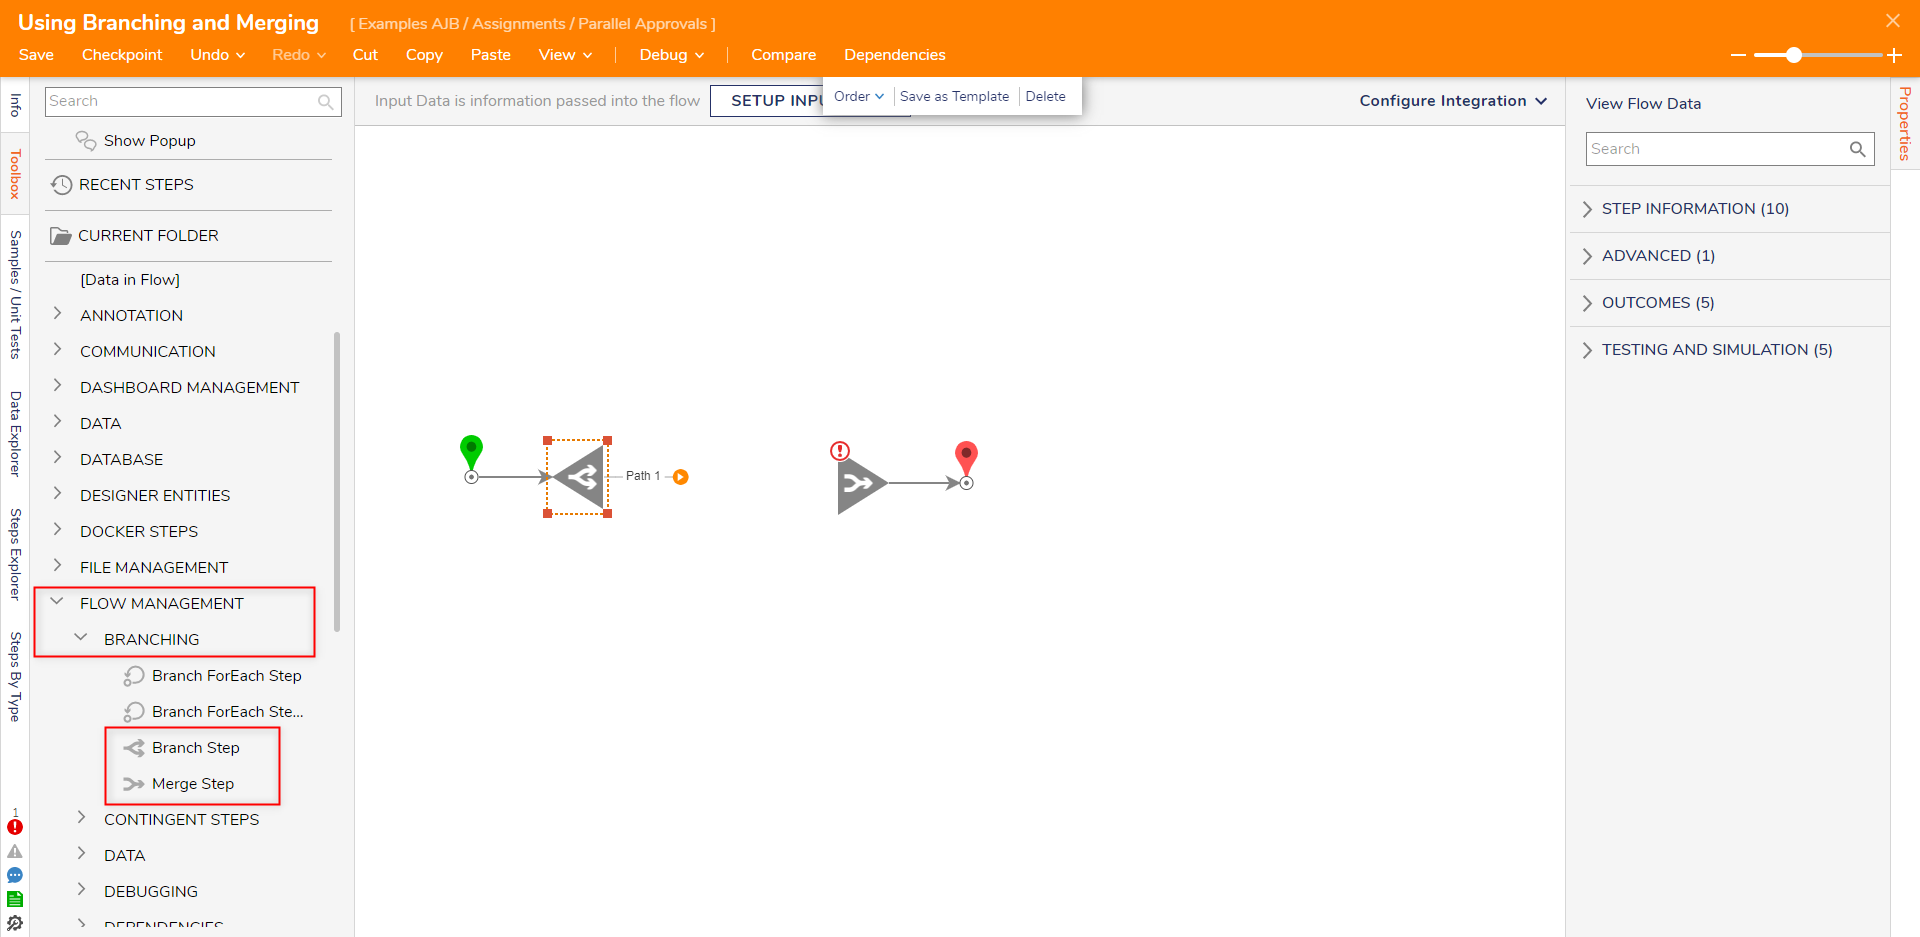
- However over the Branch step to expose its Outcome Paths; then, attach a Show Form step from Toolbox > FAVORITE STEPS to Path 1.
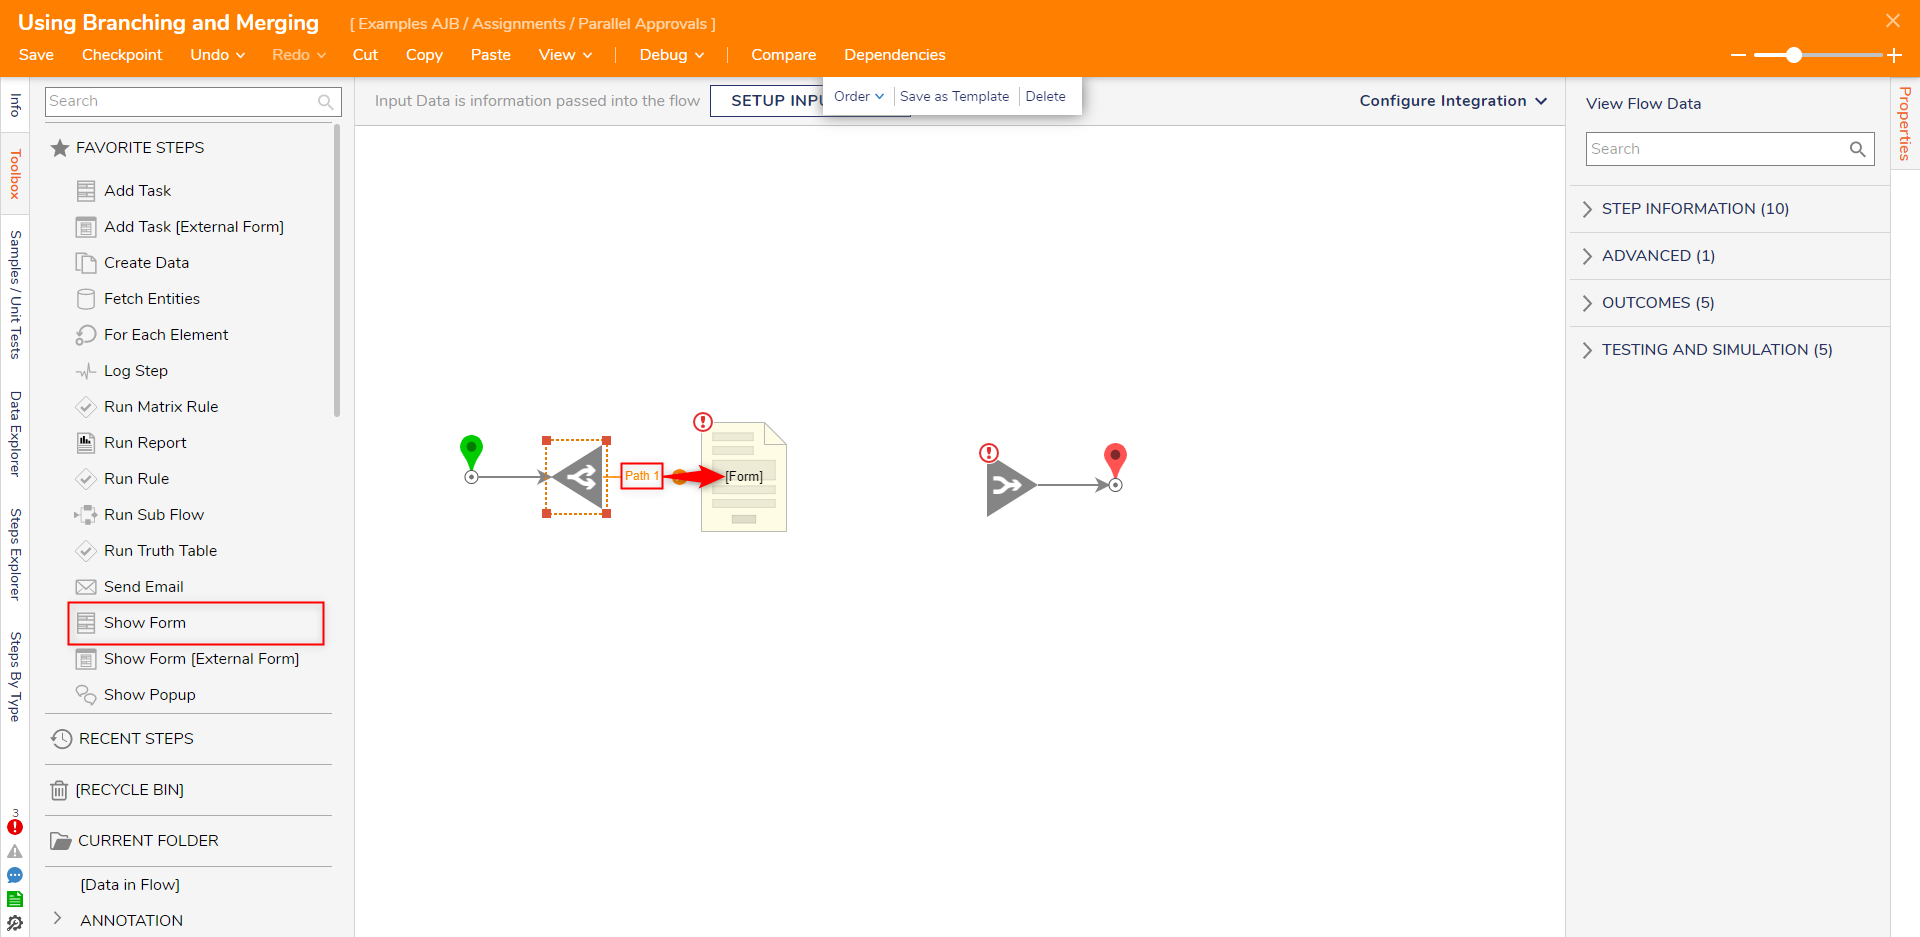
- From the Properties tab of the Show Form step, either create a new Formor pick a preexisting one. Attaching FormsThe Form attached to a Branch and Merge Step may be any Form that results in an Outcome Path. For this example, a Form containing a single "Submit" Button component is used.
- Hover over the Branch Step once more to reveal Path 2. Attach another Show Form step to newly revealed Outcome Path; then, via PICK OR CREATE FORM, PICK the same Form that was attached to Path 1.
- Repeat the same process demonstrated in step 4 for the Branch Step's Path 3.
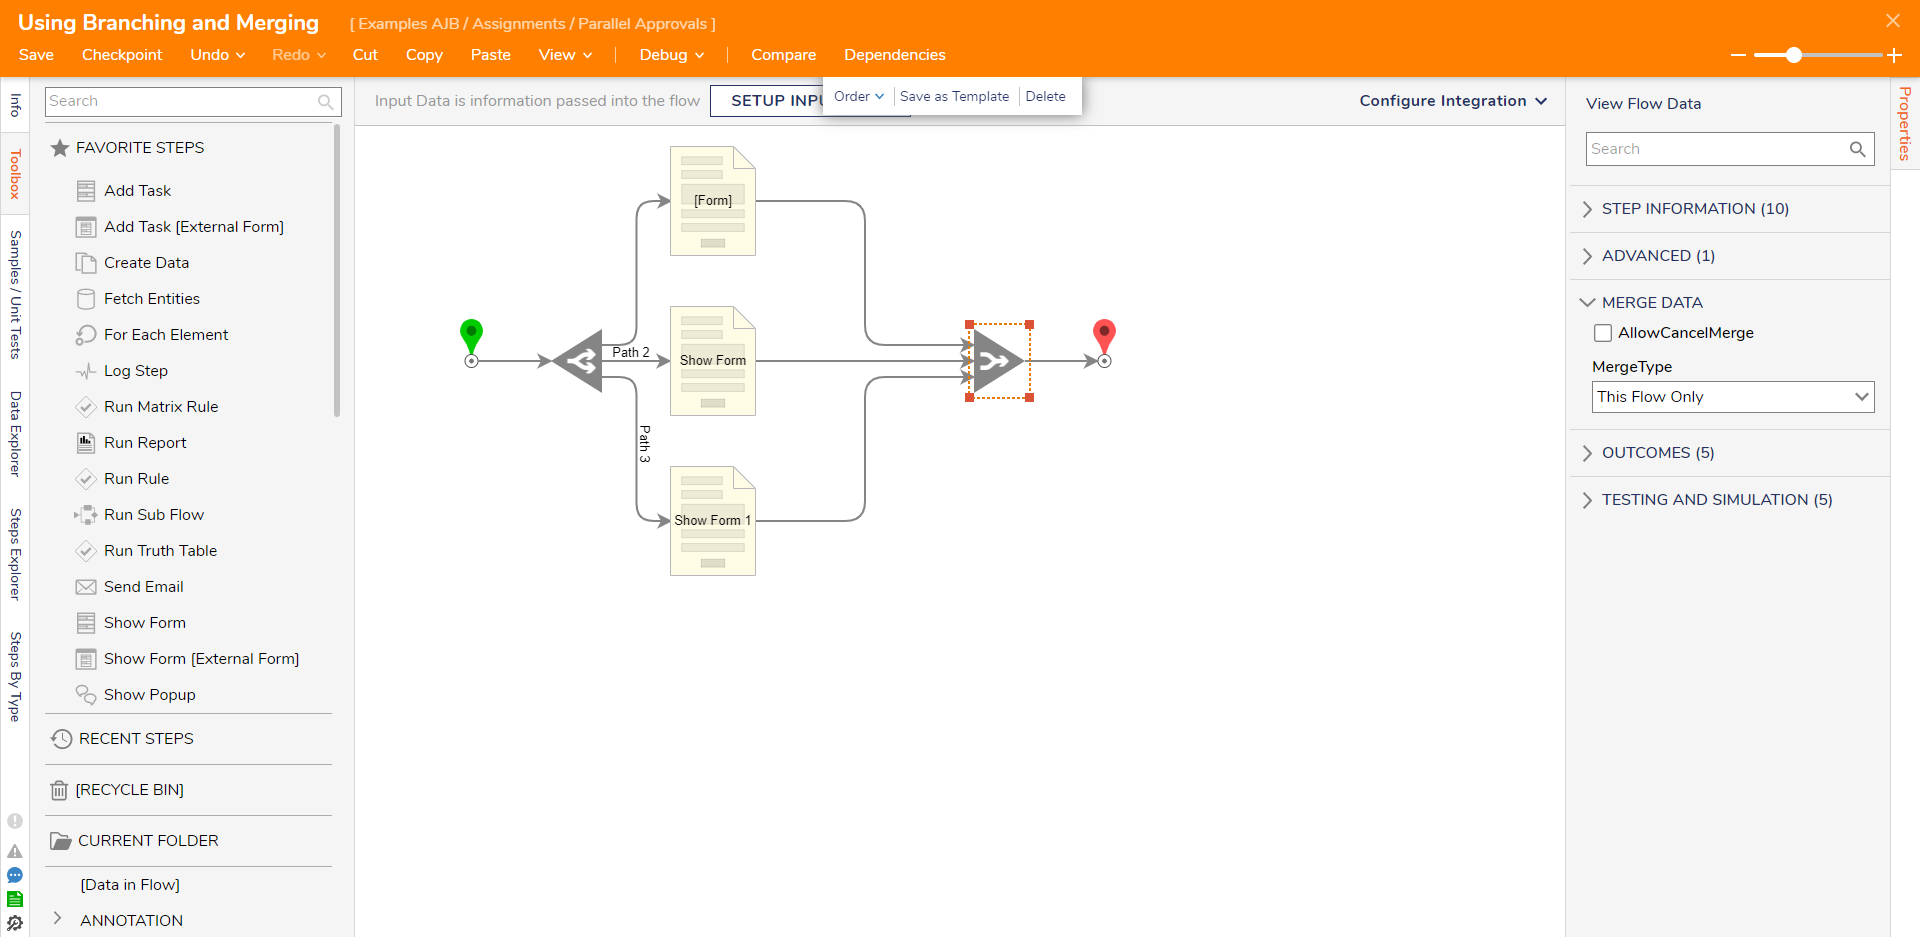
- Save the Flow, then if desired close via X.


Debug
- From the Flow Designer, select Debug in the top Action Bar.
- Select START DEBUGGING.
- Complete each instance of the Show Form step in the order that they are reached.
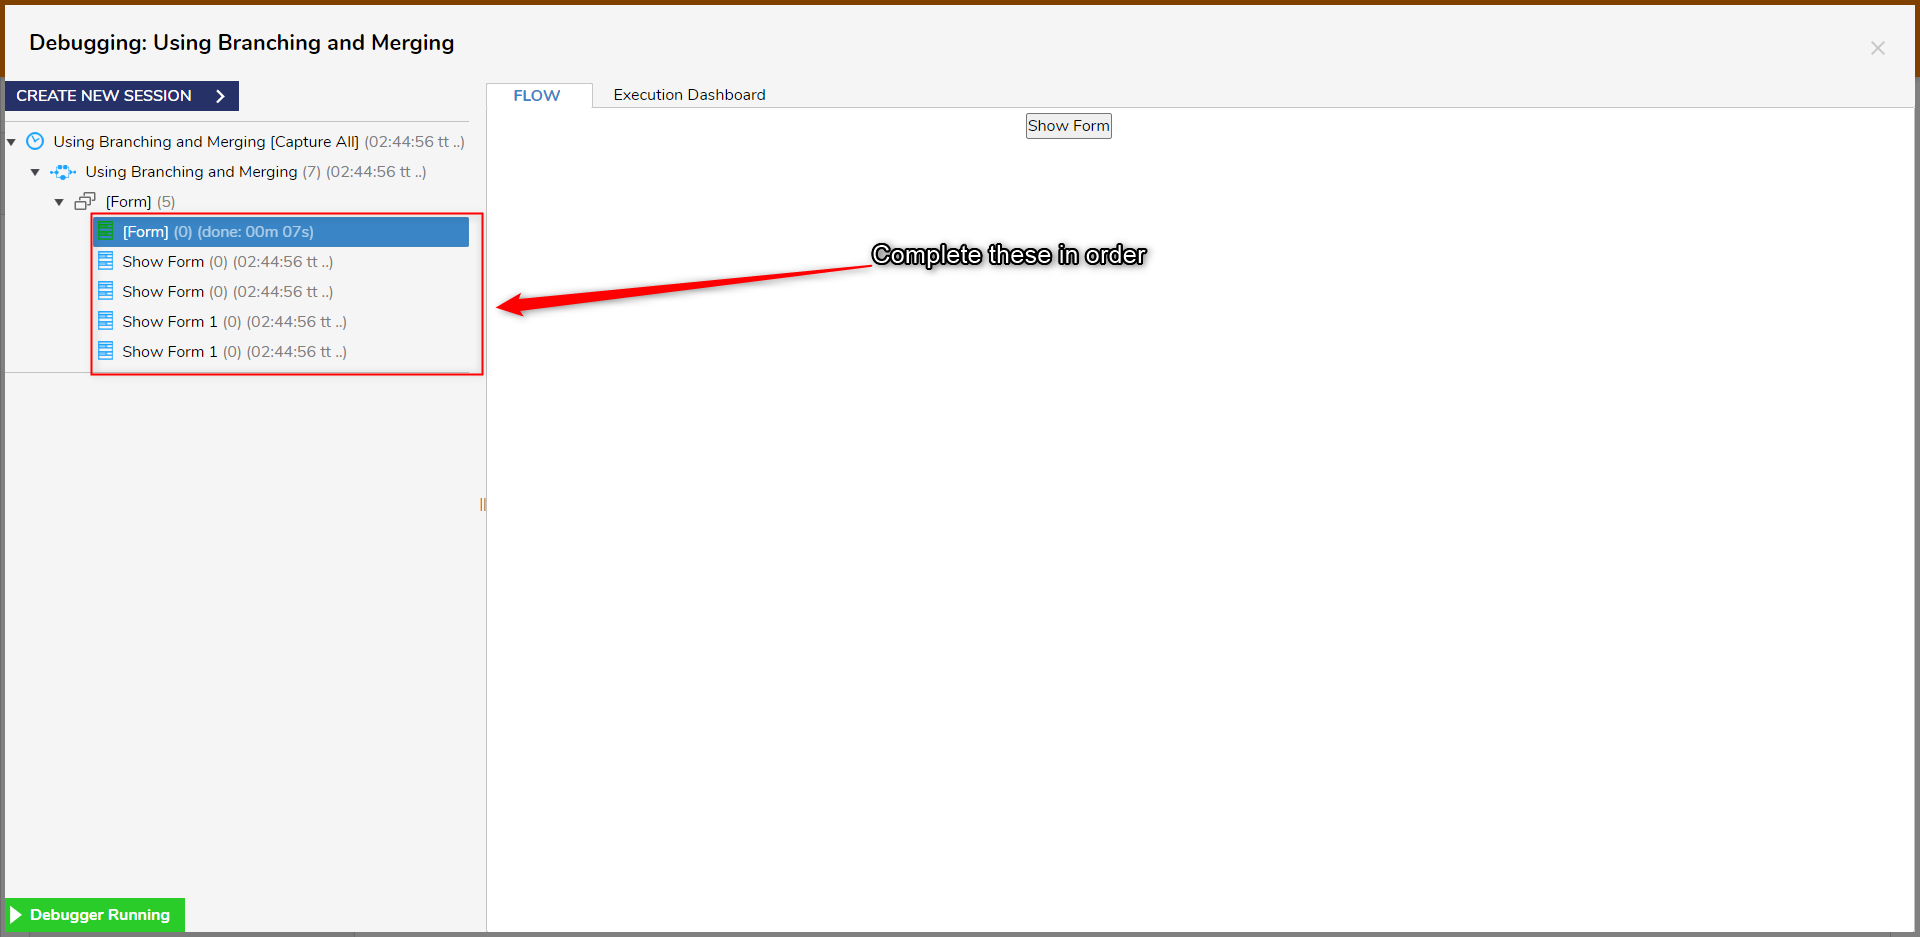
- Verify that the Outputs of the FormsMerge at the Merge Step and complete the Flow.


For further information on Forms, visit the Decisions Forum.
Was this article helpful?